In my previous post, I explained how to easily create a DNN site using Microsoft Azure Websites. I hope you followed along and have a shiny new Azure Website ready to go. In this post, I’m going to explain how you get that site launched as a ‘real’ website, not just a test DNN install.
Going from default DNN install to your own content.
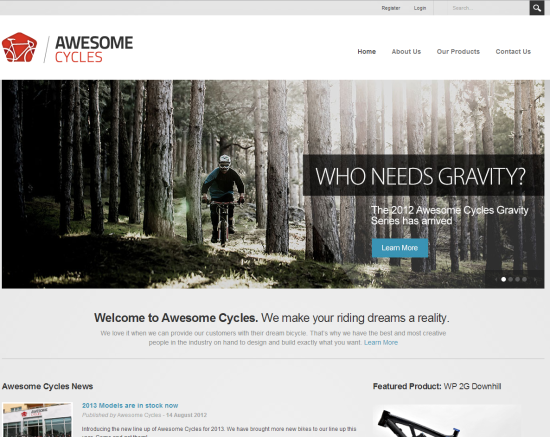
When you first install DNN, you’ll get the default template on the default installed site. For my install, this is what it looks like when you’re finished:
Delete all the standard content
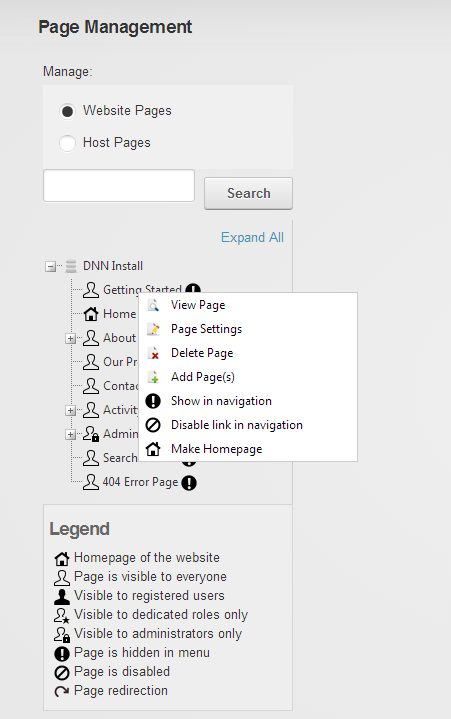
The first thing to do is to delete all the demo-site pages that get created when you do a new install (that is, unless you happen to be running a bike store). The easiest way to do that is to go into the Admin->Page Management screen, and use the right-click, delete method to delete the pages. I just leave the Home page, the Search Results and activity feed (user profile) page.
Because the home page has a lot of existing content, I just visited the home page, put the page into ‘Edit Mode’ using the ‘Edit Page’ drop down, and then deleted all the existing modules until I had an empty page.
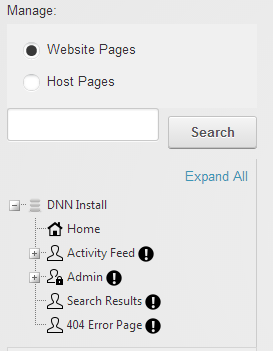
After deleting all the pages, you should have left the Home, User profile (Activity Feed), Search Results and 404 Page.
Next you want to upload a logo for the site, to replace the default ‘Awesome Cycles’ logo. As I’m using this particular installation as a personal site, I whipped up a PNG in about 5 minutes using a simple graphics editor. You may want to spend a bit more time than that. To upload your logo, go to the Admin->Site Settings page, find the ‘Appearance’ section and just drag/drop your logo file into the area where it says ‘Drop File(s) Here’.

I also created a favicon file by using an online favicon converter – and then drag/dropped the resulting .ico file into the ‘favicon.ico’ setting.
When this is done, click ‘Update’ to update the new settings.
Change the site design and theme with a new skin
Continuing with my simpler-is-better, I wasn’t going to spend any time building a new skin, so I went with a pre-existing one. There is a large range of skins available at the DNN Store, but I went for a simple community skin, the Hammerflex skin from christoc.com. I see a lot of people try and modify the default Gravity Skin to get their unique look, but I’m a firm believer in finding a new skin and tweaking that. For a site destined for commercial use, buying a quality skin will pay off many times over in terms of saving time getting it looking good. So go and find a new skin to use in the Store or on Codeplex.
Mine was easy to find and download, so once I had the skin download installed, I went to the Admin->Extensions page and uploaded it. This installs the skin, but doesn’t apply it.
There are two levels to applying a skin. While newcomers to DNN often expect that they can apply a new skin to an entire site, in reality each page in DNN can have a skin associated with it. You can also set a skin as the default for all new pages in a site, and all existing pages which don’t have a specific skin installed. To apply the new skin to the now one-page site, two steps have to be completed.
Step 1 : Set the skin as default in the Admin->Skins section
Select the Skin in the ‘Skins’ drop down. While it says ‘Skin’, in reality what it means is ‘Skin Package’, because each Skin package will have one or more options for applying a Skin to a page – sometimes for different layouts or different colored themes with the same layout. Selecting the Skin package will load a set of preview images for each Skin type available [some skins don’t have the preview images]. In this case, I’m going to apply the ‘home’ Skin to the site as the default Skin. This is done by clicking ‘Apply’ under the specific Skin from the Skin Package.
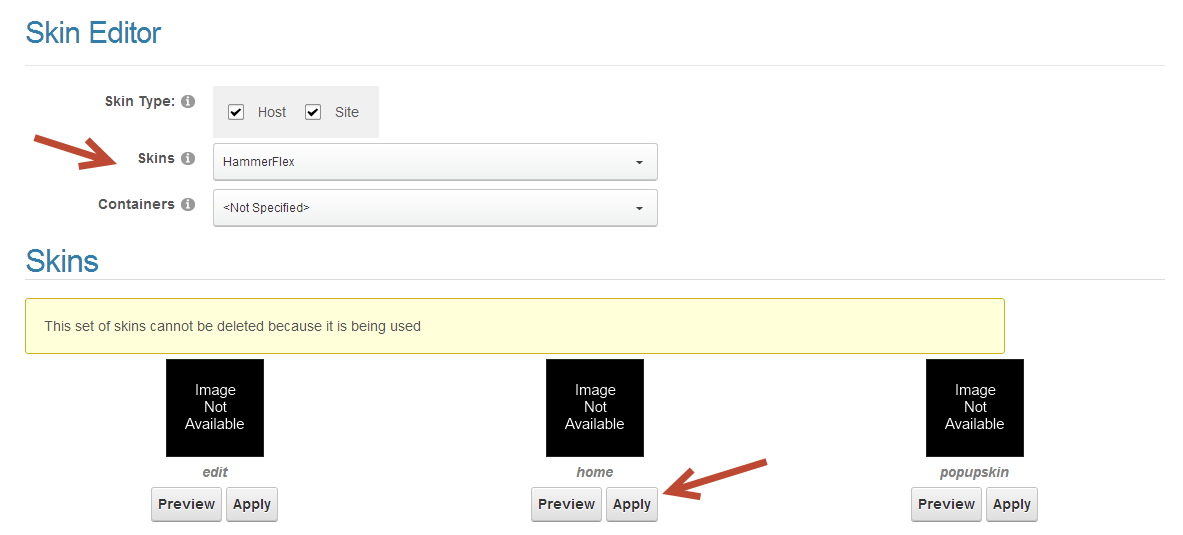
I’m also going to apply the ‘Edit’ Skin to be the default for the ‘Host’ pages. This is done by unchecking the ‘Site’ checkbox at the top of the page, and then selecting the ‘Edit’ Skin in the package. This applies the ‘Edit’ Skin to the entire Host/Admin section of the site.
Step 2 : Set the Home Page to use the new Skin.
Because the default DNN install template creates a site with a specific home page Skin, it will still show the ‘Gravity’ Skin for the home page when you browse the site. To use a new Skin you’ve installed, then go to the ‘Edit Page’ dropdown, and select the ‘Page Settings’ option, which brings up a pop-up. Go to the ‘Advanced Settings’ tab, then scroll down until you find the Page Skin dropdown. You then just select the Skin you want, and click on ‘Update’. When the page refreshes, you have applied your new skin.
If you completed Step 1, then every new page you create from here on, for this site, will apply that skin by default. So you won’t have to repeat this process.
Remove all the default theme images
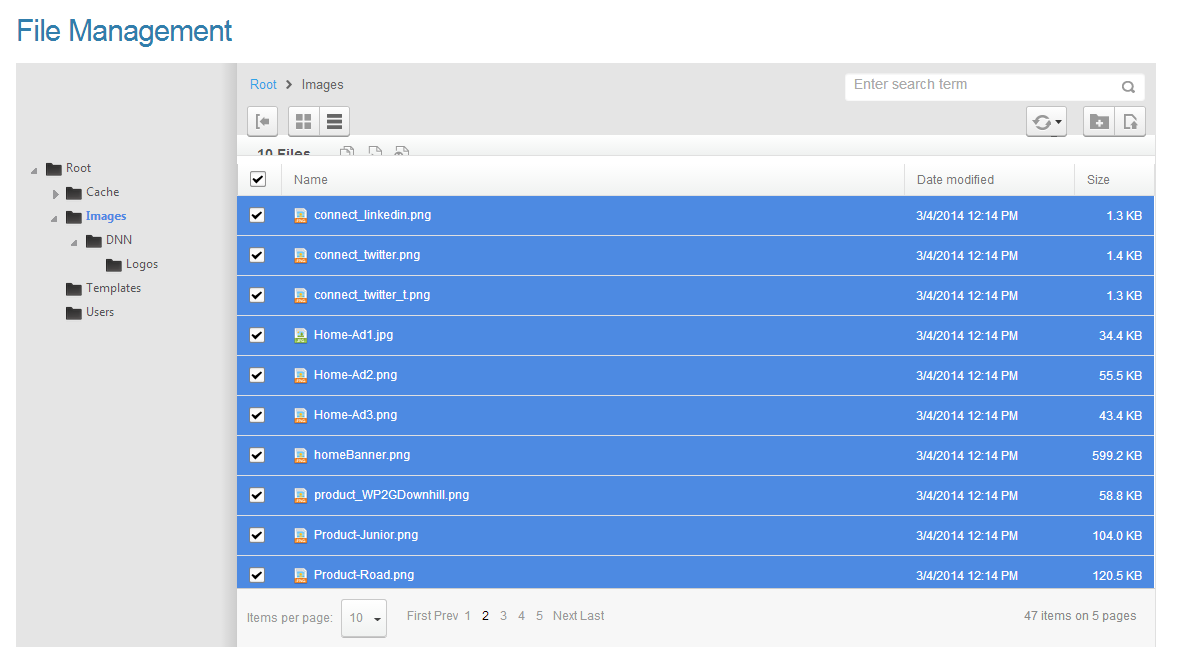
When your site got created, a set of standard images got added to the /images folder. You don’t want these clogging up your new content, so best to get rid of them now before you start adding new content. Go into the Admin->File Manager, and start deleting. DNN now has a fantastic File Manager called the ‘Digital Asset Manager’. This allows you to easily navigate through, select all the files for deletion and then just right-click and select ‘delete files’. Don’t delete the images folder, though, you will want to keep that there for when you start uploading the images that do belong to your site.
Point your Domain Names at Azure Websites
This is where it gets a little different from regular domain management, which generally consists of pointing a domain name at an IP address. There are more steps to do when using Azure Websites. Essentially what you’re going to do is point a CNAME DNS record to the existing URL you already created for your site when you created it (*.azurewebsites.net – in this example, dnninstall.azurewebsites.net) . CNAME means ‘canonical name’ – but don’t get this confused with Canonical Urls which we will dive into later).
So first, go to your domain name registrar and update the DNS hosting so that you create a CNAME record for each domain you want to associate with the Azure Website installation. In my case, this was as easy as adding in the Azure Websites address (dnninstall.azurewebsites.net) as a CNAME and specifying that the ‘naked’ domain (brucerchapman.com) as the value. I then repeated this for the www domain (www.brucerchapman.com).
I can guarantee that your registrar will probably look differently, but this is what it looked like for mine:

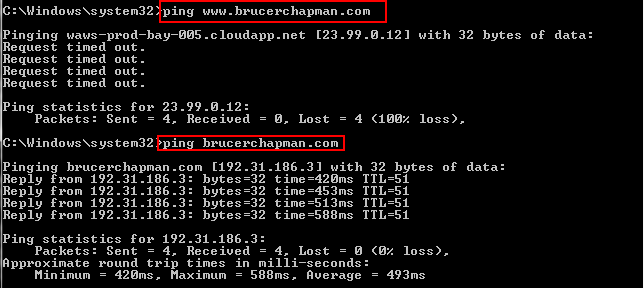
I did a quick ping check to make sure this was configured correctly:
Hook up your Domain Names to your Azure Websites DNN Install
The first thing you must do to use Azure Websites with a proper domain name is to convert it from ‘Free’ mode to either Shared or Standard mode. Shared is what it sounds like – you don’t get your own dedicated resources, but go into a pool of sites all being served by a set of shared compute resources. Standard gets you dedicated resources (memory and CPU). This is purely an economic decision – but don’t fret too much, because you can move between modes as you need. Given, if you’re following along, you haven’t launched your site yet, you should just switch it to shared mode and worry about the best mode to use when you start to get traffic.

Above: You can’t manage domains in ‘shared’ mode.
Convert site to ‘Shared’ mode
To convert your site to ‘Shared’ mode, go to the ‘Scale’ top-level menu option
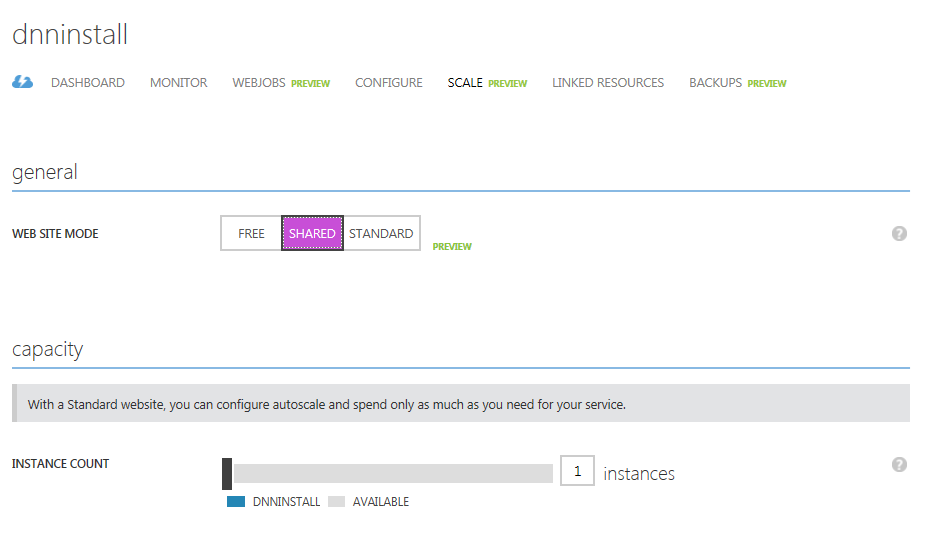
It’s very simple – click on the ‘Shared’ box and confirm that you want to make the change stick.
You’ll get a warning message telling you that it will change your billing status – it will, you’ll start getting charged – you need to confirm this. Due to the magic of Windows Azure Websites, your site will keep running while the grinding in the background means that the site changes to using standard mode. In reality, all you’re really doing is changing the feature set you can now access. Shared mode still means your site is sharing the compute resources with other Azure websites installs, but now you can hook up a domain name.
Add your Domain Names
Click on the ‘Configure’ top-level menu option, and scroll down the page. Past the general options until you see ‘domain names’. Click on ‘manage domains’ and then just enter the domain name you are going to use.

Above: Use the ‘manage domains’ button to enter domain management
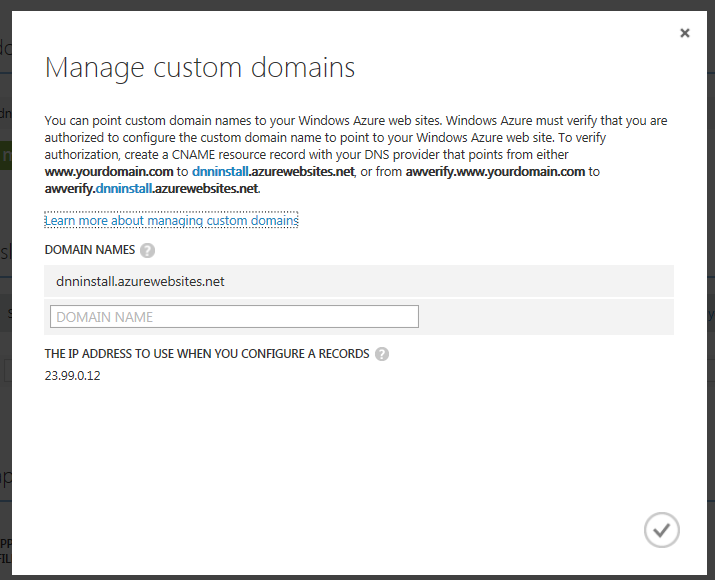
A little ‘spinner’ will appear as Azure checks whether you have completed the process of hooking up the domain name properly. You’ll either get a green tick, or you’ll get a warning message like this one:

This means that either you made a mistake at the registrar end, or the change is still propagating across the internet and Azure can’t see it yet. I suggest checking by other means (do a ping, request in Fiddler, try it in the browser). You’ll have to do some troubleshooting at this point until you can verify your domain name is correctly configured to point at the Azure Website and you get the ‘green tick’.

Above: The new domain name is setup correctly
Configure your DNN Install
At this point, presuming you have the ‘green tick of approval’ from Azure, it’s all working and you can go straight to your DNN installation by requesting the domain name in a browser. Your new site should load up as expected. This is because, by default, DNN is distributed with the ‘Auto Add Site Alias’ option, which will automatically add a domain name to the ‘host’ portal if a new domain name is requested to the installation.
Presuming this part has worked, what I *now* recommend is that you log on as a site administrator, and go and disable the ‘Auto-Add site alias’ option once you have set up the domain you intend to use. The Auto Add option is a powerful ally but you want to make sure it stays on your side and doesn’t start working against you.
To disable it, go into the Admin->Site Settings page, and in the ‘Basic Settings’ tab, scroll down and expand the ‘SIte Aliases’ section. This should already show an entry for the *.azurewebsites.net domain that was created by default, and it should show the domain name you just configured. Both of these entries will have been created by the Auto Add functionality. Assuming you’re finished adding domains, then what you should do is disable the Auto Add.
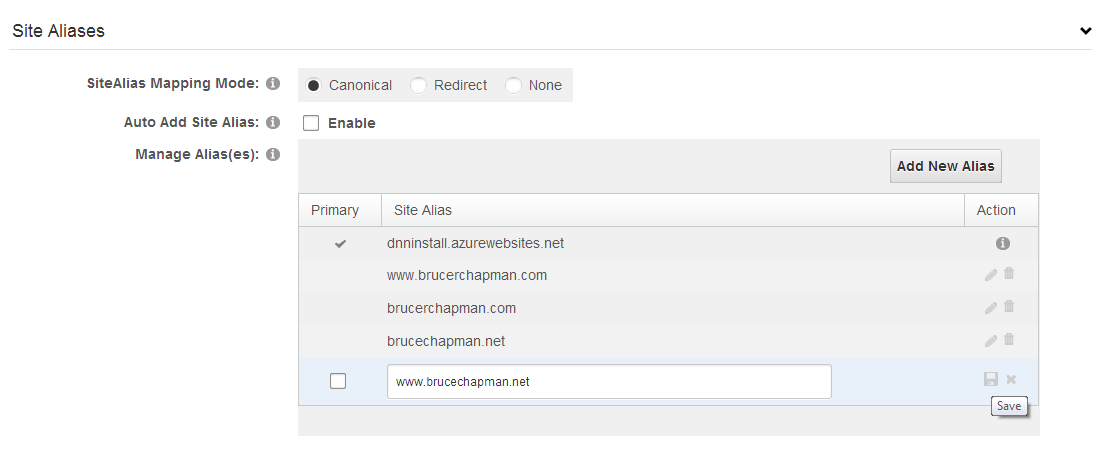
If your Auto Add feature didn’t work, or your domain is still propagating, or you’re still haggling over transfer of a domain name you just had to have, you can add in domains manually. This is very easy – just click the ‘Add New Alias’ button, and then click the ‘save’ icon when you’re finished.
If your Auto Add feature has been misbehaving, you might have some odd-looking domain names there. I can’t always explain how this happens, but I have seen it in plenty of Azure installations. It may be related to recycling IP addresses, but it’s possible that you’ll get a domain name popping up in your site that you don’t own and have never seen before. If you encounter these, just delete them and double-check you’ve disabled the Auto Add feature.
Note : when you access DNN with a different domain name, and you’ve been logged in, it will appear as though you will get logged out. This isn’t really the case – it’s just that the authentication cookie used by ASP.NET to keep you logged in is based on the domain name. Different domain names need different authentication cookies – that’s all there is to it. I often see newcomers to DNN getting confused by this, particularly when they log in as a ‘host’ user and then switch between sites, and find themselves logged out. The solution is to log in with each different domain name you’re working with, and then you can skip from domain to domain without being logged out.
Start Adding your Content
Your site is launched now – it’s ready to receive the content you’re going to fill it with. You can either start adding Html to the page with the Text/Html module, or you can install specific content extensions to have the ability to create modules of different types. In my case, I’m making this a personal blog site, so I’ve installed the DNN Blog module to create my blog. You can find endless amounts of different extensions in the DNN Store, and on Codeplex as well. With these you can create blogs, forums, events, calendars, e-commerce sites and much, much more.
If people already are using your domain name for any reason, then it might make sense to reverse the order of managing the domain names and creating the content. In my case, I like to submit my new domain names to search engines so that they start crawling the site. It doesn’t really matter if there is no content there- you’ll soon be adding plenty of that. Good luck and get out there and launch those sites!
Of course, you can view the results of this procedure at the new personal blogging site I have set up.
This is the second post in a series on Creating DNN Websites with Microsoft Azure Websites. The first post is ‘Create a DNN Installation on Azure Websites’.