In my previous two posts, I have discussed Creating a new DNN install in Azure Websites, and Launching a DNN Install in Azure Websites. This post is all about moving an existing DNN installation from some other location into Azure Websites. This is suitable for people with an existing site, who want to move the hosting location into Azure.
Like any site migration, it’s about four basic phases:
1) Exporting the existing site database and content
2) Importing the application files and content to the new location
3) Importing the database to the new location
4) Configuring settings so it runs
The steps explained here will create a DNN install as a copy of your site in Azure Websites. The database will be hosted on Azure SQL Database.
1. Prepare your Site for moving
There’s a couple of things to do here. I recommend upgrading your DNN site to the very latest version available before you shift it. I recommend this to make sure that you have all the latest features, that it’s using Azure SQL Database compatible code, and that you’ve got the latest security and performance patches. I’m not going to cover the topics of upgrades here, but this should be your first priority. I will remind you to make a backup of your site and database before doing anything.
The next thing I recommend is making sure your site is set to use the ‘Auto Alias Add’ feature in your site settings (at least for the main site you’re moving, if your DNN install has more than one site). By configuring this option before you move the database, you’ll make it easier to get your site running in the new location.
This is in the Admin->Site Settings->Advanced Settings->Site Aliases section.

I also recommend a site move as a good time to go through and clear out any old images, files and other references you don’t really need, and remove any DNN modules, skins and extensions you may no longer be using. Giving your site a good spring-clean makes it smaller, faster and easier to migrate.
However, before you start on the process of moving the site, take the time to check that the site still runs as expected – after your upgrades, cleanups and checks. You don’t want to troubleshoot why a site is not running in a new environment. So be sure to get it running well before starting the move.
You might do this in a local installation of your site on your local machine, or you might do it in-place on your site.
2. Export your existing database
You’ll need access to SQL Server Management studio to complete this action. If you don’t have access to this, you may need to ask for help from your existing provider of database hosting. You need to export your database into a .bacpac format. This is a different step from creation a backup (.bak) of your database. Azure SQL Database can’t restore a database from a .bak file, and can only import a .bacpac file. I really recommend taking your existing site offline while you do this (so that the database doesn’t change during the process) – but you may not have that option. This process assumes that you are moving the site completely and you won’t have to perform a future data merge – which would be the case if your old site was still online and still taking order or user cotnributions.
To create one of these, connect to your existing DNN Database using SQL Management Studio, then right-click on your database, and choose Tasks->Export Data-tier Application.
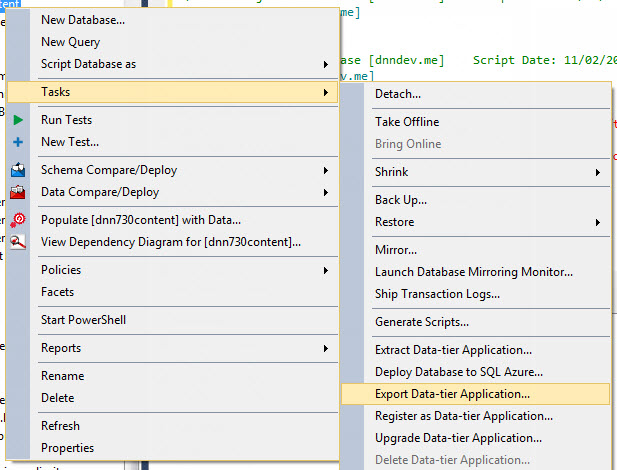
This brings up a wizard, which will prompt you for the database to export, and a location to export it to. Use a file name of [yourdatabase].bacpac and save it somewhere on your local computer you can easily find again. The export will run for a while, creating an exported version of the database structure.
3. Create a new Azure Website
This part is easy – in your Azure Management console, click on ‘+ New’ and create a new Website using ‘Quick Create’. This creates an empty Azure Website.

Choose the region that makes the most sense for your audience, and note down which region you have created it in – all your other Azure resources for this installation should be in the same region.
4. Import your database
Once you have your .bacpac file of your exported database, it’s time to import that into Azure. Each Azure SQL Database lives in a ‘Server’ – which is really just a logical container for your database, rather than any actual physical server. If you already have an Azure Database Server created, you can skip the next piece. If you don’t, you’ll need to create one. This is very simple – just click on the ‘SQL Databases’ section of your site, and then on the ‘Servers’ section, and then on the ‘+ Add’ button at the bottom of the screen.
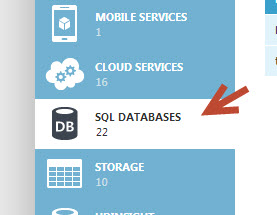


This will bring up the Server add window, which allows you to provide the server username and password to use. Note that you don’t get to pick the server name – that will be allocated for you.
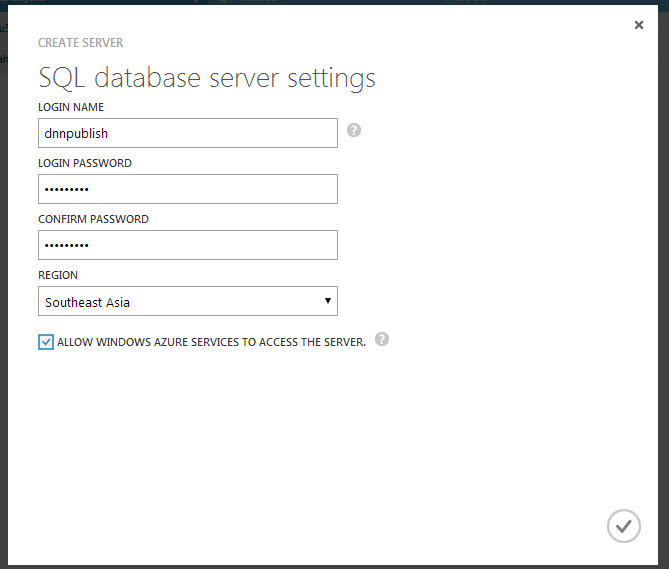
You can choose whichever Username / password combination you like, and choose which Azure Region your server should be in. Note that you must always create your server in the same region as your Azure Website.
Once you have created your server (or have identified an existing server to use), then you can connect to that server using SQL Server Management Studio, and import your database.
To connect, open up a new Server Connection in SQL Server Management studio. The server name is the [servername].database.windows.net – and is available on port 1433. The username/password are the same as you have just created – the username should be [username]@[servername] as shown below:
https://www.dnnsoftware.com/Portals/0/Users/161/61/230561/dnn-waws-3/connect-to-azure-sql-server-dialog.jpg
If you haven’t yet added your local IP Address to the firewall for the server, you’ll see an error like below:
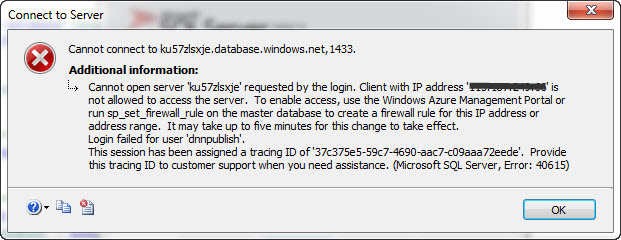
To fix this, go back to the Azure Management Portal, and click on the server, then ‘Configure’, which shows the IP Address management screen:

Add your IP Address to the list of allowed, and click on the ‘Save’ icon at the bottom of the page.
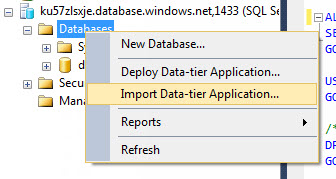
You should then be able to connect to the Server using SQL Server Management Studio. Right click the ‘Databases’ icon and choose ‘Import Data Tier Application’:
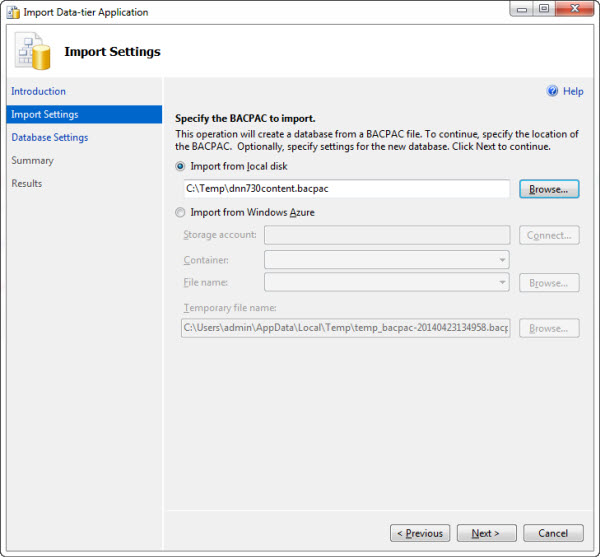
This brings up the wizard, which you can follow to import the database you exported.
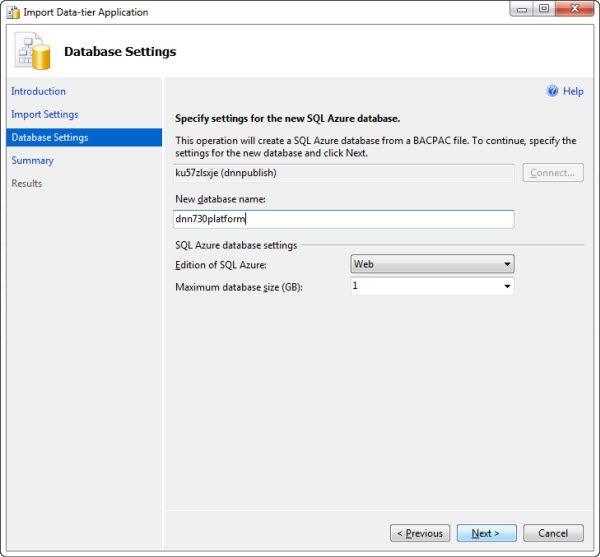
Following the wizard completes the import:
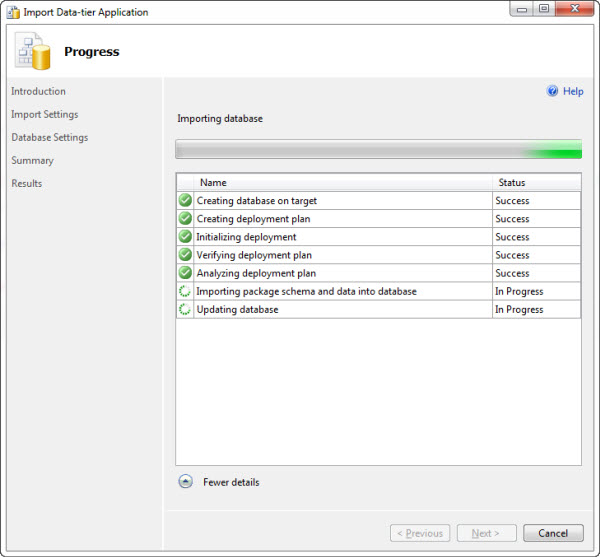
Once the import completes (this will take a few minutes), you can then link the database as a resource to your Azure Website. You can do this through the Websites – ‘Linked Resources’ menu option. Use the ‘Link’ option to link the database to the Azure Website by choosing to link an existing resource.
Note : It is possible to achieve this without using SQL Server Management studio. Using that method, you must first create an Azure Storage account, then upload the .bacpac file to an Azure Storage container. From there you can use the built-in management tools within the Azure Management console to import the database from the Storage account. This method hasn’t been covered in this example.
4. Download your publish profile
Now that you have your website and your database configured, you’re ready to download your publish profile. This is an xml file with connection strings, passwords and other credentials. You’ll use this to connect via FTP, and to configure your database connection string.
Downloading your publish profile is done by going to the ‘Dashboard’ view of your Azure Website in the Windows Azure Management console.
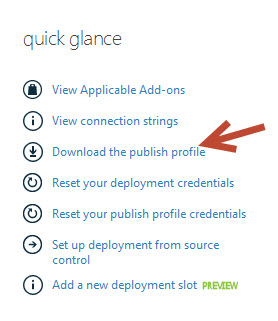
When you download the file, it has a .settings file extension, which is unlikely to be associated with any application on your local computer. You can open this up with any text editor, or any editor that will display text/XML files.
5. Update the database connection string in your web.config file.
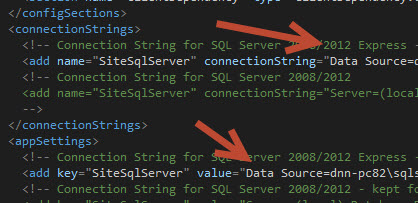
When you open the publish settings file, you’ll see a database connection string. Search for ‘SQLServerDBConnectionString’ within the publish settings file. When you find it, copy this entire connection string into the ‘SiteSqlServer’ connection string values within your DNN web.config file (remember, for most DNN Installs there are two locations for this file). This is in preparation for uploading the file to your site, so that when the site runs, it will connect to your Azure SQL Database rather than the existing SQL Database.
6. Upload your files to the site
There are several ways to push content to Azure Websites. I prefer using FTP because it’s old skool and always works. There are other options, but I’m going to describe how to use FTP using FileZilla.
Normally what people might do is create a compressed file of their existing file contents, and send up the zip file, and then expand it. In this case, we aren’t going to do that because we don’t have the file compression tools to work with at the destination. So I just FTP up the entire site contents, file-by-file. It’s not the fastest but it certainly is thorough.
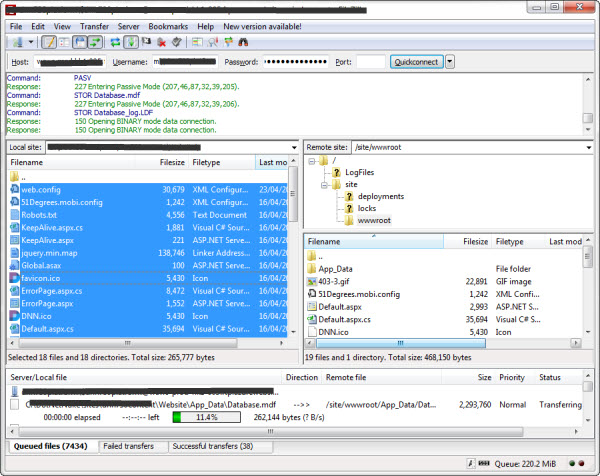
To connect, find the FTP connection details in the Publish Settings file. This includes the FTP connection address, the username and the password. Enter these details in FileZilla (or similar) and connect. This should operate correctly and show the structure of the FTP publish location. This is the file storage of your site.

Upload from your computer to the Azure websites location – all of your DNN files and content. The files should be transferred into the /Site/wwwroot location.
7. Browse your site
Your site will be accessible on the public URL as shown in the Azure Websites dashboard, under ‘Site URL’. As long as you set the ‘Auto Alias Add’ option earlier in the procedure, then the site should load as expected. If this is not working (usually you will see a 404 error) you will have to manually insert Site Alias records into the PortalAlias table – specifically the [sitename].azurewebsites.net domain name to get the site running on the temp domain name.
8. Complete the configuration for the launch.
Your site is now up an running, but not answering to your domain name. You may also have to change some of the SMTP settings and other configurations. Launching the site is covered under the prior blog post Launching a DNN Site on Microsoft Azure Websites.
Note that when you are finished, you should go back in and switch off the ‘Auto Alias Add’ option again, to prevent accidental creation of domain names.
Comments?
Please let me know if there are missing steps or a particular step causes issues in practice. While the process seems complicated upon first reading, it’s really much simpler than most hosting migrations are. Feel free to share your newly migrated site!