In the previous blog entry we created the “Task” class in Visual Studio so that we have a definition for the task objects that will be created and populated with data whenever we’re sending tasks to or retrieving tasks from the database. As you can imagine our module will repeat this process of adding and retrieving tasks very frequently. Next we need to create some “Stored Procedures”, which are scripts that reside in SQL Server that will execute these frequent adding and retrieving actions. Stored Procedures will execute a specific script or procedure every time they get called. That procedure may be adding a task, getting a task, getting multiple tasks, updating a task, or deleting a task. Ultimately the scripts will execute whatever we code them to as long as it is valid SQL.
Side note: Typically you will have at least 4 stored procedures that make up your “CRUD” operations. If you hear developers mention the word CRUD they are referring to the “Create”, “Read”, “Update”, & “Delete” operations or procedures which make up the 4 basic procedures done to data. You will also here developers refer to stored procedures as “Sprocs”.
Side note 2: Also, it’s notable that DNN has something called a “DAL2” or Data Access Layer 2 which makes handling CRUD operations really easy. For more info on the DAL2 see this blog "A New Data Layer for a New Decade". Keep in mind that we are not using the DAL2 in this tutorial series.
In case you’re wondering why we don’t just include these scripts in the code of our module’s user controls (like the view control) there’s a reason for that. In the past some developers did include SQL scripts directly in their module code rather than storing them in SQL Server as stored procedures. Though this opened up a security hole and is what led to something known as a SQL injection. If you’ve ever been a victim of a SQL injection then you know they are not fun. So when you think about stored procedures think of them as another way to have separation of concerns or a loosely coupled system plus another additional layer of security for your module. More info on SQL Injections via Wikipedia & Computerphile
If we consider the graphic from the previous blog entry we can extend it to illustrate where the stored procedures reside in our interactions with the database.
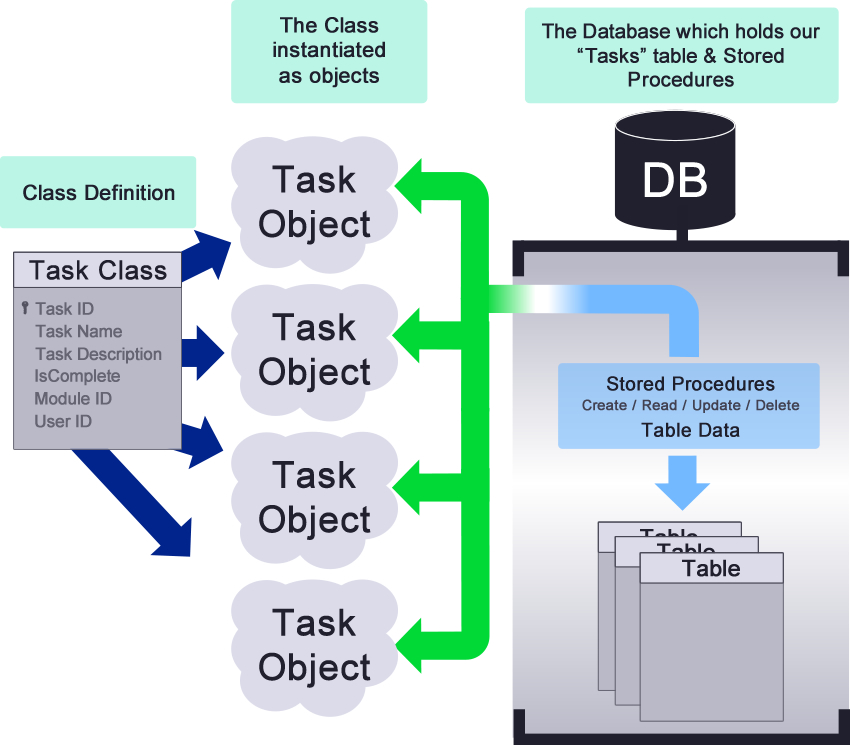
As denoted in the above graphic, our stored procedures reside in SQL and will be used to take the information from our populated objects and add them as rows in our Tasks table and they will also retrieve data from the table which will eventually populate the properties of objects in our module’s memory. The only thing left to do at this point is to create our “GetTasks” stored procedure.
Keep in mind that by the end of this we will have multiple stored procedures, but currently we are only creating 1 stored procedure so as to hopefully waste no time with simply getting data returned and on the screen in our module. Most developers will create the majority of their stored procedures at the same time and there is nothing wrong with that. Though, when I was trying to learn I had difficulty mentally mapping things together as I would get confused with all the code in so many places. With that in mind we will take all steps needed to retrieve data and then we’ll come back in and add, update, and delete data later.
Querying the Database
In order to create a stored procedure first turn on SQL Server and expand your database node for this blog series. Once you get your database expanded right click and select “New Query”. This tells SQL that we want to create a new database query and a new window opens up. Also, as we go through the next section of this entry if all this SQL and stored procedure stuff gets a little fuzzy I’ve included some helpful links at the bottom that will get you up to speed.
Since we are creating our “GetTasks” stored procedure we want to write a SQL script that will return the information from our Tasks table. So in the open window type the following script:
SELECT TaskID,
TaskName,
TaskDescription,
IsComplete,
ModuleId,
UserID
FROM CBP_Tasks
Once you’ve gotten that script inserted then either click the F5 key or the “!Execute” key with the red exclamation beside it (F5 is the shortcut key for execute). If all went well you should be seeing a results window with the sample data we entered returned that looks something like the below image:
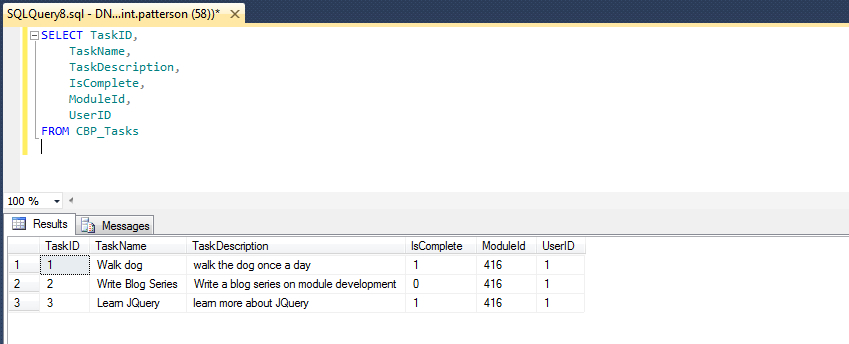
Creating the GetTasks Stored Procedure & Scoping by the ModuleID
This is the exact information that we want to return, but it’s not a stored procedure yet… it’s just a query at this point. Also, something we need to think about that may not be as obvious initially is that scenario again where our module can be placed on the page multiple times or even on different pages across the site. We don’t want each module to show the same data, but rather we want each module to have its own unique task list. This is where the ModuleID field comes in. So we need to update the script to account for the module Id. Update the script to something similar to the below. (Note that I’m using module ID 416 because that is what the module ID in my sample data is – you will need to update yours accordingly):
SELECT TaskID,
TaskName,
TaskDescription,
IsComplete,
ModuleId,
UserID
FROM CBP_Tasks
WHERE ModuleID = 416
Execute this script and if all goes well you will still get the same results set returned because currently all of our Tasks table data has the same module Id.
Now we need to handle 2 items to make this “GetTasks” stored procedure work. We need to update the script to accept a parameter for the module ID because the module Id could be any number within our DNN instance. We never really know what the module ID will be as they are generated by DNN. Also we need to turn this query into a stored procedure.
Since we haven’t yet, let’s talk about where Stored Procedures reside in SQL. Stored Procedures live in the “Programmability” node of our database. Expand the Programmability folder and then expand the Stored Procedures node and you’ll see that DNN has quite a few stored procedures in the system. These stored procedures were created during the install process.
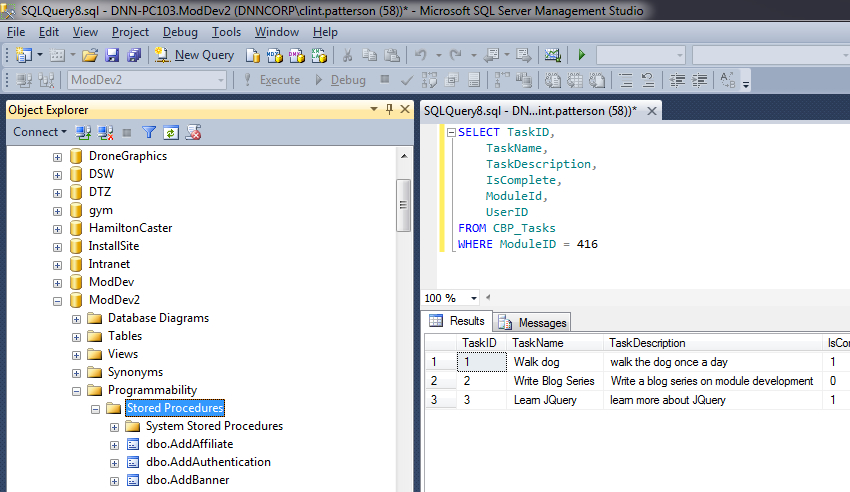
We need to convert our current query to a stored procedure so we need to add some simple syntax to make this happen. Update the query to the following:
CREATE PROCEDURE CBP_GetTasks
@ModuleId int
AS
SELECT TaskID,
TaskName,
TaskDescription,
IsComplete,
ModuleId,
UserID
FROM CBP_Tasks
WHERE ModuleID = @ModuleId;
GO
Notice we just include the “CREATE PROCEDURE” followed by our procedure name to start. This is another point to where you want to name your stored procedure uniquely because we don’t want our stored procedure to clash with any other stored procedures. Also, notice the @ModuleID int included just after the procedure name. That is the parameter of our “GetTasks” stored procedure. Remember we need to accept the parameter for the module ID because each module’s ID is unique in DNN. This is also referred to as “scoping” our data at the module level. After the parameter we add in the “AS” before the query and then the “GO” after it and that’s all it takes to code our stored procedure.
Now we need to execute this script and see if our stored procedure is correctly created and functions as we expect. Click F5 or “!Execute” to run the script and if everything was typed in correctly you should see a message “Command(s) completed successfully”. Now go back to the Stored Procedures folder and refresh the folder and see if your stored procedure exists in the list. You should see it listed there.
Next we need to test this procedure out to ensure that it functions as we imagine (you can never do enough testing). So right click on your newly created stored procedure and choose “Execute Stored Procedure” as shown below:
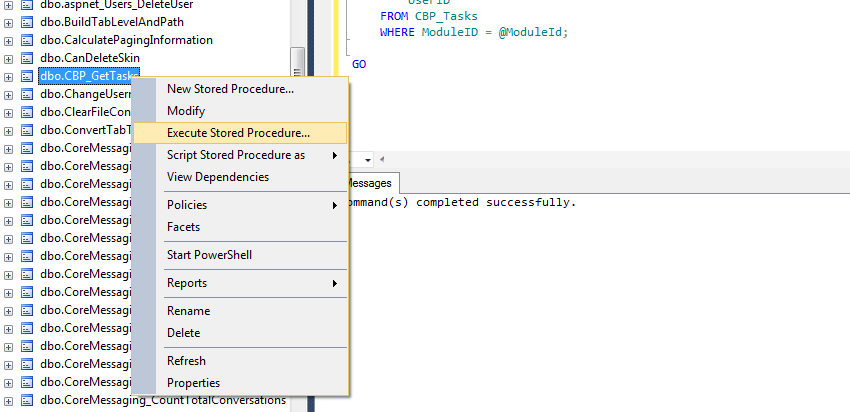
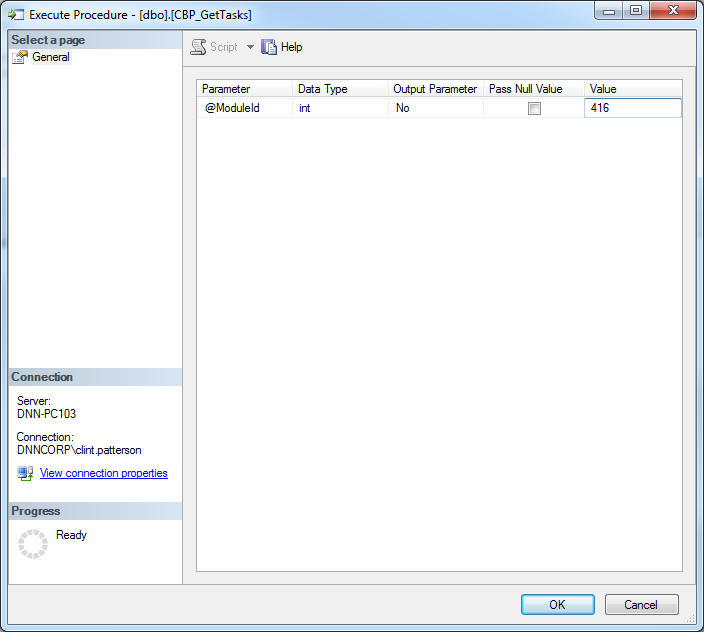
When you click to execute the stored procedure a pop-up window comes up on the screen. This happens because of the Module ID parameter that needs to be entered. SQL Server is giving us the option to enter the parameter manually for testing purposes. Enter the number of your module’s ID here in order to see if this works correctly. In my case this is module 416. After you’ve inserted your module’s ID then click “Ok”.
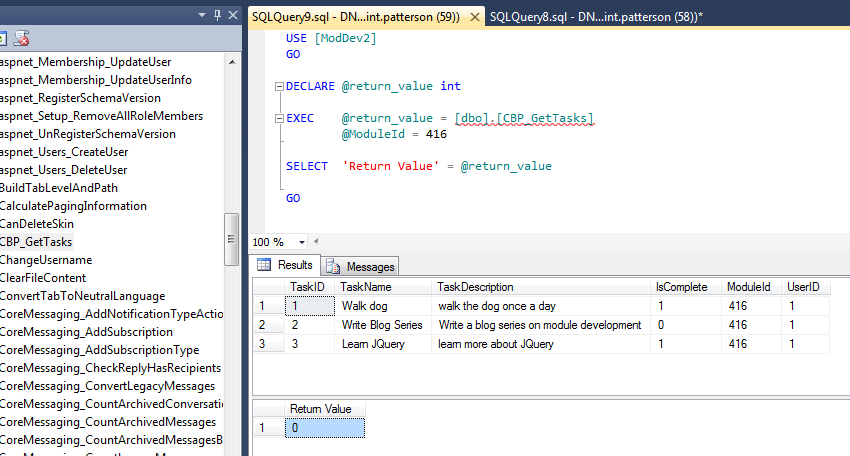
If everything goes as planned you should get the same results set back in a window that looks like this:
Updating the SQLDataProvider File
If you made it this far and got your results set returned then congrats! We’re still making progress. Now there’s one last thing to do that you may have guessed by now. We need to include the DNN specific syntax so these scripts will work whenever the module gets installed into any DNN instance. And if you remember correctly these files reside in Visual Studio so let’s update these scripts and then plug them into our SQL DataProvider files in Visual Studio.
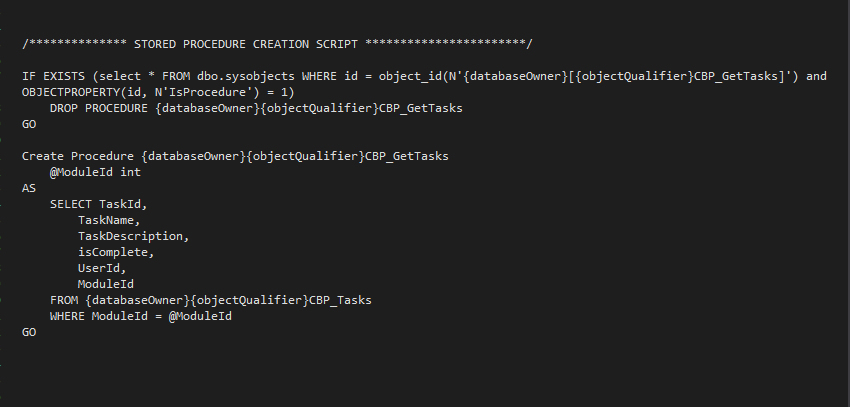
In order to update the scripts we need to insert the following script just before the code for our stored procedure. Note that this portion of the script needs to be updated to reflect the name of your stored procedure. You can see where mine is using CBP_GetTasks in the below script:
IF EXISTS (select * FROM dbo.sysobjects WHERE id = object_id(N'{databaseOwner}[{objectQualifier}CBP_GetTasks]') and OBJECTPROPERTY(id, N'IsProcedure') = 1)
DROP PROCEDURE {databaseOwner}{objectQualifier}CBP_GetTasks
GO
Again this script checks to see if the stored procedure already exists and if it does it will drop (or delete) the stored procedure and then we create it again. Now we need to add this to our script and add it to our SQL Data Provider file in Visual Studio. To do this turn on Visual Studio and open up your module project then open the 00.00.01SqlDataProvider file. Simply paste in your total script.
So all together the script will look as follows:
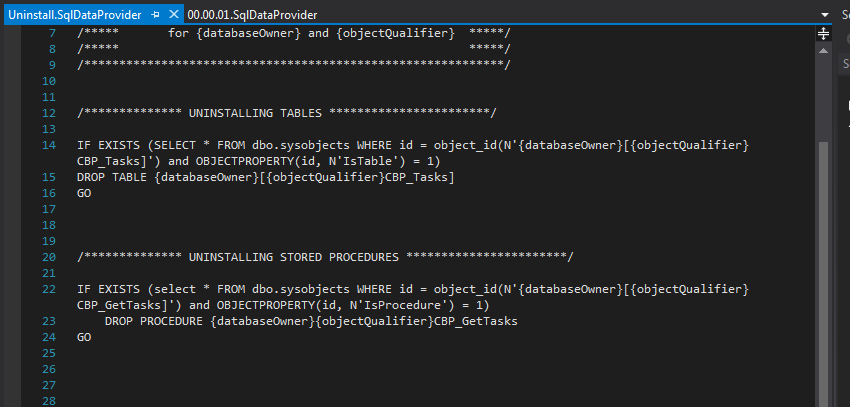
Now with the script updated be sure to save the 00.00.01SqlDataProvider file and then close it. As you may have guessed we shall next update the Uninstall.SqlDataProvider file. Open the uninstall file and add in the portion of the code that checks to see if the stored procedure exists and if it does then drops the procedure. Once you update that be sure to save it and you should be good to go.
A video walk through of this entry
Summing Up
Now we’ve taken the proper steps to create our “GetTasks” stored procedure which will execute a query on our Tasks table every time the procedure gets called. The procedure will, as we coded it to, look for a module ID parameter and then give us all the tasks associated with the module. We are indeed making progress and I hope you’re finding this series helpful and learning some. Now that we’re able to select rows of data from our table we now need to populate those objects that we previously defined with this data. We will do this in the next blog entry. See ya in the next entry…
Helpful SQL & Stored Procedure Links:
Go to the Next Entry: "Creating the Task Controller Class"