Writing Your Own ATFS Tests
Introduction
In the first two articles, I explained the basics of ATFS
and how to use it to run all existing or specific UI tests. In this article, I’ll show you how
to write your own UI tests.
Prerequisites
You need to have followed the previous two articles to get
yourself familiar with the framework and its configuration file. The articles
were published here https://www.dnnsoftware.com/community-blog/cid/155462/dnn-automation-ui-testing-with-f-atfs--part-1
and here https://www.dnnsoftware.com/community-blog/cid/155463/dnn-automation-testing-with-f-atfs-part-2.
Before proceeding, you need to revert any changes made to
the framework you downloaded from Github or to start with a clean clone of the
repository.
Writing Your First UI Test
Now let's get to the real work of writing our own tests. Let's start with a simple test to check whether a specific text is displayed in
at the home page or not. We will to add the test under P1
Community area (folder).
Step 1
Open the solution in Visual Studio and browse to the ATFS
project. Expand the project
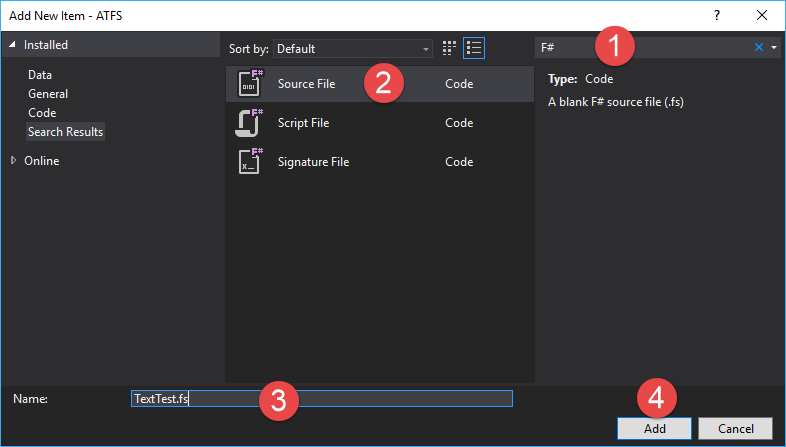
“<project-name>/TestCases/Community” node, right click the mouse over the "Community" folder, select
“Add | New Item …” then click. In the dialog that opens select F# files,
source file, then enter a descriptive name for your test suite, and click the Add button.
In the image below I choose to use TextTest.fs for the file.

Step 2
In the new file window that opens type the following
code (note that F# relies on indentation for identifying its code blocks; therefore be aware of that when editing the code):
|
module TextTest
open canopy
open DnnCanopyContext
let positive _ =
context "Testing Text in Pages"
"Home Page Contains 'Every Journey
...'" @@@ fun _ ->
goto "/"
let el = element "#dnn_HeaderPane" |> elementWithin "h2"
Check.Contains el.Text "Every
journey begins with the first step."
let all _ =
positive()
|
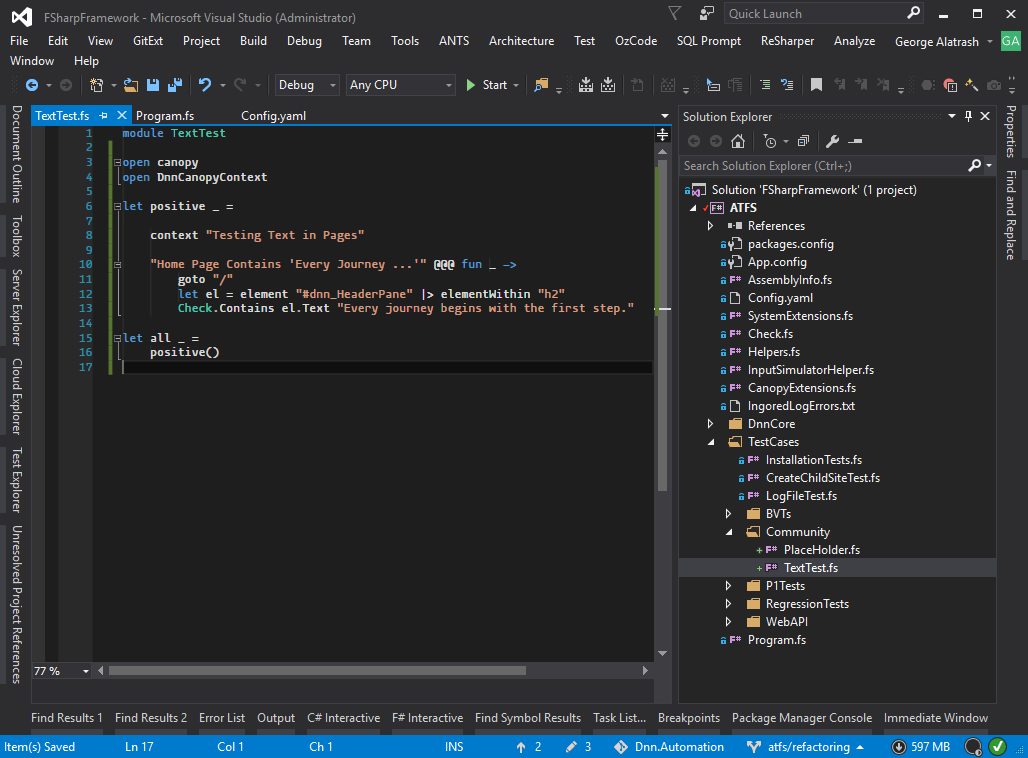
Your window should look similar to this.

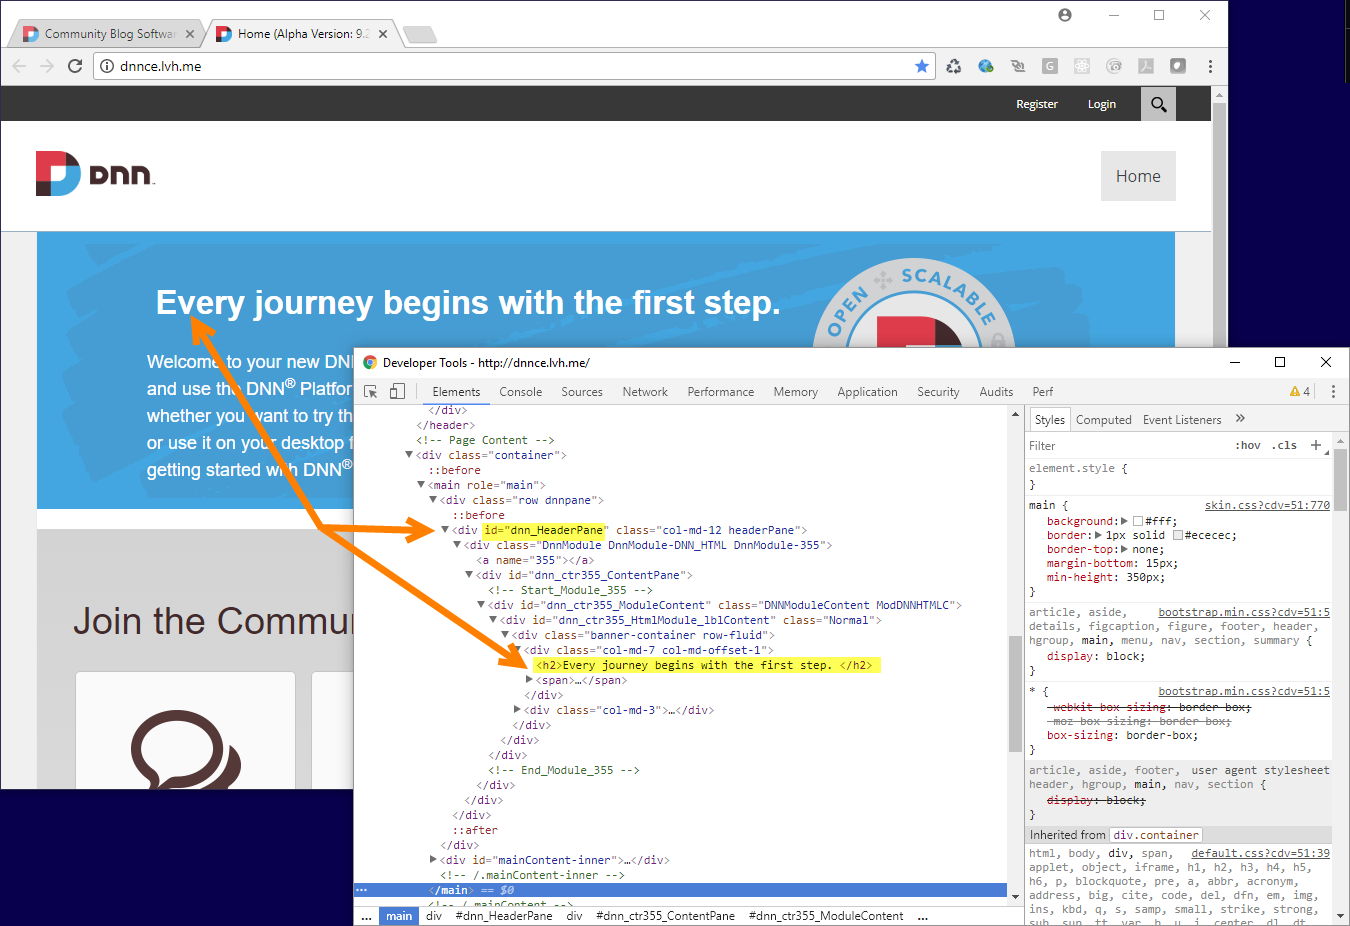
What we are trying here is to browse to the home page “/”
and locate an element with an ID equals “dnn_HeaderPane” then try to locate a
child element with “h2” tag under this (not necessarily a first child; it could be a grandchild deep under the parent). Afterwards, we verify that the found element’s
text contains the text “Every journey begins with the first step.” If we
use the browser tools to locate this, then it will be something like this:

Now, enter the following line in the “Program.fs” file as
shown in the previous practice section (and pay attention to indentation).
TextTest.all()

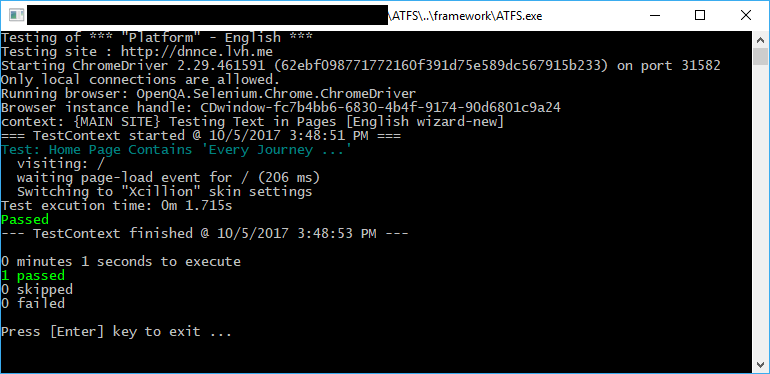
Now press F5 and watch your test run. You should see a
window similar to this.

Congratulations, you wrote you first UI test with ATFS
framework
Summary
In this article I explained how you can write our automated
UI tests and run them. If you followed the previous two blogs and this one you will be able to start on your own and extend the tests to your own
written modules. The tests provided with the framework represent a good
starting point for you to learn from and see how we at DNN perform out
automated UI tests.
When you start writing your tests and face any blocking issue or need
further information, don’t hesitate to ask (as a comment to any of the blogs) and I or another person from the automation team at DNN will do our best to reply in a
timely manner.