Previously, Ash dove into and explained the inner wiring between the Persona Bar and the React JS sample application. In this blog post, we’re going to take a look at how to call an existing web api and display the information returned.
Useful Blogs
Before we proceed, you may want to reference these blogs:
1. DNN 9: Persona Bar Architecture
2. DNN 9: Extending the Persona Bar
3. DNN 9: Adding a ReactJS App to Persona Bar
4. DNN 9: Diving in a ReactJS Persona Bar Extension
Note: In this example, we are using the already available getUsers API in the persona bar.
First, let’s go back to the very beginning of our app. Here, you’ll see boilerplate code required to connect our Redux state to React.
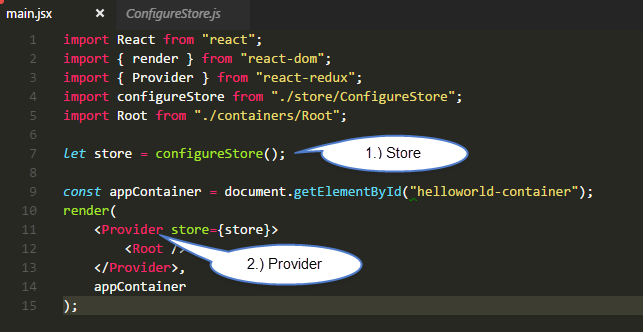

1.) Store – this generates our store from the reducers we specify, and also applies any middlewares that are defined.
2.) Provider – this is provided by React-Redux to allow all containers in our React application to access the store’s state.
To get a better understanding of the principles of Redux, refer to https://egghead.io/lessons/javascript-redux-the-single-immutable-state-tree
Once our app has been setup, we can now start defining the necessary elements to create our react-redux workflow.
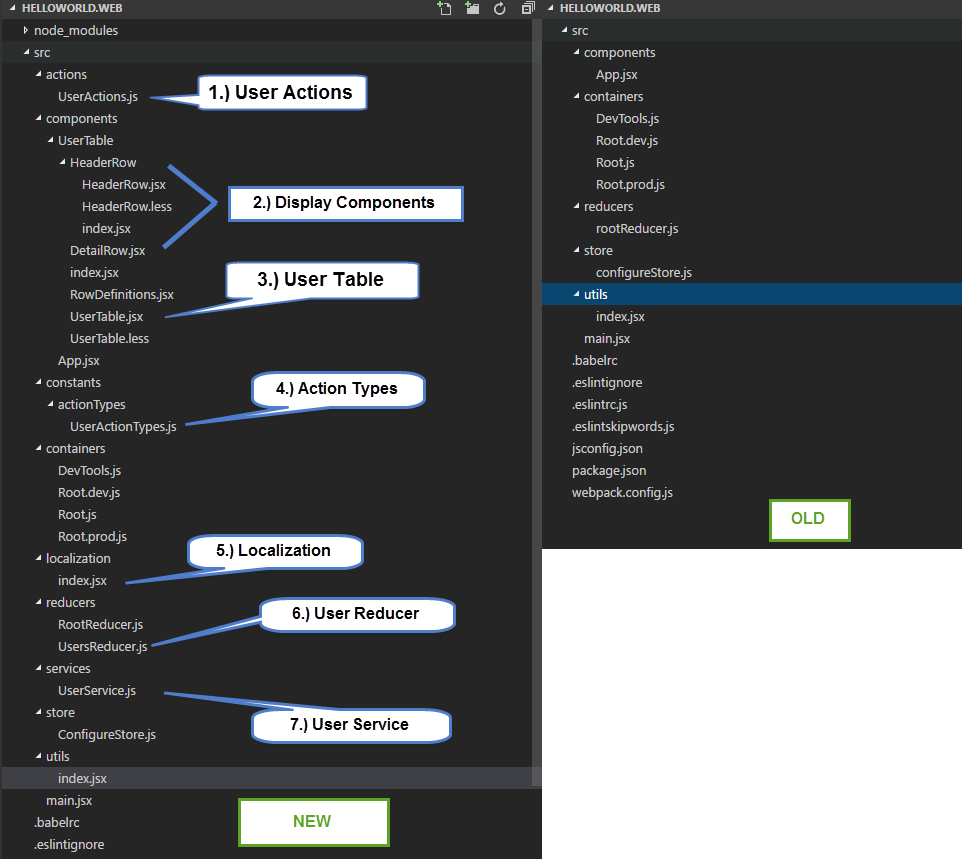

Let’s break this down.
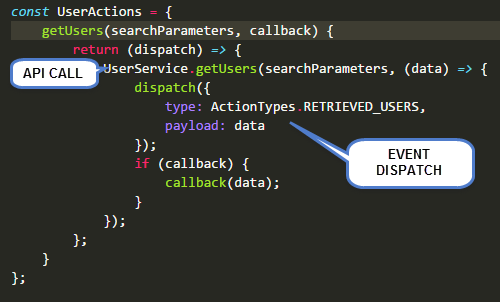
1.) User Actions – these contain actions that call a service and dispatches events after the call has gone through.
a. User Action breakdown
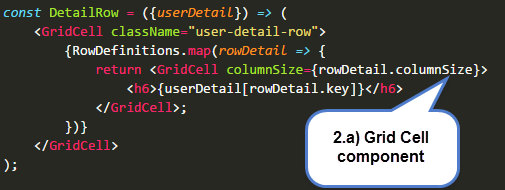
2.) Display Components – these components take the data and display them accordingly, in this case, a table layout using DNN-GRID-CELL component.
a. Grid Cell Component – this component takes a column size, which turns it into a percentage. This behaves much like the bootstrap grid, floating elements to the left and using percentages as width to allow responsiveness.

3.) User Table – this table uses some of the display components such as Header Row and Detail Row in order to build a table.
4.) Action Types – these are variables used to define actions that a dispatcher listens to (see figure 1.a.)

5.) Localization – we have built in localization to all persona bar modules in the utility library. In order to grab a resx key from a module, we can use the getResx function.
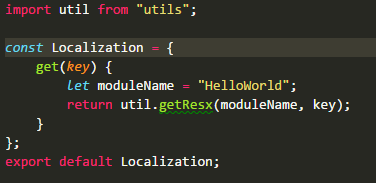

In this case, our resx file name is HelloWorld (matches module name), and we can use the getResx method to call for any keys.
Example: Localization.get calls the getResx method, looking for the key “Name.Header”.
Note: If the key ends with .Text, there is no need to add .Text to the key name. (Localization.get("Name") will look for Name.Text as the key)
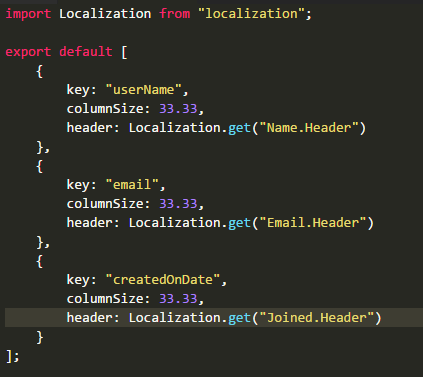
6.) User Reducer – this reducer contains the list of users that are returned from the API. It’s job is to provide an initial state (list = empty array), and listen to actions (RETRIEVED_USERS) and update their contents accordingly.
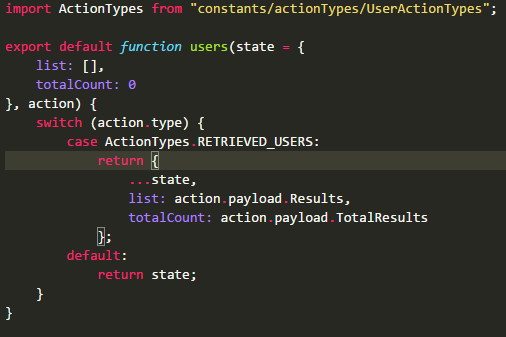

Note: When using redux, it is generally a good practice to avoid mutations, hence we should avoid using methods such as push, etc. In this example, we are also using ES 6’s rest/object spread notation in order to return a copy of the state.
7.) User Service – this service uses the service framework that is provided in the utility library in order to make API calls. The service framework comes preloaded with the proper tools to authenticate API calls.
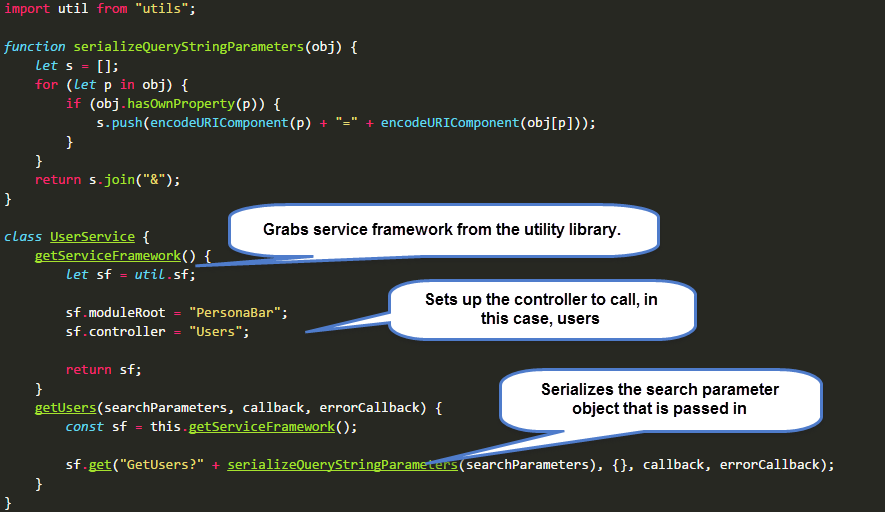
GetUsers search parameters:
1.) searchText: text to search for in users [""].
2.) filter: filter by type of user [0 - shows all]
3.) pageIndex: pagination index [0 - gets first page]
4.) pageSize: number of users to get [10]
5.) sortColumn: column to sort by ["" - default]
6.) sortAscending: descending or ascending order [false]

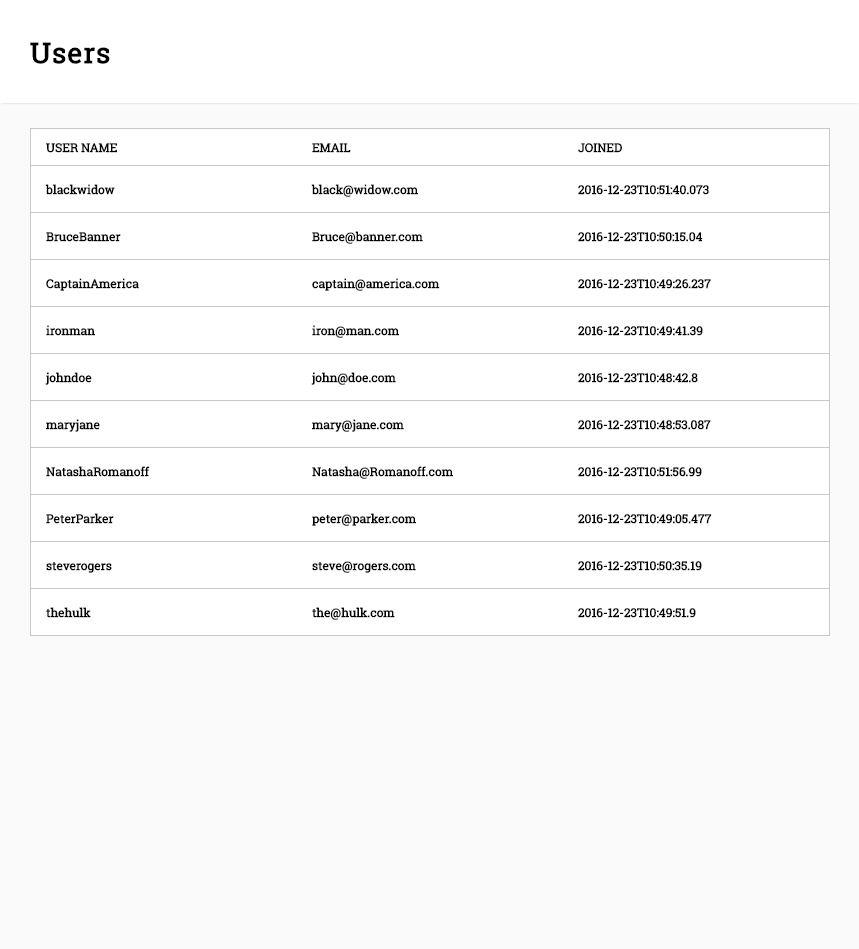
With all of the components in place, our application now has the full workflow in order to retrieve and display the list of users.

SAMPLE MODULE SOURCE CODE HERE