Why get an SSL certificate
Just to clarify a small technical semantics issue, SSL (Secure Socket Layer) is the old standard of transmitting secure data and was deprecated, what is used now is actually TLS (Transport Layer Security). Basically, the encryption in the new standard is on another layer of the OSI model, but that is not important for our usage and for this blog post. We keep seeing and hearing the term SSL to represent both, so it this blog post SSL means one or the other.
It is also important to understand that SSL is only effective at securing the transport of data, it does nothing as far a securing the website, if you have other security issues, ssl will not resolve them by magic. It is crucial to not get a false sense of security just by installing SSL on a site.
More and more sites now use SSL not just on some pages, but on the whole website. SSL usage has more than doubled in the last 4 years as shown in this chart form the Mozilla Telemetry SSL Ratios:

Why all sites should use SSL in 2018
- SSL is required if you take credit cards online in order to be PCI compliant, so if you take payments online, it is not even an option.
- It provides a sense of trust for your visitors because they will see a green lock next to your website address.
- It removes a sense of danger, modern browsers such as Chrome will actually add an Not Secure icon on the left of the website address as soon as you enter into a form. This can be any form, even just the search field. This alone may scare users away from your site.
- It may be beneficial for SEO. Although search algorithms are very well guarded secrets, many SEO experts have noted a small preference when all else is equal towards sites that use SSL, so it may be part of the formula that search engines use to rank websites.
- Best of all reasons: it's now free ! So why not.
Types of SSL certificates
On the technical aspect of securing the transmission of data, the only technical specification is the length of the key, the longer the key, the more time it takes to crack it (remember that everything can be cracked, it just takes a lot of time). As computing power increases, you need longer keys because they can be cracked quicker. A 2048 bits key is pretty much standard now and it would take at least 1200 years to crack a specific key. Of course that may change very quickly with Quantum Computers. The point is any of these types will do the same job on a strictly technical point of view, what changes is how users see your certificate.
- DV (Domain Validation) certificates only verify that the person who requested the certificate has control over the domain name of the website. These certificates are available for free or a very small fee. They are usually obtained in minutes or hours and only requires you to prove (by uploading a small file or modifying the dns record or using automated tools) that you can control the domain name. This will in most browsers show a green lock next to the website url.
- OV (Organization Validation) certificates also verify the organization (company) behind the website. The verification is made by verifying public governmental records for the company address and contact information. These certificates cost some money. They are usually obtained in a few days and your company needs to be registered for the certificate issuer to be able to verify it. In most browsers, it will show a green lock and in the certificate details it will show the organization address and contact information.
- EV (Extended Validation) certifications go one step further and the issuer will do a small audit of the company and it's owners. They cost the most money. In most browsers, it will show a green address bar or a larger lock badge with the company name next to the lock.
How to obtain an SSL certificate
Obtaining and installing an SSL certificate will vary depending if you have desktop access to the windows hosting your site or if you use a shared hosting account. If you are hosting your website somewhere, just follow their instructions. If you are self hosting your site and have direct or remote desktop access to your server, then I recommend using https://certifytheweb.com/, their software is free for small operations and very inexpensive if you grow and need more sites. This is good to obtain one or multiple https://letsencrypt.org/ certificates. Those are free DV (Domain Validated) certificates that are perfect for public facing websites that have no Ecommerce or very high security standards to maintain. Visit their website for details but basically you select the site, request a certificate and the software takes care of configuring everything for you in IIS. If you need an OV or EV certificate, the issuer will provide you with instructions for installing it in IIS.
Enabling SSL in DotNetNuke
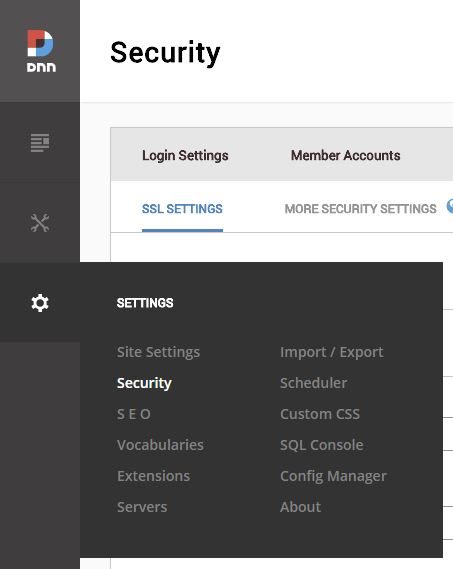
Once you got your certificate, you need to make DotNetNuke aware of that by going to Settings -> Security -> More and enabling SSL
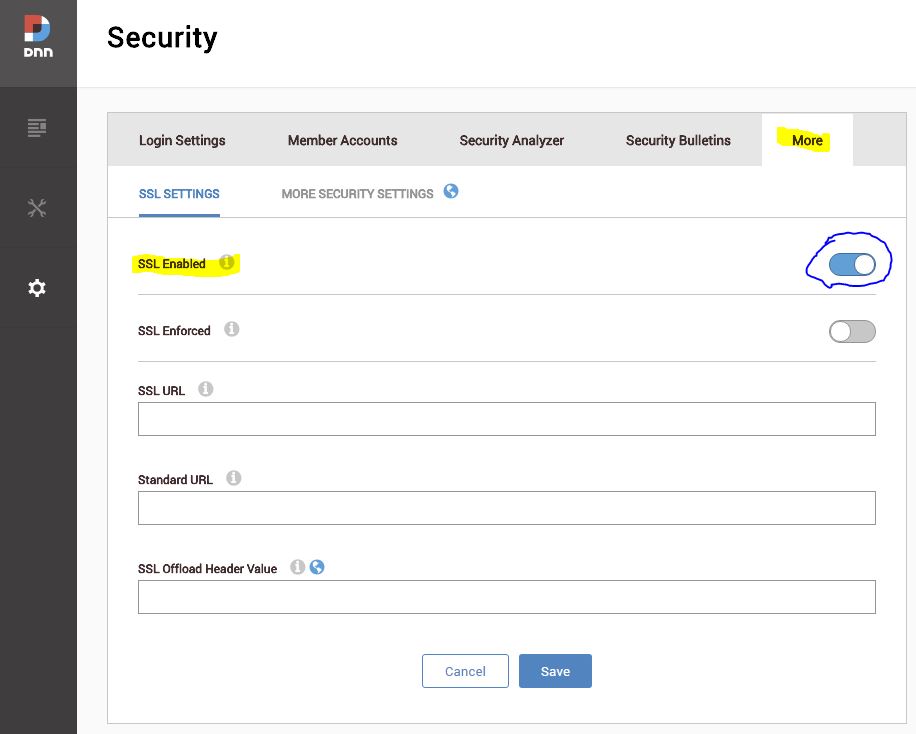
Unless you have different URLs for http and https or have some special needs, everything else may be left blank. You can now access your website either with http:// or https:// . On each page, you can now enable the Secure option and the page will always only show with https: but that would take a lot of time to go edit each page one by one. Unfortunately, I do not know of any Dnn feature that will force SSL for the whole website. But IIS can do that for us:
Forcing SSL for the whole website
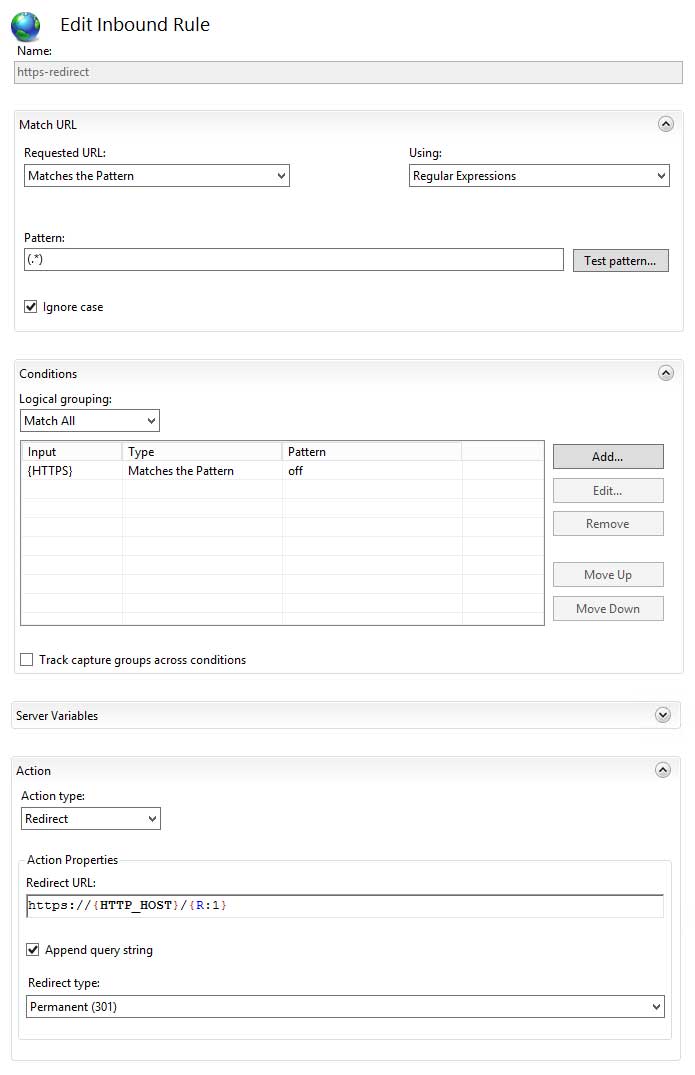
This technique uses IIS rewrite rules to create a 301 redirect for any ressource accessed by http to be fetched by https. A 301 redirect will notify search engine indexers that the resource has moved permanently to https, which will help with your SEO efforts. Here goes the step by step instructions:
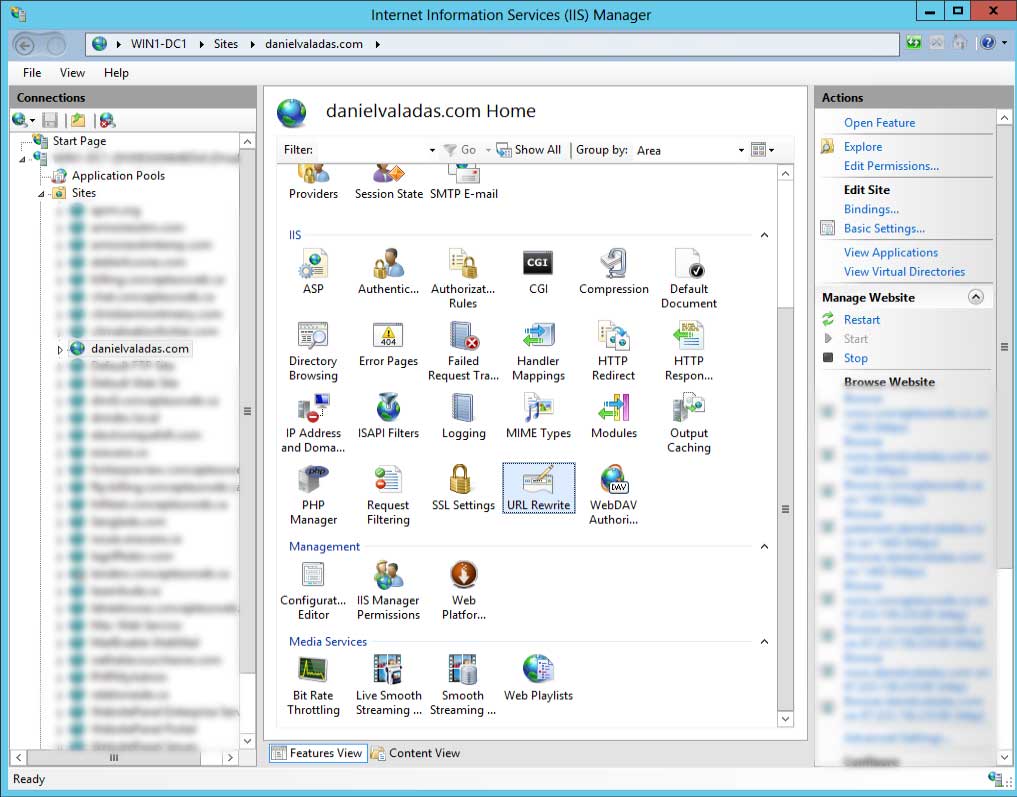
- Open IIS, navigate to your website and double-click on URL Rewrite
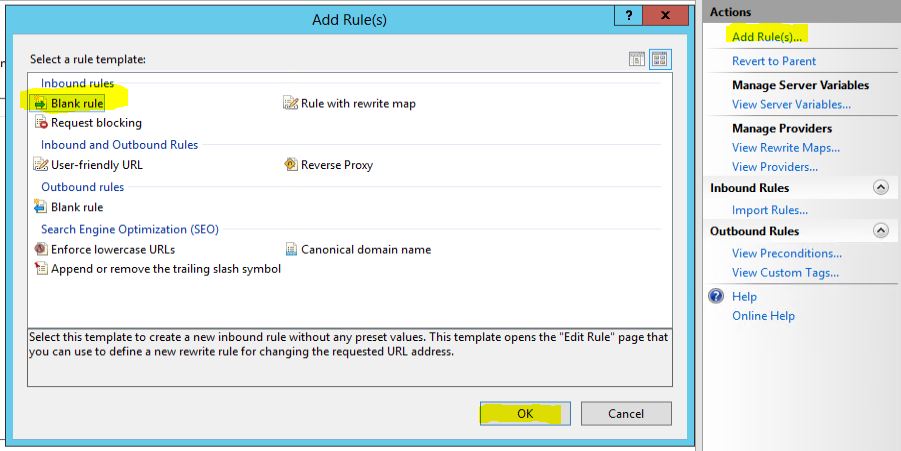
- Then click on Add Rule(s)... and in the new windows, select blank rule and OK.
- In the new rule window, enter the following in the Match URL section:
- Name: anything you want, I suggest https-redirect
- Requested URL: Matches the Pattern
- Using: Regular Expression
- Pattern: (.*)
- Ignore case: ticked
- In the Conditions section, click add and enter the following:
- Condition input: {HTTPS}
- Check if input string: Matches the Pattern
- Pattern: off
- Ignore case: checked
- In the action section enter the following:
- Action type: Redirect
- Redirect URL: https://{HTTP_HOST}/{R:1}
- Append query string: checked
- Redirect type: Permanent (301)
- Here is how it should look all together:
- Click apply on the right and you are all set, just navigate to your website using http and you should be automatically redirected to the https version on every page or resource.