Separation of application and storage is always a good thing. When we build a website (or any software, for that matter) it’s best to separate out the storage of data used by the site with the application code used to deliver the site itself. This gives you the possibility of being confident in upgrading application code without risking data. In the case of websites, it can also give you better performance because browsers are able to open multiple connections to multiple domains at once. Both Microsoft Windows and Apple OSX have different locations for storage (Documents, images, etc.) than for applications (Program Files, Applications). This makes it easy to backup just your data and even to move data between copies. So far, so good.
Since the very beginning Dnn has been built with the assumption of a single storage space for the application and the files belonging to that application. Originally, this was a good idea as not many people would have adopted the platform had you required a separate server to deliver images and documents to the web server itself. Not many people had two servers lying around, or even had a SAN to deliver files. The rise of public cloud services has changed this scenario, and now it is trivially easy – and cheap – to store your application files separate to your application code.
Enter the Separation of Storage and Application
A change was introduced to Dnn Platform in version 7.3, which was the ability to create a new install/site with Dnn and create the contents of the /Portals/ path created on separate file storage. This is achieved through the use of Folder Providers, which were originally introduced in Dnn 6. The change is pretty simple – when the install is run, it looks for a directive to create the portal folders either within the application (the default scenario) or using another Folder Provider. Note that I have talked about Cloud providers here, but it’s not restricted to that – you can use any Folder Provider, and you can build your own Folder Providers. So that includes UNC based folder providers and anything else you can come up with.
Once the install is finished, you’ll see that the installed folders are created with the specified Folder Provider (usually represented with a different icon).
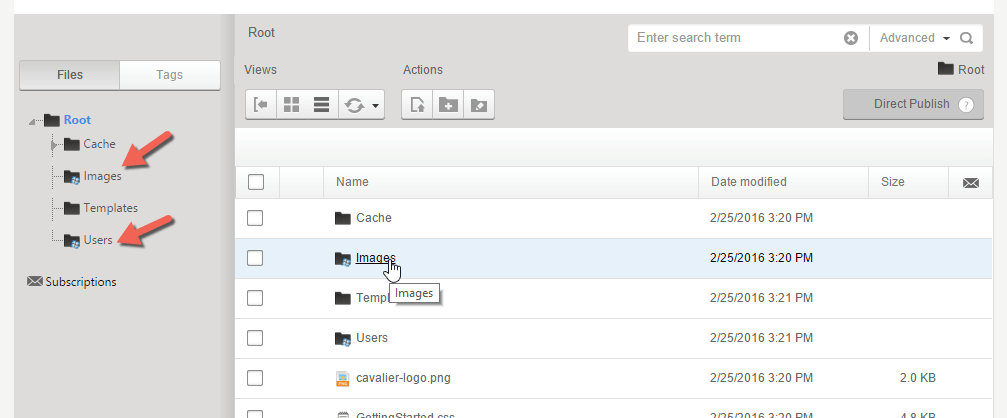
This means that any data uploaded to the Users or Images folder in this site will be uploaded directly to the Azure Storage account set up for this site. This is including any new Users that create a profile and upload content for that profile. Of course, you can still create different types of provider-based folders now the site is created. This change is to allow folders in the install template to be created in your provider of choice at the time of installation.
How to Create a new Dnn Installation using an Azure Storage Account
Note: this example uses Evoq Content 8.3 as the install package, but the same process works for Dnn Platform in all versions since 7.3. However, you do have to have a Folder Provider installed. Evoq Content comes with both Azure and Amazon S3 folder providers built in, Dnn Platform doesn’t come with any standard Folder Providers. This example shows the use of an Azure storage account and Azure Folder Provider. To follow this example with Dnn Platform, you’d need to purchase or build your own Folder Provider and include that in the list of modules installed by default. You can find different examples in the Dnn Store. There are also open source examples available.
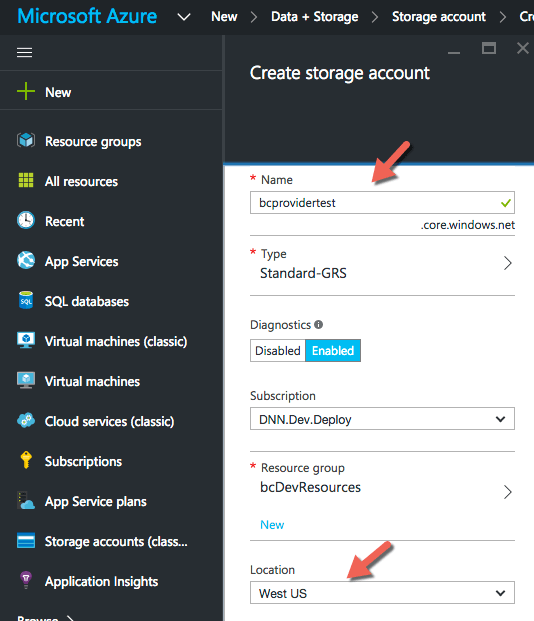
Step 1 : Open a new storage account in Azure through the Azure Portal, using the + New button. Provide a name for the storage account and choose the Azure Region and subscription. In this example I have chosen Geo-Redundant storage, which ensures that the data is written to two different locations in the region.
Step 2 : Prepare the new installation by unzipping the install package, and locate the DotNetNuke.install.config.resources file. Open the file in a text editor.
Add in the following section, after the last </portals> closing tag:
<folderMappingsSettings>
	<folderTypes>
		<folderType name="AzureFolderType">
			<provider>AzureFolderProvider</provider>
			<businessClassQualifiedName>DotNetNuke.Professional.FolderProviders.AzureFolderProvider.AzureFolderProvider
, DotNetNuke.Professional.FolderProviders, Version=7.2.2.0, Culture=neutral, PublicKeyToken=null</businessClassQualifiedName>
			<settings>
				<setting encrypt="true" name="AccountName">{accountname}</setting>
				<setting encrypt="true" name="AccountKey">{accountkey}</setting>
				<setting name="Container">portals</setting>
				<setting name="UseHttps">True</setting>
				<setting name="DirectLink">True</setting>
				<setting name="DefaultMappedPath">{PortalId}/</setting>
			</settings>
		</folderType>
	</folderTypes>
	<folderMappings>
		<folderMapping>
			<folderPath>Images/</folderPath>
			<folderTypeName>AzureFolderType</folderTypeName>
		</folderMapping>
		<folderMapping>
			<folderPath>Documents/</folderPath>
			<folderTypeName>AzureFolderType</folderTypeName>
		</folderMapping>
		<folderMapping>
			<folderPath>Users/</folderPath>
			<folderTypeName>AzureFolderType</folderTypeName>
		</folderMapping>
	</folderMappings>
</folderMappingsSettings>
Note that this example uses the DotNetNuke.Professional.FolderProviders.AzureFolderProvider business class definition. If you are not using Evoq Content, you’ll need to substitute in the value for the Folder Provider you’re intending to use. This should be easily accessible by looking at an install web.config file with the same Provider installed, or just ask the developer who made the provider.
The folderMappings section specifies which folders in the install template are going to be created on the specified Folder Provider. In this case, you can see that Images, Documents and Users are to be created in Azure. You can modify this as needed.
Step 3 : Add in storage account credentials
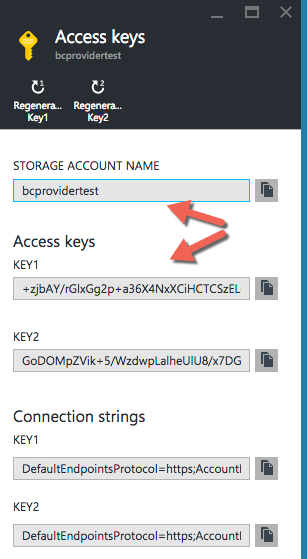
Open the storage account and copy the storage account key from the azure portal, and paste it into the DotNetNuke.Install.config.resources file, where I have added {accountkey} in the above example. It doesn’t matter which key you use. I tend to use Key1 for ‘fixed’ values like this, and reserve Key2 for giving out to others, if needed, because you can then easily rescind that key. You must also substitute the account name in the {accountname} value in the xml.
Step 4 : Create the Container in the Azure Storage Account
A Storage account needs a Container before you can save any files in it. As per the ‘Container’ setting in the above example, I have specified a container called ‘portals’. This means there needs to be a container called ‘Portals’ in the Azure Storage account.
You can create a Container through the Azure portal (click on the ‘Blobs’ in the Storage Account), but I have used Azure Storage Explorer (a free tool) to create the container:
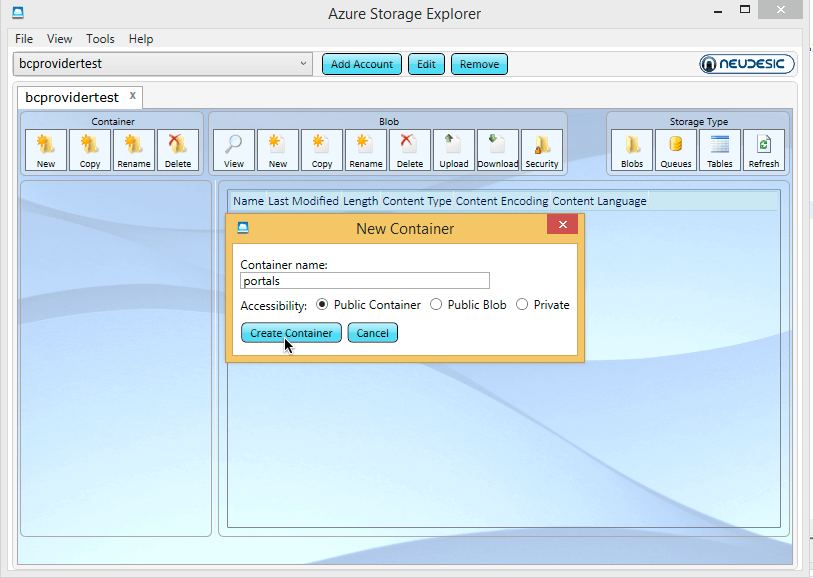
This container is created as a public access container, which is suitable for the public-access images I intend to store in it.
Step 5 : Run the Installer
For this step, run the Dnn install as you would any normal Dnn installation. As the install completes, you will see the files from the Site Template you use fill up the container in the storage account:
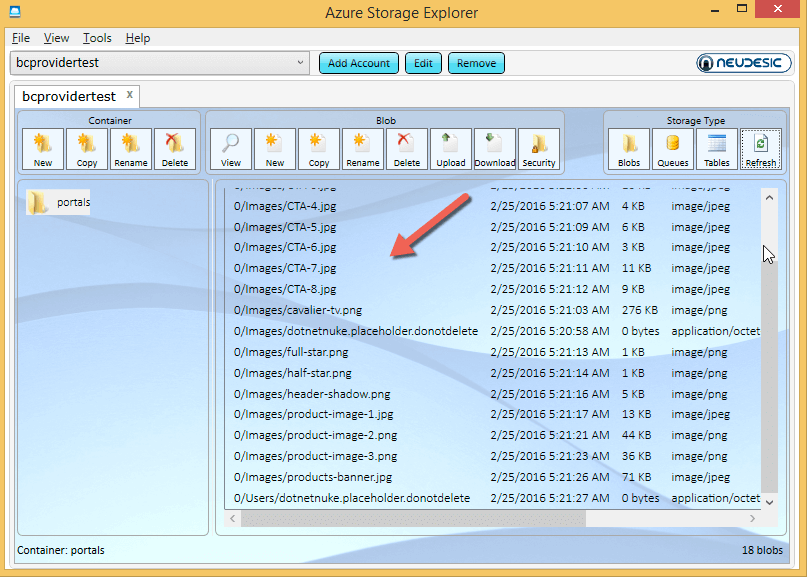
When the install is complete, log onto the File Manager and you’ll see that the folders are created using the Azure Folder Provider.
Looking at the Install Files
If you take a look at the Dnn install, you’ll notice a couple of things which are slightly different to a standard Dnn install.
1. There will be a copy of the portals/0 folder on the application folders as well as the Azure container.
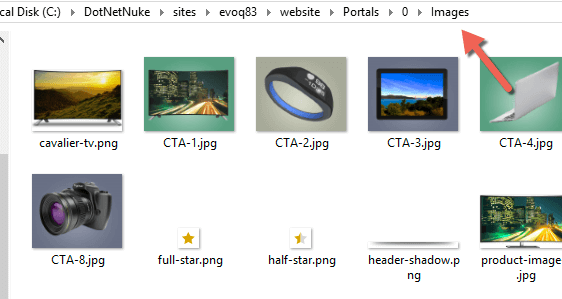
This is an artefact of the installer. Because the content in the site template is usually hard-coded to a local path, the files are copied there. You can ignore the files and delete them after you delete the default content. From now on all your files will upload to the Azure storage container.
2. Your file system has portals/0-system

In fact, this is present in all installs from 7.3 onwards, whether you use Folder Providers or not. This is actually used to separate out the Cache folder (which needs to be local for performance reasons) from cloud storage folders.
3. You have a new file called ‘DotNetNuke.folderMappings.config’ in the root of the application install.
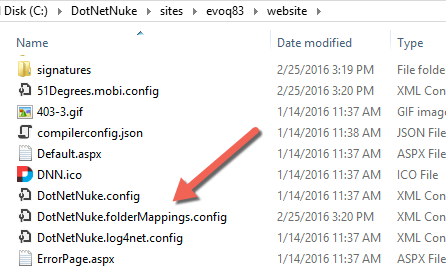
This is a copy of the folderMappings section from the DotNetNuke.install.config.resources files. Because the install file is ignored after the installation is complete, future sites added to the Dnn installation wouldn’t know what storage account to use. If you add a new Site to this install, the Folder Provider configuration is read from this file during the new site creation process. This also means you can modify the file between site creation to change the Folder Provider details used for new sites.
Using with Dnn
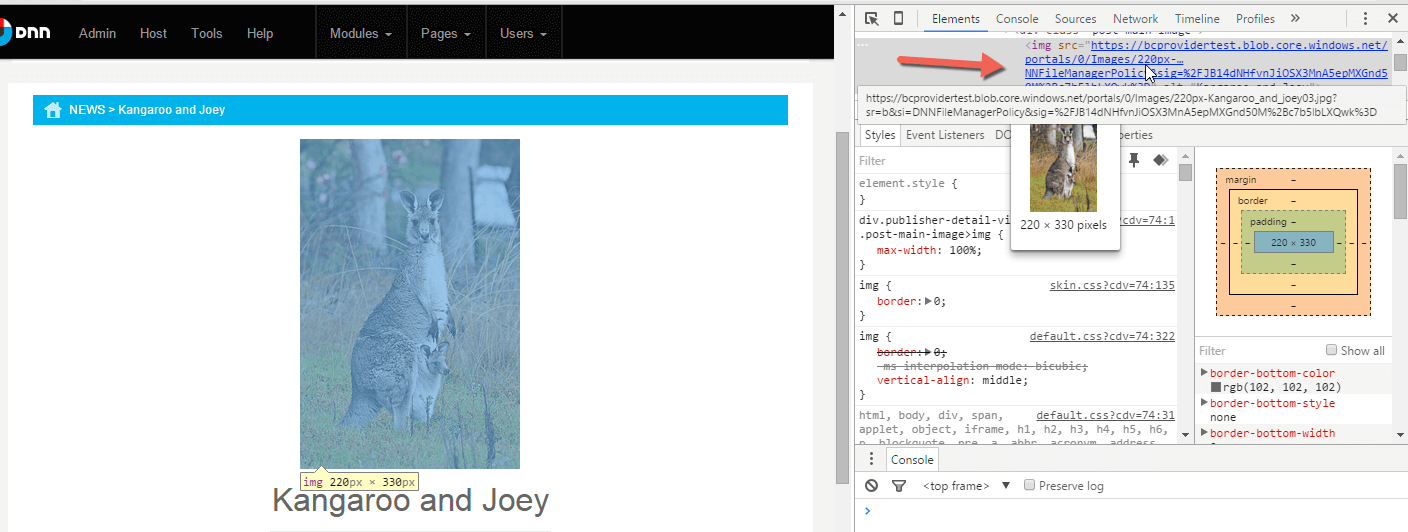
From this point onwards, there is no difference to using Dnn with the Folder Provider. For an example, I used the Evoq Content Publisher functionality to publish an article. I selected the image for the article and uploaded it to the images path. This uploaded the file to Azure, and when the file is inserted into the Article, it uses the URL as generated by the Azure folder provider.
Using a CDN to deliver content
Azure Storage providers can easily be used to deliver the stored content over an Azure Content Delivery Network. This pushes the data closer to the application visitor, so that they receive a faster response and are able to lower bandwidth costs in some case.
To create a CDN in Azure, add a new CDN using the +New button, and give it a name and the home Azure Region.
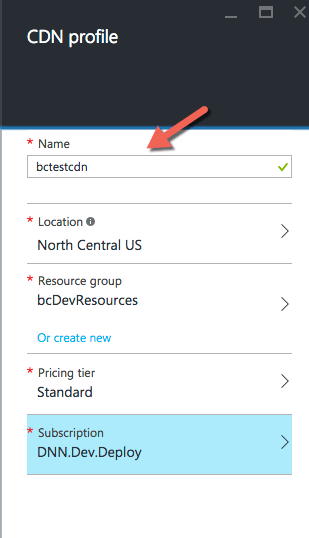
Then associate a CDN endpoint with the Storage Account.
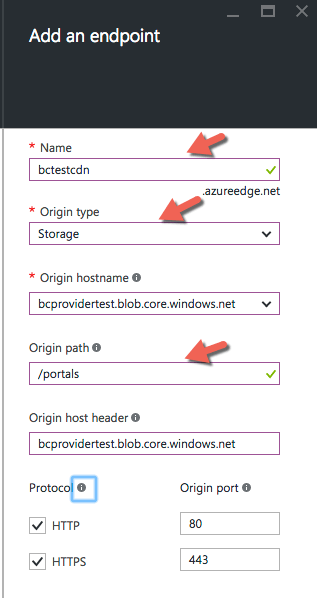
When creating the endpoint, associate it with the storage account, then set the origin path to the /portals container.
From then, the files will be accessible in the format of http(s)://<yourcdnname>.azureedge.net/0/images/your-file.jpg, where your-file.jpg is a file you uploaded to the Images folder in Dnn. Note the /portals path is not in the CDN path.
At this point, the Azure Folder Provider doesn’t automatically pick up the CDN URL, but you can easily insert images by URL, as shown in this example where I create a new article in the Evoq Publisher, and insert the image by URL. Note the CDN endpoint URL serving the same image already uploaded via Dnn.
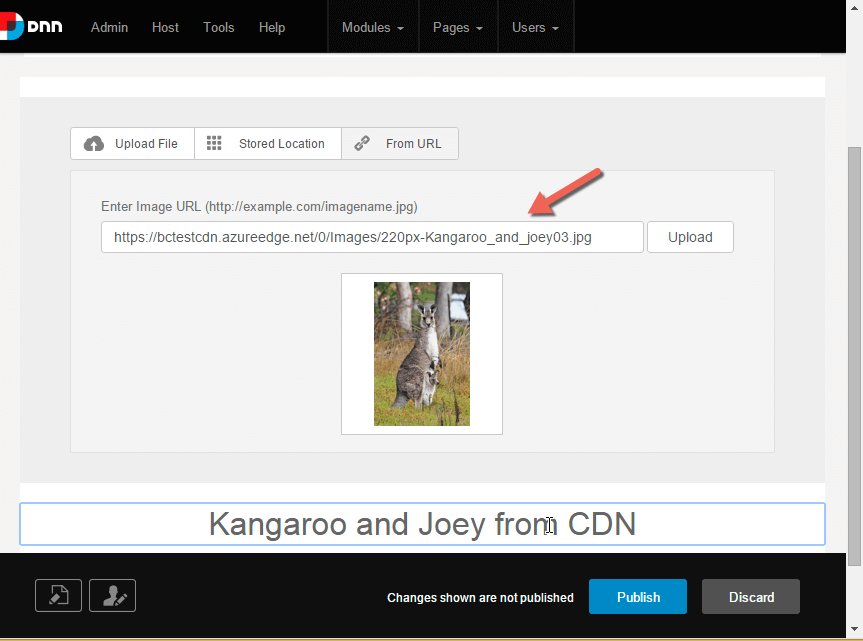
The return of the URL is the responsibility of the Folder Provider so any Provider with any storage platform can be made to return the CDN URL.
Conclusion
The use of Folder Providers at the installation level is very useful when you want to separate out the delivery of content from the application itself. This is particularly important when it comes to storing extremely large amounts of content – storage on web servers is exceedingly expensive when compared to cloud storage. In the case of some cloud platforms, the total amount of storage you can get with the application is capped at a hard limit. It also allows for separate backup strategies for content versus application data. Finally, endless cloud accounts means that you’ll never run out of space, no matter how many funny cat videos your site users upload. You can also take advantage of built-in CDN functionality in some Cloud storage providers.
The drawback is that this can only be achieved with new installations. It also takes some configuration knowledge of the install process and configuring Folder providers – so I don’t recommend for the first-time installers. However, if you regularly create Dnn installations then I suggest you give it a .