I am sure everyone in the DotNetNuke ecosystem had to go through Installation at least once and Upgrades multiple times. In 7.0 we decided to simplify the user experience for Installation and Upgrade. We wanted to provide one-click installation experience without having to go through multiple steps. Initially three Engineers were tasked to work on the new Installer, with one them being yours truly. I am dedicating 2 blogs to go through a couple of challenges we faced and how the team resolved it.
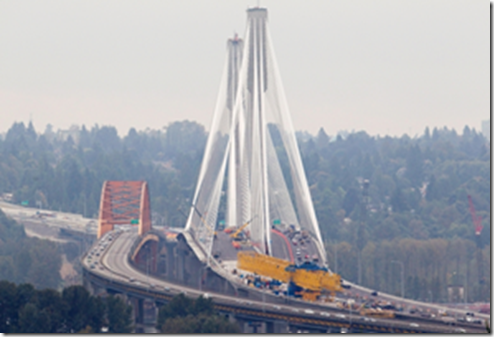
Port Mann Bridge
The picture above is that of new Port Mann Bridge (under construction) in Vancouver, BC, Canada on a very popular Highway (named #1). You may wonder why I choose this picture. Every time I pass by the old bridge I salute to the Extreme Engineering going behind building this massive bridge. The thought always runs through mind on how well they plan and execute; after all people’s lives and livelihood depends on quality of construction. In the Software world we always talk about dogfooding, infact DotNetNuke practises it very well, DotNetNuke.com is hostned on the DotNetNuke framework itself. However, the above is Dogfooding on steroids. Construction workers actually use unfinished bridge itself to construct further. The partly finished portion better have the best quality. The picture above shows lots of construction vehicles on the partly finished portion.
Story is similar on the Installer side as well, where we actually use the Installer to install framework while developing on the framework. Always a fine balance, develop enough that nothing else breaks but at the same time keep plugging ahead.
Separate Branch
We had to do a lot of prep work before we could write a single line of new installer code. It was almost like getting the patient ready before the surgery.
The DotNetNuke Engineering team works in an Agile fashion where great emphasis is given to Continuous Integration (CI). We run number of Build Verification Tests (BVTs) with every checkin. BTW, we use Team City for CI. Cruise Control used to be our CI tool, which is long gone now and we don’t miss J
Many Engineers install DotNetNuke several times a day. We didn’t want to interfere with Development and Testing efforts on other features. So, we created a separate branch just for Installer work. We merged to the main trunk right after a Sprint or two. BTW, our Sprints are 2 weeks long (more on that in a future Blog).
Reset Scripts

The installation process is pretty intrusive, where it makes lots of changes here and there (web.config, file system, database, etc.). Things get created, updated and deleted. It’s not very easy to go back to preinstall stage once installation is completed or underway.
We created special batch files to backup pre-installation stage and then restore on demand. We were able to use the scripts to run quick tests and get back to the starting point pretty quickly. These scripts are usually combination of xcopy, osql, iisreset and couple of PowerShell scripts.
I will blog about the scripts in future.
Progressbar and Key Milestones

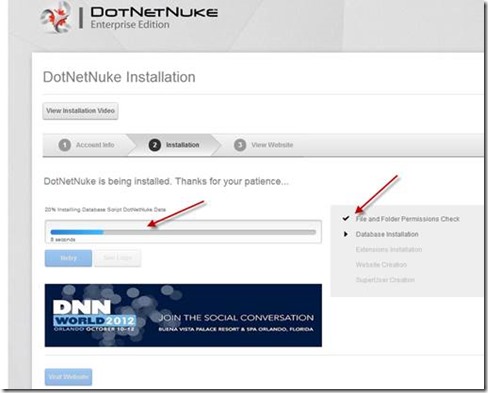
One of the key requirements of the Installer was to show a Progressbar and status of key milestones. The older Installer displayed the entire Installation activity all on one page.
Telerik Progress Area
Telerik’s Progress Area was the first choice for Progressbar as we already use this control in Content Localization and have good sample code. Not so fast. We ran into following obstacles:
1. Telerik Dll wasn’t part of Bin folder to start with, as it gets added during installation. Not a big deal we could add it as part of pre-install.
2. This control didn’t have a lot of client-side features we were looking for. Not a big deal, we could write additional jQuery to get by.
3. However, the deal breaker was missing web.config entries needed for the Ajax call back. We said it’s enough of tinkering to get a Progressbar going.
That was a bummer, time to move on J
jQuery Progressbar
Next option we looked for was jQuery Progressbar. It actually looked pretty promising as it had a pretty simple API set and easy to configure and use. We settled on jQuery Progressbar pretty quickly.
Move on to my next
blog on more adventures with the Progressbar.