In our series on developing DotNetNuke Modules I have covered two ways to create a simple module - using DotNetNuke itself, and using WebMatrix. In this post I will show how Visual Studio can be used to create a similar Hello World module.
Before we do that lets take a more detailed look at the module control itself. As the examples in Hello World and Hello World 2 are similar, we will focus on the first example. The code for HelloWorld.ascx is shown in Figure 1.
Figure 1: HelloWorld.ascx
|
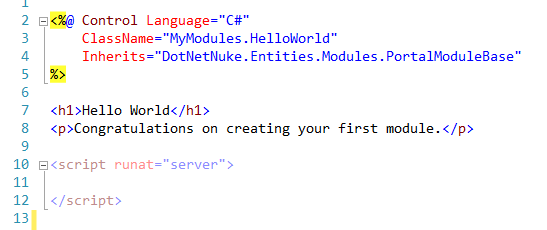 |
There are three main sections in this file. At the top of the file enclosed in the “<% … %>” is the Control statement, which tells ASP.NET that this control is using C# as its language, the class is called MyModules.HelloWorld and it inherits from the base class “DotNetNuke.Entities. Modules.PortalModuleBase”. The next section is the HTML of the module, and finally, at the bottom, is a “server-side” script block. The script block looks just like the script block’s that we use to enclose client-side JavaScript, but the runat=”server” attribute indicates that this is a server-side script block and would be where we can place our C# code.
While this style of writing User Control’s works fine and is fully supported by ASP.NET, when we create a User Control in Visual Studio it looks different.
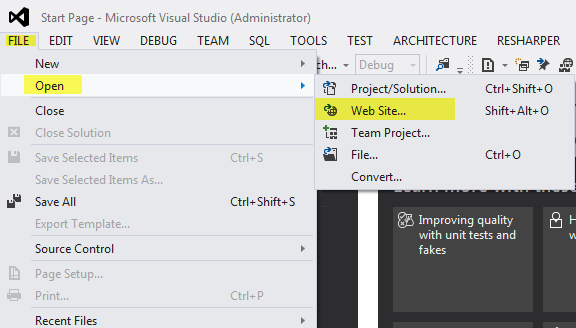
To open our website in Visual Studio 2012, we would choose File > Open > Web Site …
Figure 2: Opening a Web Site in Visual Studio 2012
|
 |
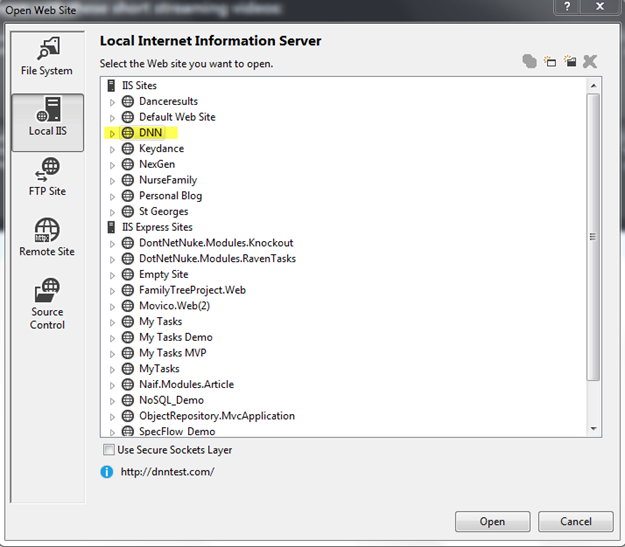
We are then presented with a dialog which allows us to chose. As with WebMatrix we can open a Website in many ways - from the File System, or as IIS or IIS express sites or even using FTP or HTTP to open remote sites. IN this case I am opening a website created in IIS with the name “DNN”
Figure 3: The Open Web Site Dialog in Visual Studio 2012
|
 |
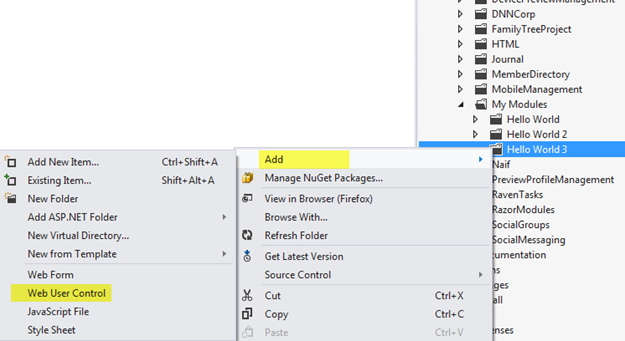
Once we have opened the website we can use the Solution Explorer to find our My Modules folder, and we can create a new User Control, by right-clicking on the folder and selecting Add > Web User Control
Figure 4: Adding a new Module Control to the My Modules folder
|
 |
When we do that we get two new files: HelloWorld.ascx and HelloWorld.ascx.cs.
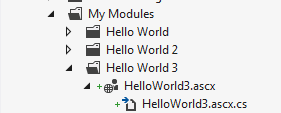
In this model rather than use a server-side script tag the server-side code has its own file. The ascx file is initially empty except for the Control directive, which is a little different this time.
Figure 5: HelloWorld3.ascx
|
 |
Instead of the ClassName attribute we have the CodeFile attribute which points to the other file created.
Figure 6: HelloWorld3.ascx.cs
|
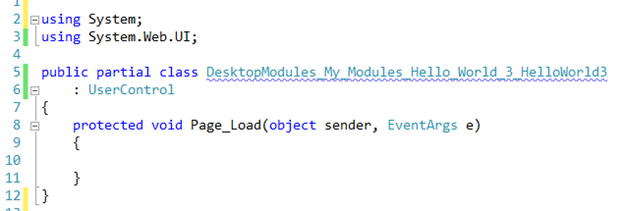 |
There are a few things to note about this code file:
- The class is defined as a “partial” class which means it is combined with another partial class (the ascx file).
- The name of the class is the same name as the “Inherits” attribute in the ascx file.
- The class inherits from the base class UserControl
- Visual Studio adds the Page_Load event handler - which I usually remove - but more on that later.
There are a couple of things we need to modify to make this module work (like the other Hello World modules).
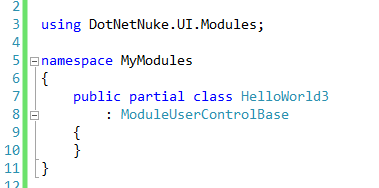
- We need to make the code behind class inherit from one of the 3 base classes - in this case we will use ModuleUserControlBase
- We need to add the html block to the ascx file.
and there are a couple of things that I will make for consistency.
- Remove the Page_Load event handler
- Move the class to the MyModules namespace
- Rename the class HelloWorld3
Figures 7 and 8 show the updated files.
Figure 7: Modified HelloWorld3.ascx
|
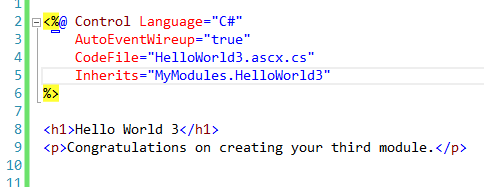 |
Figure 8: Modified HelloWorld3.ascx.cs
|
 |
We can register the module in exactly the same way as we did in the previous post, and if we add the module to a page it will render the following.
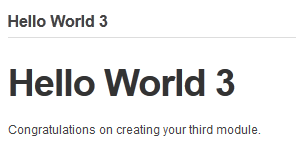
So - now we have 3 ways to create the same module. In the next article in this series I will show how we can start to add code to these modules, to do just a little more than render some static text. After all I can use an HTML/Text module to render simple HTML.
This post is cross-posted from my personal blog.