The DotNetNuke Automation Testing project is available on CodePlex at http://dotnetnukeautomation.codeplex.com/ and is welcoming testers and developers and anyone else who would like to contribute to try it out and write your won tests based on the style we have set up. To get started you will need to set a few variables and create some folders. Stefan did a nice post on it a few weeks back so this post is to add to that and explain a few differences. In this example the tests will run the installation for DNN 5.2.3, the upgrade from DNN 4.9.3 to DNN 5.2.3 and a series of tests on those installations.
The project is on CodePlex so you can use SVN or the TFS client to download the source or you can download the zip file if you like. Once you have that local open the solution and follow these steps:
Setup folders and package files.
The idea behind the following folder structure is that all of the websites that get built as part of the installation tests get loaded into the Websites folder, and databases that are created and reused are held in the Databases folder and any packages you wish to test such as upgrades, module installations, languages and skins are stored in the Packages folder.
- Choose a location on your hard drive where you will keep all the files associated with the tests.
I use D:\Tests - Inside that folder add a folder called Websites
- Add another folder inside the testing folder called Packages and another called Databases.
- Inside the packages folder add any package files that you will need for testing.
- For this example you will need DotNetNuke_Community_05.02.03_Install.zip, DotNetNuke_Community_05.02.03_Upgrade.zip and a zip file of an existing DNN 4.9.3 site. The upgrade site must have the .mdf file for it in the App_Data folder.
Updating the project for your environment
- Expand the DotNetNuke.Tests.UI.WatiN.BuildVerification project.
- Open the app.config file
- In the TestVersion setting set the version you wish to test, use 05.02.03 for DNN 05.02.03
- In the DatabaseName section enter the name you want the database to be called for any newly created databases created by the tests.
- In DatabaseServer enter the name of the server you have access to, use (local) if its on your dev machine.
- At the bottom of the file update the values for the Test File Locations section to the values that correspond to your environment.
That’s all you need to do, the tests have been written with Setup and Teardown methods that will automatically create and destroy any IIS sites or databases that need to be created for the tests. Each test gets its own database so you know you are starting from a known testable position each test.
To run the tests simply build the solution and use your chosen test runner. See my earlier post on test runners to see which suits you best. Automation Testing of the Core – Frameworks
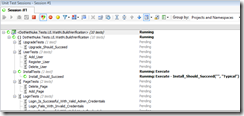
As the tests run you will see progress shown below in the ReSharper test runner. You will also notice that the order of the tests is handled by an attribute in MBunit that allows you to specify that one test is dependant on another having run successfully. This is done so that we can use a new ly installed site from teh Installation tests in further tests for Adding pages etc.

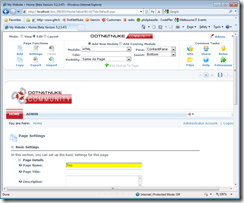
As each test progresses you will see a new instance of IE popup and the various fields getting filled in as the test runs. The yellow field is what is being edited by the test.

Please download the tests and get started on learning how it all works so we can all pull together and build a thorough suite of tests for DNN.