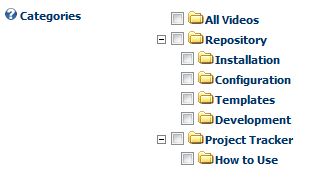
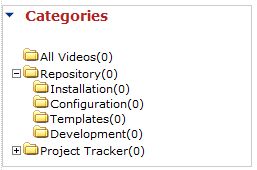
One of the biggest changes in 3.01.12 is the ability to define unlimited levels of sub-categories. The enhancement was added in such as way as not to break any existing Repositories out there, or force you to make any changes. So even though there are a lot of changes internally around categories, you can install 3.01.12 and without having to make any changes at all, your existing Repositories will continue to work and look exactly as they did before. However, that also means, that after you install 3.01.12, you won't see anything different :) but stay tuned ...
So, how can you take advantage of sub-categories? Because of the template driven nature of the module, there are a few changes you'll have to make.
1. setup your sub-categories on the Module Settings page
On the module settings page, there is now an additional drop down list that you can use to set the root of the categories as you are entering them

Here's an example.
a. with <root> selected as the category, add "Ford", "Chevy" and "Toyota" the same way you did in previous Repository module releases.
b. now, change the top drop down from <root> to "Ford". You'll see the list of categories is now empty because Ford does not have any sub-categories. Now add "Mustang", Explorer", "Expedition" as sub-categories.
c. change the top drop down from "Ford" to "Toyota", then add "Camry", "4Runner" as sub-catgories
d. you can add a third level .. in the top drop down, select "Ford->Explorer", then add "2006", "2007" as sub-categories of Explorer.
you can add as many sub-categories as you wish
At a minimum, that's all you need to do. The categories dropdowns will display your categories using a breadcrumb style display. However, with 3.01.12, you also have the option of using a 'Tree' control. If you prefer a Tree control, make the following changes to your template
2. Selecting Categories on Upload / Edit
a. modify Form.xml of the template you are using to display the categories on the upload/edit form as a Tree control. Edit the 'Categories' token in the Form.xml file ( NOTE: The token name is case sensitive ). Modify the Setting named 'Select' and set it's value to 'TREE'.
<Object>
<Token>[Categories]</Token>
<Settings>
<Setting>
<Name>Select</Name>
<Value>TREE</Value>
</Setting>
<Setting>
<Name>CssClass</Name>
<Value>normal</Value>
</Setting>
</Settings>
</Object> |
Save it and now, on the upload / edit form, your categories will be displayed as a tree control with checkboxes.

3. And finally, if you want to use a 'Tree' control on your Dashboard, make the following changes
a. modify the dashboard.index.html file and just replace the entire file contents with the following
b. if you want to display the item count next to each category in the tree control, edit the dashboard.index.xml file and Add a Setting named 'ShowCount' to the 'CATEGORY' token. ( again, note that tokens are case-sensitive )
<Object>
<Token>[CATEGORY]</Token>
<Settings>
<Setting>
<Name>ShowCount</Name>
<Value>true</Value>
</Setting>
</Settings>
</Object> |
That's it. you now have sub-category support and are using tree controls in your upload/edit forms and dashboards.
