 DotNetNuke recently moved to an Open Repository that is hosted on CodePlex. As Phil Beadle recently noted, the synchronization process is now fully operational and is running nightly to ensure that the CodePlex repository mirrors our internal version control system. Of course, having access to the source code and understanding how to use the source code to get to a working build is two different things. The source code package that we deliver with each release is slightly modified from our own internal repository in order to minimize confusion for the community. Over the years the core team has become accustomed to these steps, but for new people, getting DotNetNuke up and running from source code can be a bit daunting. Hopefully I can help dispel the mystery and make it a little easier to understand why DotNetNuke source code is packaged in this manner.
NOTE: For the remainder of this post I will assume that you are familiar with DotNetNuke and that your system is already configured. The source code version of is not intended for people who are just getting started with DotNetNuke. If you fall into this category then I would recommend starting with one of the install packages to better acquaint yourself with DotNetNuke. If you use the install version with the Web Platform Installer, then it will ensure you have all the necessary pre-requisites installed. For more information on installing DotNetNuke you should review the Installation Instructions or watch the Installation Webinar which are available on the downloads page.
The first step in configuring your system is to download the source code. There are basically three methods for getting the source code: 1) Download the source code package from a packaged release (you can do this from the DotNetNuke Downloads page), 2) Download a specific changeset from CodePlex (each changeset includes the complete source code), 3) Download a version using SVN or TFS (see CodePlex for more information on how to configure your specific version control client). Regardless of how you get the source code, once complete, you will have everything you need to get DotNetNuke up and running. Once you have the source code, you will need to extract it to a directory on your system.
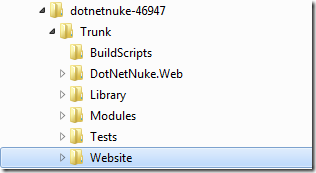
After you have downloaded and extracted the source code, you will need to configure the project website. By default, the included solution file includes a reference to an IIS website at http://localhost/DotNetNuke_Community. If you don’t want to alter the solution file then you will need to configure IIS with this application. Open IIS Manger and add the DotNetNuke_Community application to the Default Web Site. This application should point to the Website directory inside the directory where you extracted DotNetNuke as shown below.

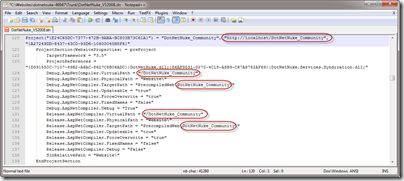
If you are going to use a different IIS website name then you will need to edit the Solution file to change the website reference. You really only need to edit the full website URL but I like to keep everything consistent, so I edit all of the locations shown below (click to enlarge).

With the IIS application configured, you are now ready to open the solution file with Visual Studio. Currently, we only support Visual Studio 2008. We are working to ensure that DotNetNuke will work correctly with VS 2010 when it launches, but for now you will need to stick with 2008 unless you are comfortable with doing some exploration on your own. The Source Package should work with Visual Web Developer 2008 without issues.
As Phil noted in his blog, the CodePlex source code version includes references to MSBuild community tasks and will show a warning dialog when first opening the solution file (technically, the error occurs when the individual project files are opened). If you downloaded the source code from one of the official repositories, then you can safely ignore these warnings. If however, you received the source-code from a third party, then you should proceed with extreme caution as running external tasks can pose a potential security risk.
Out of the box, the source code does not include a copy of web.config. This often trips up new users. Over the years we have changed the standard source code configuration to minimize the chance that someone would accidentally overwrite critical system information that is stored in web.config. The source code package supports both new installations, as well as upgrading an existing source code installation. As a result we exclude web.config from the package. However, we do include both a development.config and a release.config. The development configuration file is setup to run DotNetNuke in medium trust, with debugging enabled and with a “dnn_” object qualifier in the SqlDataProvider. These settings will aid in development by ensuring that your code is portable across different DotNetNuke site configurations. Any changes you make that run in this configuration are likely to work in any other supported DotNetNuke configuration. To get up and running, you will need to copy either the development or release configuration files to web.config.
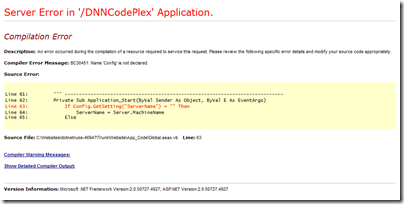
The last required step is to build the solution. We do not include compiled assemblies for core projects in the versioned code. As a result, if you try to run the installation wizard before building the solution you will receive a compilation error.

If you have followed along and completed every step, you should now have a working version of DotNetNuke open in Visual Studio and ready to begin developing your own modules, providers, skin objects or other extensions.
WARNING: While technically possible, you should avoid changes to the DotNetNuke core application source code. Any changes you make may be overwritten by subsequent DotNetNuke versions and may result in the inability to upgrade to later DotNetNuke versions due to incompatibilities.