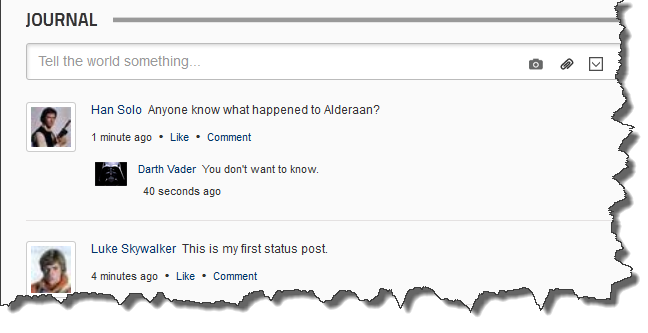
 One of the key aspects behind successful collaboration is making sure that content is easy to find. Thanks to Facebook, Twitter and LinkedIn, people now expect to see content in an activity stream or content list. If you look closely at Facebook, you will see that almost all of the site navigation is based on the news feed. The majority of people have become comfortable with this type of information structure. However, this doesn’t mean we can just throw various types of content into a long list, we need to make sure the content is easy to read, useful and relevant.
The DotNetNuke Journal is made up of two main components. The first component is the Journal API. This is an API in the DotNetNuke core that is available to all developers. The API is used for the creation and retrieval of Journal content. The second component is the Journal module. The Journal module is what you would add to a page to allow users to view and interact with Journal content.

If you have every used Facebook, LinkedIn or Google+, the Journal should seem a little familiar to you. The first thing you see in the Journal is a text box that says “Tell the world something…”. This is the area where the user would enter a status update or other text that they wish to share.

When the user clicks on the textbox, the area will expand to allow for more room for the user to type their message. The “Share” button will also be revealed but will not become active until the user enters some text.

After the user has finished entering their text, they can click the share button and their new message will immediately appear in the list of journal entries.

Once the journal item has been created, other users will have the ability to like and comment on each item.

More Than Just Text
The Journal allows us to create more than just basic text entries. You can upload new files or attach files that already exist in “My Files”. You can also embed links with preview information. You also have the ability to tag other users in your posts.
Sharing Photos
Uploading a photo is fairly simple. First thing you need to do is click the Camera icon in the Journal editor. This will open the photo sharing options section. You can then select “Browse from site” or “Upload from my computer”. If you select “Upload from my computer” the photo is automatically uploaded and attached to the post. All you need to do is click the Share button for your photo to appear in the list of Journal items.

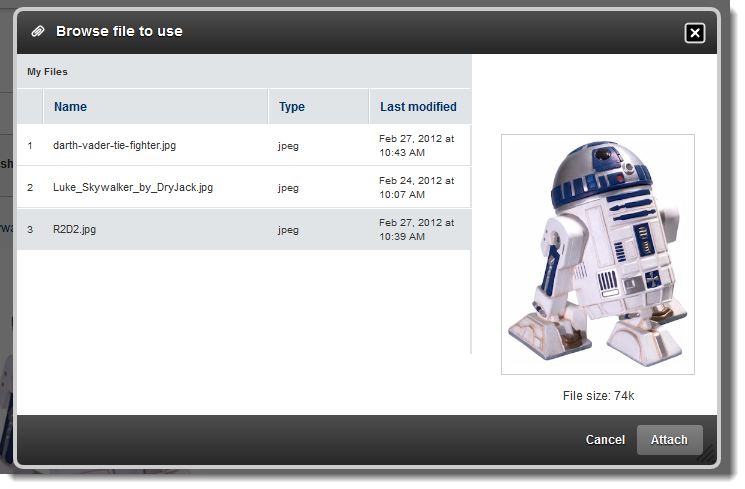
If you wanted to attach a photo that you had previously uploaded, you would select the “Browse from site” option. This will open your personal file manager so you can browse and preview your files stored on the site. Once you have found the picture you wanted to share, simply click the “Attach” button and you are ready to share your photo.

Sharing Links
We wanted to make sharing links as easy as possible. Many times users just want to copy and paste a URL and provide their own comment. The journal module was designed with this particular use case in mind. Whether you type or paste a URL, the journal editor will detect the link and automatically attach a preview for you.

The link preview automatically imports the title and description from the page along with any images that it determines would be an acceptable thumbnail image. The information provided by the link preview is completely based upon the page returned by the link entered. In some cases, the link preview may not find any suitable images or even a page description. You can still share the link without all the preview information.
Tagging Users
The journal editor provides and autocomplete option so that you can easily identify other users in your posts. Simply enter “@” followed by the first letter of the person you would like to add and a list of potential users will appear. You can further refine the list of users by typing additional letters.

Once you click the share button, the tagged users will also appear in the journal content so that it is easy to click through to the profile of each user.

What’s Next?
We still have more work to do on the journal. In another blog post I’ll cover some of the details of the API and how module developers can add their own content. We are also working on some additional features that you will see in the next CTP or Beta. Be sure to watch the Journal Walkthrough video created by Chris Hammond.
Don’t Forget…You could win a $100 Amazon Gift Card!
We’ve added an Easter Egg in the CTP that you’ll find in one of the areas I mentioned above. You will need to download and install the CTP to find the Easter Egg. Find the Easter Egg, give us your feedback and you’ll be rewarded! You could win $100 Amazon Gift Card.! Learn more about the DotNetNuke 6.2 CTP1 Easter Egg Hunt.
Download DotNetNuke 6.2 CTP1