Starting DotNetNuke 6.0, all the editions of DotNetNuke Platform (Community, Professional, Enterprise) will natively support SQL Azure. In order to help the Module Developers and everyone else in the community to use SQL Azure with DotNetNuke, we’d like to note down the methodology we implemented to complete the integration. Most of the changes were needed either due to change in Syntax or Deprecated Commands.
Connectivity Tools
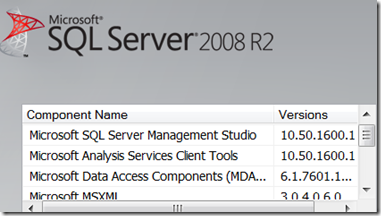
In order to access SQL Azure, Microsoft SQL Server Management Studio needs to be upgraded to 2008 R2. Microsoft SQL Server 2008 R2 RTM - Management Studio Express can be downloaded from Microsoft here.

Connecting to SQL Azure using SQL Management Studio is no different than connecting to a regular SQL Server, simply supply the Server’s name, Login and Password.
Database Creation
Once connected, simply right-click Databases and select “New Database”

This action will not open the typical “New Database” from SQL Server, instead it will open the SQL Query Window, where all one needs to do is specify a database name. Modify the template provided and execute the command:
CREATE DATABASE DotNetNuke
GO

Migration Tool
SQL Server Migration Wizard can be downloaded from codeplex. Below is a quick description of the tool:
SQL Azure Migration Wizard (SQLAzureMW) is designed to help you migrate your SQL Server 2005/2008 databases to SQL Azure. SQLAzureMW will analyze your source database for compatibility issues and allow you to fully or partially migrate your database schema and data to SQL Azure.
Syntax Changes
1) Column Alias - Statement such as Select ‘xx’ = ColA is not allowed, instead specify Select ColA AS ‘xx’. Note ‘=’ has been replaced by ‘AS’ and the position of the column name is swapped.
Deprecated Commands
1) Create Table… [ON Primary] - Keyword [ON PRIMARY] is not allowed as there is no concept of file group in SQL Azure, simply remove the entire keyword.
2) Deprecated Keywords - Following Keywords are no longer allowed; we simply removed them from the statements: NOT FOR REPLICATION, PAD_INDEX = OFF, ALLOW_ROW_LOCKS = ON, ALLOW_PAGE_LOCKS = ON, NOT FOR REPLICATION, ROWGUIDCOL.
More details on deprecated commands can be obtained from this MSDN article “Deprecated Database Engine Features in SQL Server 2008 R2”.
Mandatory Clustered Index
SQL Azure requires every table to have a Clustered Index. Instead of analyzing all the tables one by one, we simply performed a base install on SQL Server and ran the following query to find out tables without a Clustered Index:
--list tables without clustered indexes
SELECT * FROM sys.objects
WHERE OBJECT_ID IN
(
 SELECT DISTINCT object_id FROM sys.indexes
 WHERE OBJECT_ID NOT IN
 (
  SELECT object_id FROM sys.indexes
  WHERE type_desc = 'CLUSTERED'
 )
)
After getting the list of tables requiring Clustered Indexes, the next task was to decide which column was to be selected for the index. We tried a few tricks:
a) In many cases where table had a Primary Key with a Non Clustered index, we simply modified the Create Table script to add CLUSTERED key word next to PRIMARY KEY, e.g.
CREATE TABLE …….. CONSTRAINT [PK_COLUMNAME] PRIMARY KEY CLUSTERED
b) Few tables had no index created as they contain fewer rows. For such tables we picked a column and used the following SQL to create Clustered Index:
CREATE CLUSTERED INDEX [IX_MyTable] ON {databaseOwner}[{objectQualifier}MyTable] ([MyColumn])
MyTable is the table name and MyColumn is the column name.
ASP.Net Memebership scripts
SQL Azure requires updated ASP.Net Membership scripts. DotNetNuke uses four script files located at Website\Providers\DataProviders\SqlDataProvider: InstallCommon.sql, InstallMembership.sql, InstallProfile.sql and InstallRoles.sql. Updated version of the scripts have been provided by Microsoft, which can be download from Microsoft here. The updated scripts have already been included in DotNetNuke 6.0, there is nothing more needed to be done.
Installation
SQL Azure being on the cloud, the connectivity from DotNetNuke application can be slower, especially they are hosted apart. During our testing we noticed ‘Typical Installation’ failed a few times due to http time out (System.Web.HttpException: Request timed out). This does not happen during ‘Auto Install’, mainly because ‘Auto Install’ bumps up the http timeout.
For ‘Typical Install’, the http timeout can be manually increased by adding executionTimeout setting under httpRuntime.

Key points:
1) Keyword “executionTimeout” is case-sensitive.
2) A value of 900 indicates 15 minutes, which is more than enough for any installation.
3) Add setting to web.config prior to starting installation (for Typical Installation only), and remove the setting after installation is completely done.
Verification
Using SQL Server Management studio, one can run the following SQLs to get an idea whether all the objects were successfully created in the SQL Azure database or not. The counts are rough counts for a typical 6.0 Community Edition installation
--list tables (95 records)
SELECT COUNT(*) FROM sys.Tables

--list stored procedures (553 records)
SELECT COUNT(*) FROM sys.objects
WHERE type = 'P'

--list indexes (192 records)
SELECT COUNT(*) FROM sys.indexes
Availability
Now with Beta2.