One of the new major additions in DotNetNuke 6.0 is the Extension Gallery. If you read this blog post from Joe, you may already be familiar with this feature. If not, the DotNetNuke Extension Gallery is an integrated section in the Extensions module (under Host –> Extensions in the navigation menu). This interface permits the searching, as well as the downloading and deployment of third party extensions made available from Snowcovered as well as the DotNetNuke Extension Forge (FYI: This has not been a working piece in any of the CTP’s or Betas to date but will be available in the final release).
If you are a Snowcovered vendor, you should have already received some instructions (via email) for updating your products. If you are a Forge extension developer, the remainder of this blog will show you how to update your project to make it eligible for the Extension Feed. Please note here that only modules and skins will be eligible in the initial 6.0 release.
Editing Your Forge Project
If you navigate to the Extension Forge page, and you are logged in, you will be able to reach any of your projects by selecting the “My Projects” link in the upper right hand corner of the module. When clicked, this will take you to a list that displays all projects you are associated with in the Extension Forge. Once on this view, find a project you would like to make available and click on it to navigate to the project’s home page (in the Forge).
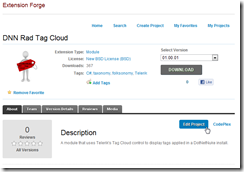
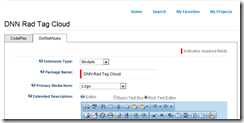
Once you are on the project’s home page, click the “Edit Project” link as shown in the first screenshot below, clicking it will navigate you to the “Edit Project” page as shown in the second screenshot below (where you should select the “DotNetNuke” tab).

Forge Project Home

Forge Edit Project
Now, before you edit anything it is important to understand what these fields are. As a DotNetNuke extension developer, you should be familiar with the .dnn manifest file. If not, I have provided a sample from my Tag Cloud module (the same project I am using throughout this blog for demo purposes) shown in the screenshot below. For now, focus on line 3 in the screenshot and notice how it sets the package name, type and version. The package name here is what you want to set for Package name in the “Forge Edit Project” screenshot. You also want to set the type in the drop down to what is set here. As for version, we’ll get to that in a minute. Once you have made the updates (to the project and saved them), you are now ready to edit the individual releases.

Sample Manifest (Beginning)
Edit A Forge Release
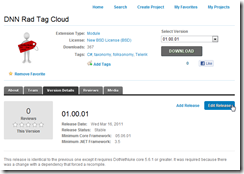
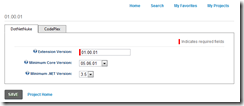
To edit a Forge release, you simply need to select the “Version Details” tab and click “Edit Release” (as shown in the first screenshot below), which will navigate you to the “Edit Release” screen which is shown in the second screenshot below (the “DotNetNuke” tab will be selected for you). FYI: If you want to change the release you are editing, simply select a different one from the drop down list.

Editing a Forge Release

Edit Forge Release Screen
Once on this screen, you only have 3 possible fields to edit (and the last one, .NET version is basically ignored). The first one, extension version, is the version taken from your .dnn manifest file (in this case, it is 01.00.01). Please note, this must always be in a ##.##.## format (It’s also worth noting that many release the version as the name, too, but that is managed at CodePlex thus we require it as a separate entry here). The next part, minimum core version, is a very important field for compatibility reasons (of course). As you can see, this is a drop down list. It will list all stable core versions available for you to choose from (this is also available in the .dnn manifest, line 15 from my screenshot above).
You must repeat the above step for all stable releases, if you wish for them to be eligible for inclusion in the Extension Gallery. Also note that ‘stable’ is a requirement (which is set @ CodePlex per release) in order for it to be considered. If you have any questions, please use the Forge Forum.