 I have often heard it said that people have difficulty creating skins for DotNetNuke. I am always baffled when I hear these comments especially in light of what I see in the competing skinning engines on other platforms. In this series of posts I’ll be looking at the basics of DotNetNuke Skinning, creating a complete DotNetNuke skin and associated containers, dispelling a few Myths and Misconceptions about DotNetNuke Skinning and finally we’ll wrap up the series by comparing the DotNetNuke skinning engine with those of some other web platforms.
- Part 1: Understanding the Basics
- Part 2: Building a Skin
- Part 3: Building Containers
- Part 4: Packaging
- Part 5: Myths and Misconceptions
- Part 6: Skin Engine Comparison
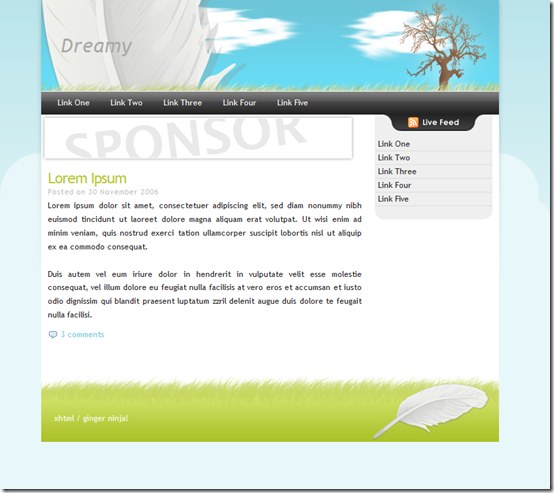
During the course of this series, we’ll be working towards building and packaging a skin that is based off of the Dreamy design template from the Open Source Web Design site. This template uses a very simple design layout which should work well for explaining the basic concepts of DotNetNuke skinning.
Understanding the Basics
In the first part of this series we’ll be covering the basics of DotNetNuke Skinning. My intent is to demystify some of the terms that we use and to relate them to our simple design. Once you understand the basic elements that make up a DotNetNuke skin, then the rest of the skinning process becomes very easy.
A Little Background
One of the original goals we had when the DotNetNuke skinning engine was first created in 2003 was to make skinning accessible to both developers and designers. This fundamental requirement has driven many of the changes over the years and continues to shape how we think about skinning in DotNetNuke. From the very outset we thought that it was important that skin developers should be able to use whatever tool they were comfortable with and that they should not require any knowledge of programming in order to create cutting edge designs. We also thought it was important that we put as few restrictions as possible into the skinning engine which would provide skinners with complete freedom in their designs.
The DotNetNuke skinning engine supports 2 different types of skins: HTML Skins and ASCX Skins. HTML Skins are the most basic form of skin and allow designers to use whatever HTML editor they desire. When HTML skins are installed in DotNetNuke they are automatically converted to ASCX skins in the background. During the conversion, the only part of the HTML skin that is retained is the innerHtml of the body tag. Anything in the HTML Header will be discarded.
The DotNetNuke skinning engine recognizes a “Skin” as having two distinct entities: skins and containers. These elements can be packaged and installed as a single package or as two distinct packages. We’ll discuss containers later in this series and for now will focus on just the main skin package. All of the concepts translate directly from skins to containers with a few minor differences. If you understand how to create a skin, then creating the associated containers is easy.
The Terminology
A skin is comprised of one or more layout templates. Each skin can also have a master CSS style sheet and a stylesheet for each of the named templates. These stylesheets, if present, will be automatically added by the DotNetNuke skinning engine to the page whenever the associated skin template is assigned. For example, if you have a template called index.html (which will be converted to index.ascx during installation), and skin.css and index.css stylesheets, then whenever you assign the Index skin template to a page, the skinning engine will automatically include the skin.css and index.css stylesheets on the page as well. This will become more apparent when we build a complete skin in later parts of this series.
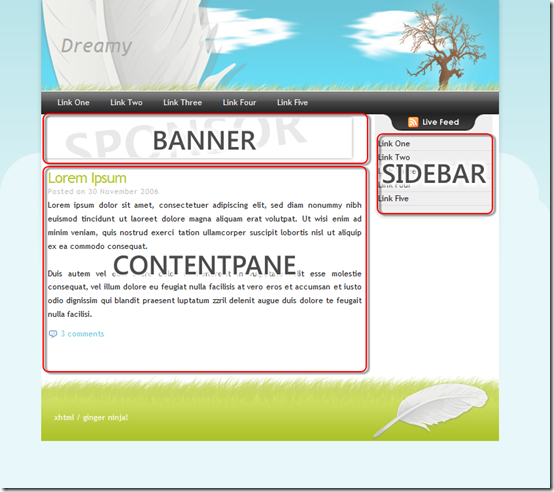
When building individual layouts for our skin we need to define where we want user generated content to be placed and where we are going to place some standard skin elements. For the dreamy skin I have identified 4 content areas as shown below. In DotNetNuke, these content areas are called panes. During the course of building a skin, we do not concern ourselves about the actual layout or look of content inside the panes as that is the job of the containers.
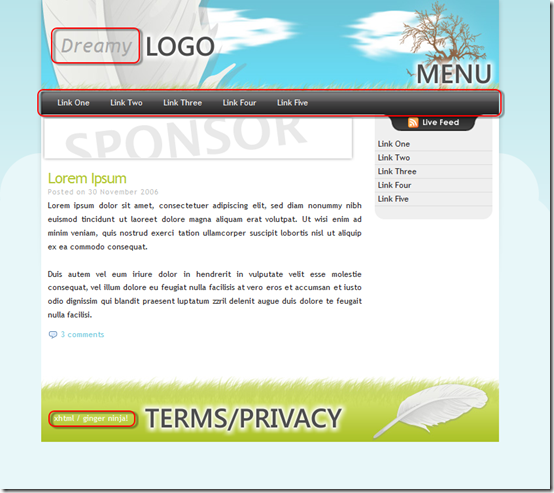
In addition to panes, our skin design has a number of elements that are fairly common across all designs. The elements include things like the menu bar, copyright notice, login/registration links, privacy link, terms of service link, search box and many others. In DotNetNuke, these elements are added to the page using Skin Objects. For illustrative purposes I have identified four potential skin objects in our Dreamy design template. I will likely make some minor tweaks to the final design to incorporate additional skin objects like a login button and a search box.
The Basics
Now that you understand the basic building blocks of a DotNetNuke skin lets get started making our first skin. The one hard and fast rule of DotNetNuke skinning is that every skin is required to have at least one content pane and it must be called ContentPane (capitalization is not important). You are not required to have any stylesheets or any other files. So our first Skin can be as simple as the following:
<!DOCTYPE html PUBLIC "-//W3C//DTD XHTML 1.0 Transitional//EN" "http://www.w3.org/TR/xhtml1/DTD/xhtml1-transitional.dtd">
<html xmlns="http://www.w3.org/1999/xhtml">

<head>
<meta content="text/html; charset=utf-8" http-equiv="Content-Type" />
<title>Untitled 1</title>
</head>

<body>
    <div id="ContentPane" runat="server"  ></div>
</body>

</html>
As I have previously stated, when this skin is installed to a DotNetNuke website it is parsed and the inner html of the body tag is converted to an ASCX control. Since most of the html in our first skin is going to be removed anyway, we can actually simplify our skin to just:
<div id="ContentPane" runat="server" ></div>
After this skin is uploaded to DotNetNuke and converted to an ascx file you will be left with the following code:
<%@ Control language="vb" AutoEventWireup="false" Explicit="True" Inherits="DotNetNuke.UI.Skins.Skin" %>
<div id="ContentPane" runat="server" ></div>
After the conversion to the ascx, DotNetNuke does not use the original HTML file any further. If you are comfortable editing ASCX files, and your editor supports them, then you can start directly with the ascx file and skip building an HTML file altogether. Many skin designers work directly with the ASCX files and don’t bother with building an HTML version. My personal preference is to start with an HTML based skin. There are pros and cons to each approach so pick which ever one you find easier to understand. For the purposes of this blog series, I am going to stick with the HTML based approach. I know that if I ever needed to I could always shift to an ASCX based design with no difficulty as DotNetNuke will do the conversion for me. Just keep in mind that this conversion only works one way – from HTML to ASCX.
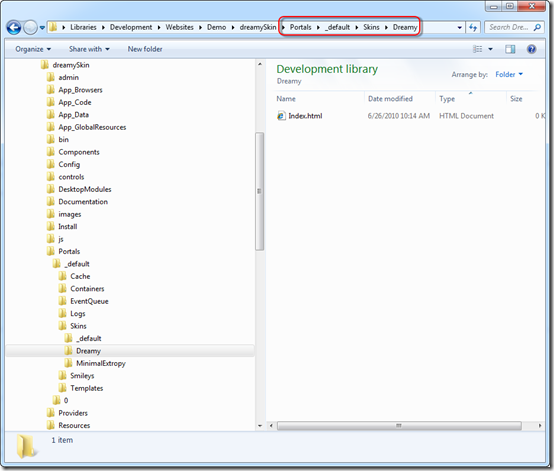
In order to test out our new skin, we’ll need to get it installed into a DotNetNuke installation. Since we haven’t learned how to package a skin yet, we’ll have to do things manually for a while. Starting with a fresh DotNetNuke installation, navigate to the Portals>_default>Skins directory and create a new folder called Dreamy. This will be the name of our Skin. Inside the Dreamy folder, add a new file and call it Index.html. Edit this file to include our first HTML definition from above (the one that includes the complete HTML page definition). Even though we don’t need to, I like to use a full page definition so I can include links to my CSS files when I am designing my skin. This will allow me to see my design as it comes together rather than being forced to constantly shift back and forth between my editor and DotNetNuke.
You now should have a directory and file structure that looks just like this:
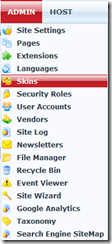 Now that we have our skin in the right location, we need to open up DotNetNuke and get it to convert the skin to the ASCX format and assign the skin to a page. Login to DotNetNuke with a super user account (also known as a host account). Because skins can contain code that is executable on the server, only Super Users have access the ability to upload new skins or to parse html templates. This prevents lower privileged accounts from installing executable code onto the server without a super users knowledge. Once logged in with a super user account, go to the skins page which is located under the Admin menu.
The skins page allows super users and administrators to manage the various skins and containers that are available to a given installation or to a single portal within an installation. Administrators can preview and apply skins and containers to a site. In addition, super users can parse an existing skin to convert it from HTML format to the ASCX format which is required for actually using the skin within DotNetNuke.
On the Skins page, select the Dreamy skin from the skins dropdown. You should get a page that looks like the picture below.
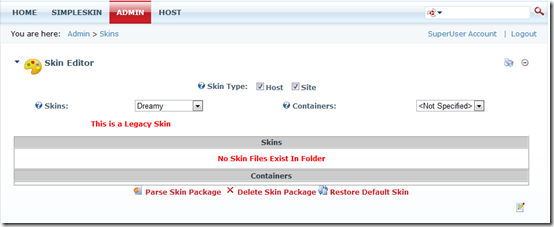
Select the “Parse Skin Package” link as shown in the image above. If you have followed all the steps correctly, then you should see a bunch of lines text that outline all of the parsing steps. The individual lines are not important, unless you see an error message which would appear in red. For this exercise you should not see any errors. If everything went ok, then you will also find a new file in your Dreamy skin folder called Index.ascx. This file should match the ascx code that we looked at earlier (you may have some extra whitespace or blank lines in the file depending on your starting html).
Now that we have a parsed skin, lets apply it to a webpage and see what it looks like. While logged in as an administrator or super user, create a new page on your website. I called mine SimpleSkin. Edit the page settings for your new page and go to the Advanced Settings section. Expand the Advanced Settings section and scroll down until you find “Page Skin” setting. Select the Host radio button and select “Dreamy – Index” from the list of available skins. As you can see with MinimalExtropy, it is possible to have several different layouts defined for each skin. It is quite common for skins to include a standard layout for end user facing pages and another layout for administrative pages.
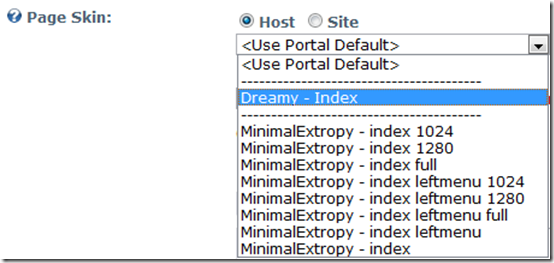
With our new skin layout selected go ahead and press the update link at the bottom of the page to apply our new skin. The resulting page should look something like my example below. In this picture I can see the control panel (here I am showing the Ribbon Bar control panel from 5.4+) and a single module. I have set permissions on the page to allow all users to see the page. Depending on how your page and module permissions are configured, you may have a red border around the module that appears below the control panel.

Congratulations. You have created your first DotNetNuke skin and used it within a DotNeNuke site. In Part 2 of the skinning series we will take our simple skin example and build on it to create the Dreamy skin as shown on OSWD.