 I have often heard it said that people have difficulty creating skins for DotNetNuke. I am always baffled when I hear these comments especially in light of what I see in the competing skinning engines on other platforms. In this series of posts I’ll be looking at the basics of DotNetNuke Skinning, creating a complete DotNetNuke skin and associated containers, dispelling a few Myths and Misconceptions about DotNetNuke Skinning and finally we’ll wrap up the series by comparing the DotNetNuke skinning engine with those of some other web platforms.
- Part 1: Understanding the Basics
- Part 2: Building a Skin
- Part 3: Building Containers
- Part 4: Packaging
- Part 5: Myths and Misconceptions
- Part 6: Skin Engine Comparison
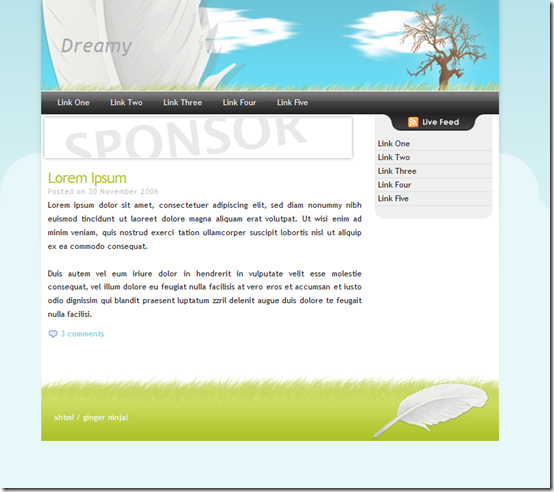
During the course of this series, we’ll be working towards building and packaging a skin that is based off of the Dreamy design template from the Open Source Web Design site. This template uses a very simple design layout which should work well for explaining the basic concepts of DotNetNuke skinning.
Building a Skin
In Part 1 of this series I looked at some of the fundamentals of creating skins for DotNetNuke. In this post I will walk through creating a complete skin based off the design I downloaded from OSWD. The original OSWD design does not include several key elements that are quite common for modern websites, especially websites built with Content Management Systems. As I progress through this post, I’ll point out when we deviate from the original to address some of these issues.
Before I get started let’s take a peek at what the source HTML looks like for the original Dreamy template. This will give us something to compare with our final version. Our goal is to stay as true to the original as possible and not introduce a lot of complexity into the design. As you’ll see, it is possible to produce DotNetNuke skins that are every bit as clean as their plain HTML counterparts.
<div id="wrapper">
<div id="header">
<h1>Dreamy</h1>
</div>
<div id="menu">
<ul>
<li><a href="#">Link One</a></li>
<li><a href="#">Link Two</a></li>
<li><a href="#">Link Three</a></li>
<li><a href="#">Link Four</a></li>
<li><a href="#">Link Five</a></li>
</ul>
</div>
<div id="sidebar">
<div id="feed">
<a class="feed-button" href="#"> </a>
</div>
<ul>
<li><a href="#">Link One</a></li>
<li><a href="#">Link Two</a></li>
<li><a href="#">Link Three</a></li>
<li><a href="#">Link Four</a></li>
<li><a href="#">Link Five</a></li>
</ul>
<div id="sidebar-bottom">
</div>
</div>
<div id="content">
<div id="ad-top">
<!-- Insert 468x60 banner advertisement -->
</div>
<div class="entry">
<div class="entry-title"><a href="#">Lorem Ipsum</a></div>
<div class="date">Posted on 30 November 2006</div>
<p>Lorem ipsum dolor sit amet, consectetuer adipiscing elit, sed diam nonummy nibh
euismod tincidunt ut laoreet dolore magna aliquam erat volutpat. Ut wisi enim ad
minim veniam, quis nostrud exerci tation ullamcorper suscipit lobortis nisl ut
aliquip ex ea commodo consequat.</p> <p>Duis autem vel eum iriure dolor in hendrerit
in vulputate velit esse molestie consequat, vel illum dolore eu feugiat nulla
facilisis at vero eros et accumsan et iusto odio dignissim qui blandit praesent
luptatum zzril delenit augue duis dolore te feugait nulla facilisi.</p>
<div class="comments"><a href="#">3 comments</a></div>
</div>
</div>
<div id="footer">
<div id="footer-valid">
<a href="http://validator.w3.org/check/referer">xhtml</a> /
<a href="http://www.ginger-ninja.net/">ginger ninja!</a>
</div>
</div>
</div>
Start with Scaffolding
There are a lot of ways I could attack this skin but I am going to approach it as if I was starting from a blank canvas. Rather than try to re-arrange and modify the original Dreamy template, I will instead start adding elements one at a time to build up our skin so that we can see it progress. As I am adding the HTML elements, I will also add the CSS to handle the associated styling. Even though I am starting with a blank canvas, I will still re-use HTML and CSS from the original design wherever possible. My goal here is to focus as much as possible on the skinning aspects of DotNetNuke and not devolve into yet another tutorial on CSS or webpage design.
Since the design I have chosen uses a floating page layout I will need a container to hold my content. This container can then be centered on the screen. Based on this, I create the following basic scaffolding.
<div id="wrapper">
    <div id="ContentPane" runat="server"  ></div>
</div>
In order to make sure this is a valid DotNetNuke skin, I added a contentpane inside my main wrapper. This will allow me to view the skin in DotNetNuke as I progress. Along with this HTML I need a little CSS to center my wrapper div in the browser window and to apply a background to the page. I also want to do a few resets on margins and fonts to make sure I start from a known point. At this point I can use the CSS almost straight from the Dreamy template.
/* Generic Styling */

body {
    background:url(images/bg-body.png) repeat-x top center #E8F7F9;
    font-family:"Trebuchet MS" Arial, Helvetica, sans-serif;
    font-size:62.5%; /* Sets default font size to 10px */
    color:#222222;
    }

* {
    margin:0;
    padding:0;
    }

img {
    border:0;
    }

p {
    margin-bottom:1.75em;
    }

a {
    text-decoration:none;
    color:#B4C835;
    }
a:hover {
    text-decoration:none;
    color:#6CC7DC;
    }

/* Structure */

#wrapper {
    margin:0 auto;
    width:700px;
    background:#ffffff;
    font-size:1.20em;
    }
After saving my skin file and css, I can look at the results in DotNetNuke. In FireFox everything looks great. My content is centered just as it should be. Internet Explorer however is not centering my content.
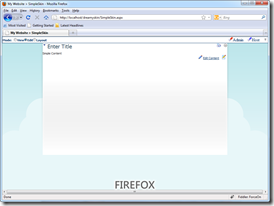
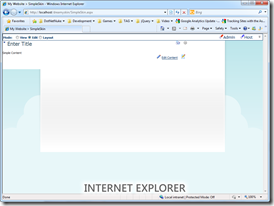
The problem in Internet Explorer is that my skin is being rendered using HTML 4.0 transitional. IE8 is rendering this page in quirks mode which doesn’t properly center the content. What I really want is for the skin to be rendered in XHTML 1.0 Transitional. I could have the administrator set the default rendering in DotNetNuke to XHTML 1.0 Transitional, which is not really a viable solution. A well behaved skin will just work and not require effort on the part of the administrator to get it to look proper. The other solution, and the one that is recommended is to include an XML file with our skin which tells the rendering engine the appropriate DOCTYPE for the skin. In my current example, I have named my layout “Index – 1.html” so I will create a new file called “Index – 1.doctype.xml” and place it in the same folder as my layout file. The doctype file includes the following XML content.
<SkinDocType>
    <![CDATA[<!DOCTYPE html PUBLIC "-//W3C//DTD XHTML 1.0 Transitional//EN" "http://www.w3.org/TR/xhtml1/DTD/xhtml1-transitional.dtd">]]>
</SkinDocType>
This file allows me to independently set the doctype for each layout in my skin, regardless of the setting in DotNetNuke.
Now that I have our base skin rendering correctly, I can finish fleshing it out with a header and footer and the content panes I had previously identified.
<div id="wrapper">
<div id="header"></div>
<div id="sidebar">
<div id="feed">
<a class="feed-button" href="#"> </a>
</div>
<div id="SidebarPane" class="SidebarPane" runat="server"></div>
<div id="sidebar-bottom"> </div>
</div>
<div id="content">
<div id="BannerPane" class="BannerPane" runat="server"></div>
<div id="ContentPane" runat="server" ></div>
</div>
<div id="footer"></div>
</div>
When creating DotNetNuke panes, I follow a naming convention of adding “pane” as a suffix for the name of the pane element. All panes must be defined as a server control by adding runat=”server” to the element. DotNetNuke only recognizes table cells (TD), divs, spans and paragraph HTML elements as valid panes. As previously mentioned I must have at least one pane called ContentPane. Finally, I generally will add a class attribute on each of the pane controls since Asp.Net will modify the control names when the page is rendered.
With my html in place, I can now add the appropriate CSS to our stylesheet.
#header {
    height:140px;
    background:url(images/bg-header.jpg) no-repeat;
    }
#sidebar {
    float:right;
    width:180px;
    background:#efefef;
    margin-right:10px;
    }
#content {
    float:left;
    width:500px;
    min-height:400px;
    }
#footer {
    clear:both;
    height:100px;
    background:url(images/bg-footer.jpg) no-repeat;
    }

/* Sidebar */
#sidebar-bottom {
    height:20px;
    background:url(images/bg-sidebar-bottom.gif) no-repeat top center;
    }

/* Feed */

#feed {
    height:25px;
    width:126px;
    background:url(images/bg-feed.gif) no-repeat;
    margin:0 auto;
    padding-left:26px;
    }
a.feed-button {
    display:block;
    width:100px;
    height:25px;
    background:url("images/button-feed.png") 0 0 no-repeat;
    text-decoration: none;
    }
a:hover.feed-button {
    background-position:0 -25px;
    }
My page is getting very close to being complete. The structure of my skin is complete with all the visual elements in place.
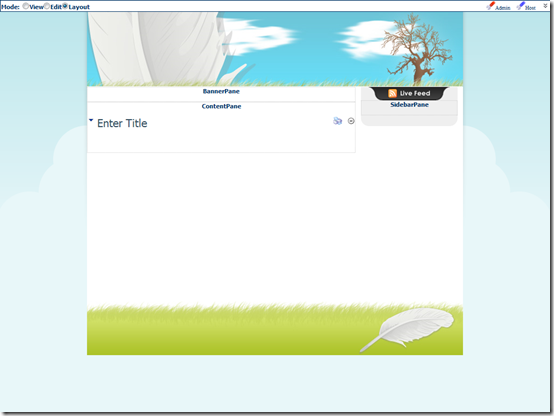
DotNetNuke Skin Objects
At this point I have a fully functioning skin that would allow me to add modules to the page but this is not really complete. For my design I want to add a couple of additional dynamic page elements. These elements all have code which runs on the server to allow the element to change based on who is logged in what pages have been created and how the server is configured. In DotNetNuke these dynamic page elements are called skin objects.
A default DotNetNuke installation includes the following skin objects.
| BANNER |
BREADCRUMB |
COPYRIGHT |
| CURRENTDATE |
DOTNETNUKE |
HELP |
| HOSTNAME |
LANGUAGE |
LEFTMENU |
| LINKS |
LOGIN |
LOGO |
| MENU |
NAV |
PRIVACY |
| SEARCH |
SOLPARTMENU |
STYLES |
| TAGS |
TERMS |
TEXT |
| TREEVIEW |
USER |
|
Vasilis Terzopolous from Think Of Design has a great reference for most of the common skin objects.
DotNetNuke supports two methods for including skin objects in an HTML skin. Older versions required the use of skin object tokens in the form [SKINOBJECTNAME]. The downside of using tokens was that each skin object can have multiple attributes that control various aspects of the skin object. In order to set token attributes I would need to add an associated xml file that identified the tokens and their attribute settings.
Later versions of DotNetNuke support the use of a simpler method for adding skin objects to an HTML skin. The new method for defining skin objects uses the HTML object tag and param elements to define the skin object. For example to add a login link to the page I can include the following HTML object:
<object id="dnnLOGIN" codetype="dotnetnuke/server" codebase="LOGIN">
    <param name="CssClass" value="user" />
</object>
The codetype attribute lets the skin parsing engine determine object tags which are skin objects and those which may be other types of objects embedded in the skin like a flash object. This attribute must be set to “dotnetnuke/server” for all skin objects. The codebase attribute specificies the skin object that should be rendered. As shown above, skin object attributes are specified using the param element in the object tag. This allows the skin object to be completely defined in the skin without requiring an additional xml file.
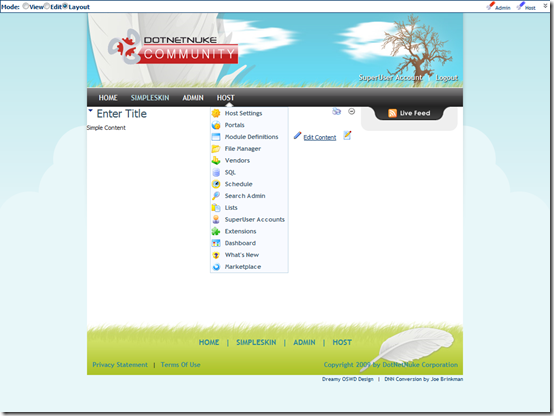
In the conversion of the Dreamy template I have decided to add a logo in place of the original “Dreamy” tagline. I will also add a login link and a user link for registration. I am also missing a menu, so I will use the NAV skin object as well. In the footer, I will add secondary navigation links for top level page elements, along with links to my terms of service and privacy policy pages. Finally, I’ll add a copyright skin object to the footer as well. With all of these elements in place I have our final html skin template complete.
<div id="wrapper">
<div id="header">
<div id="logo">
<object id="dnnLOGO" codebase="LOGO" codetype="dotnetnuke/server"></object>
</div>
<div id="login_style" class="user">
<object id="dnnUSER" codebase="USER" codetype="dotnetnuke/server">
<param name="CssClass" value="user" />
</object>
<span class="linkseparator">|</span>
<object id="dnnLOGIN" codebase="LOGIN" codetype="dotnetnuke/server">
<param name="CssClass" value="user" />
</object>
</div>
</div>
<div id="menu">
<object id="dnnNAV" codebase="NAV" codetype="dotnetnuke/server">
<param name="ProviderName" value="DDRMenuNavigationProvider" />
<param name="IndicateChildren" value="false" />
<param name="ControlOrientation" value="Horizontal" />
<param name="CSSControl" value="mainMenu" />
</object>
</div>
<div id="sidebar">
<div id="feed"><a class="feed-button" href="#"> </a> </div>
<div id="SidebarPane" runat="server" class="SidebarPane"></div>
<div id="sidebar-bottom"> </div>
</div>
<div id="content">
<div id="BannerPane" runat="server" class="BannerPane"></div>
<div id="ContentPane" runat="server"></div>
</div>
<div id="footer">
<div class="linkscontainer">
<object id="dnnLINKS" codebase="LINKS" codetype="dotnetnuke/server">
<param name="CssClass" value="links" />
<param name="Level" value="Root" />
<param name="Separator" value=" | " />
</object>
</div>
<div id="terms_style" class="footer">
<object id="dnnPRIVACY" codetype="dotnetnuke/server" codebase="PRIVACY">
<param name="CssClass" value="footer" />
</object>
<span class="linkseparator">|</span>
<object id="dnnTERMS" codetype="dotnetnuke/server" codebase="TERMS">
<param name="CssClass" value="footer" />
</object>
</div>
<div id="copy_style" class="footer">
<object id="dnnCOPYRIGHT" codetype="dotnetnuke/server" codebase="COPYRIGHT">
<param name="CssClass" value="footer" />
</object>
</div>
</div>
</div>
Getting the HTML structure in place is the easiest part of building any skin. Notice that I have not been forced to add any tables or use any inline code to build this skin. It is all pure HTML, and when rendered, it shouldn’t have any difficulty when it comes to XHTML validation. I may have to do a little bit of tweaking but I’ll save that for after I have completed my containers.
Now I need to turn mysights to the CSS to position everything correctly and make sure it looks good. I’ll walk through this section by section. First up is getting the logo and user information lined up and styled. This is pretty straight forward.
/* Header Skin Objects */
#logo {
    display: inline-block;
    margin: 20px 0 0 20px;
}
#login_style {
    position: absolute;
    bottom: 10px;
    right: 10px;
}
.linkseparator {
    padding: 0 5px;
}
#login_style .linkseparator{
    color: white;
    font-weight: bold;
}
.user, a.user:link, a.user:active, a.user:visited {
    color: white;
    font-size: 1.1em;
    font-weight:bold;
    text-shadow: 1px 1px 1px #000;
}
a.user:hover {
    color: #C00;
    text-shadow: 2px 2px 2px #fff;
}
Notice the use of the text-shadow CSS for the user links. Given current support for CSS3 in most modern browsers, I like to take advantage of it where possible. Often it adds just a little bit of polish for newer browsers while degrading gracefully for older browsers. In the past I would have used a lot of CSS hacks to achieve my desired effect. This often resulted in CSS that was hard to follow and even harder to maintain. With the advent of CSS3 I am eschewing the use of hacks and trying to limit my use of hacks. I also don’t worry too much about older browsers. I prefer to optimize my skins for current browsers and do the minimal amount to make sure it renders in older browsers without worrying too much about minor rendering issues. That is my preference, but it doesn’t have to be yours.
I am going to jump over the menu for the moment and instead clean up the footer section. Like the header section, this is pretty straight forward CSS.
/* Footer Skin Objects */
.linkscontainer {
    padding-top: 30px;
    text-align: center;
    font-size: 1.2em;
    text-transform: uppercase;
}
.links, a.links:link, a.links:active, a.links:visited {
    font-weight: bold;
    color: #28879B;
}
a.links:hover {
    color: #C00;
}
#terms_style{
    position: absolute;
    bottom: 10px;
    left: 10px;
    display:inline-block;
}
#copy_style{
    position: absolute;
    bottom: 10px;
    right: 10px;
    display:inline-block;
}
DotNetNuke Menu
DotNetNuke is a highly extensible framework that allows the user, administrator or even the skin designer to swap out core functionality or install custom extensions to provide additional capabilities. One area where this is most apparent to skin designers is in their choice of skin object for the menu. For many modern websites, menus have become one of the primary navigation elements on the site. In fact, if you look at most CSS and JavaScript tutorial and blog sites, you will see tutorial after tutorial on how to build dynamic menus. Designers have spent many hours debating the merits of each technique for building and styling menus – which one is more SEO friendly, which one is easier to style, which one is most accessible, etc. As a DotNetNuke designer you have a lot of choices for DotNetNuke navigation regardless of whether you are most concerned with SEO, style, usability, accessibility or some other design consideration. Between the core navigation skin objects and those developed by third parties, the DotNetNuke designer has a lot of flexibility.
DotNetNuke includes a pretty decent set of navigation skin objects including a feature rich dynamic menu. For purposes of this tutorial, however, I have chosen to use a third party navigation skin object. I have done this primarily to show the power and flexibility of DotNetNuke skinning engine. For my skin I have chosen the DDRMenu that is available on www.dnngarden.com. This menu is very flexible and uses a templating system to allow it to mimic almost any type of menu you might want. Since this tutorial is not about styling menus, which is a topic that warrants it’s own series of blog posts, I am going to rely on the ability of the DDRMenu to mimic the standard DotNetNuke menus. Also, to simplify things for this post, I am going to use a slightly modified version of the menu.css that comes with the standard MinimalExtropy skin. When I package my skin, I’ll cover how to include the DDRMenu as part of the skin package so that my skin is delivered as a complete solution and won’t require any additional installs by the user.
Because the menu css is very much dependent on the specific menu, I have left the menu css as a separate file. This is the same structure used by the MinimalExtropy skin. I can import our menu.css file into our skin.css using a simple CSS import statement: @import url("menu.css");. The MinimalExtropy menus work extremely well with a number of designs with just a few modifications. You can see my modified menu.css below.
/*--------- dnn menu style ----------*/
/* main menu td */
.mainMenu {
    cursor: pointer;
    font-size: 11px;
    background-color: transparent;
    width: 700px;
}
/* Main Menu Normal */
.mainMenu .root {
    color: white;
    font-size: 13px;
    font-weight: bold;
    text-align: center;
    padding: 0px 12px;
    text-transform: uppercase;
    margin-right: 1px;
    white-space: nowrap;
    margin-right: 1px;
    float: left;
}
/* Main menu hover */
.mainMenu .hov {
    color: #fff;
    background: url("images/bg-menu-hover.png") repeat-x top left;
}
/* Main menu selected */
.mainMenu .sel, .mainMenu .bc {
    color: #bce5eb;
}
.mainMenu table {
    border: 1px solid #C0D6E5;
    z-index: 5000;
}
/* SUB Menu Normal */
.mainMenu tr.mi {
    background-color: #F8FAFF;
    z-index: 1000;
    font-size: 11px;
    font-weight: bold;
    text-align: left;
    color: #375162;
    line-height: 2em;
    text-transform: none;
}
.mainMenu tr.mi td {
    padding: 0 2px;
    text-transform: none;
}
/* SUB Menu hover & selected */
.mainMenu tr.hov {
    background: #CE0D0D url("images/submenu_hover.png") repeat-x top left;
}
.mainMenu tr.hov td {
    color: #fff;
}
.mainMenu tr.sel, .mainMenu tr.bc {
    background: #CE0D0D url("/images/submenu_active.png") repeat-x top left;
}
.mainMenu tr.sel td, .mainMenu tr.bc td {
    color: #fff;
}
.main_dnnmenu_break {
    height: 2px;
    background-color: #D5E0FF;
}
/* Module Action Menus */
.ModuleTitle_SubMenu {
    border: 1px solid #C0D6E5;
}
.ModuleTitle_SubMenu td {
    background-color: #F8FAFF;
    white-space: nowrap;
}
.ModuleTitle_MenuIcon {
    background-color: #F8FAFF;
    border: none;
    padding: 0px 2px;
}
.ModuleTitle_MenuItemSel td, .ModuleTitle_MenuItemSel .ModuleTitle_MenuIcon {
    background: #CE0D0D url("images/submenu_hover.png") repeat-x top left;
    color: #fff;
}
.ModuleTitle_MenuBreak td, .ModuleTitle_MenuBreak .ModuleTitle_MenuIcon {
    height: 2px;
    background-color: #D5E0FF;
}
If you are interested in exploring DotNetNuke navigation system and menu controls then I would recommend getting a subscription to DNNCreative. Lee Sykes at DNNCreative has built tutorials around most of the major menus available for DotNetNuke and has dozens of videos and tutorials available covering every aspect of the navigation system.
The Finished Product
At this point I have a fully functional skin. All of the major structural and visual elements are in place and I have added a few dynamic elements as well. The only thing I am missing are the containers used for holding individual bits of content. I’ll be covering containers in the next part of this series.
