UPDATE: The latest release of the templates no longer use NANT, read the updated blog post http://www.dotnetnuke.com/Resources/Blogs/EntryId/2880/New-DotNetNuke-Module-Development-Templates-w-video.aspx
So this is the third and final post in the module development series of blogs I started last week. The first two covered
- Configuring your development environment
- Customizing and installing a C# module development template
This post is going to tell you how to utilize an open source project called NAnt to package up your modules quickly and easily, so that they can be installed on various DotNetNuke sites. The C# module development template that I released last week comes with a NAnt BUILD script included, so when you create a project using the template (as we do in blog #2) you are ready to use NAnt to package the module, you must get NAnt configure though, so let’s walk through that process.
What is NAnt?
NAnt is an open source .NET build tool that can be found by visiting http://nant.sourceforge.net/ You can do a lot of cool things with NAnt and the C# template linked to above utilizes a NAnt build script to package the module with both a SOURCE and an INSTALL package for deployment.
Installing NAnt
The installation of NAnt is pretty straight forward. Here are the steps for getting it setup for use within my module development template.
- Download the BINARY ZIP of the 0.90 release of NAnt from http://nant.sourceforge.net
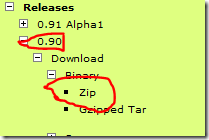
testing against the 0.91 Alpha1 release had some failures DO NOT USE 0.91 ALPHA1.
- Extract the contents of this ZIP file, this will create a local folder with the same file name
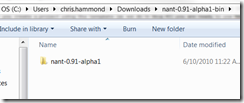
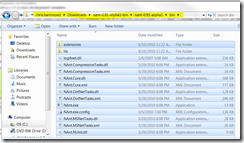
- Navigate into the extracted folder until you find a BIN folder, navigate into that BIN folder and copy all of the contents of the folder
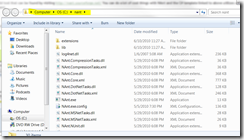
- Go to your C: drive and create a folder called NANT, within this NANT folder paste what you copied in STEP 3
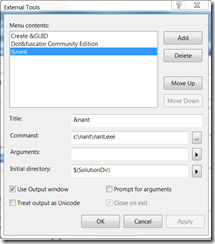
- Now that you have the NAnt files placed we can configure Visual Studio to add NAnt to the external tools menu. To do this you will open up Visual Studio, go to the Tools menu and click on External Tools option, that will bring up a window.
- Click on Add and put the information in for nant, here’s a screenshot of what information you should define.
Using NAnt to automate your module packaging
So now that you have NAnt setup within Visual Studio here comes the easy part. If you have created a project using my template the rest is really easy. You can simply open that project, and do a build within Visual Studio. You must do a build in VS first, because this creates the DLL that Nant is going to use for assembly name and version info. Once you’ve done the manual build you can then choose the Tools menu in Visual Studio and choose the nant menu item.
This will cause NAnt to do a release-compile and package your module! When that happens, you should see something similar to the following in your output window.

If you have a “Build Succeeded” message there than you are all set, NAnt has compiled and packaged your module into a folder called package, in the root of your project. You won’t see this folder in Visual Studio, but if you go to the file system, wherever your project is located, you should see the folder.
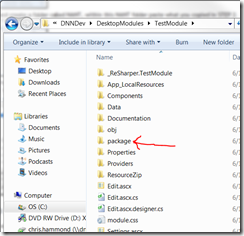
Inside of that folder you should find two ZIP files, one for the INSTALL package and one for the SOURCE package.

Installing your newly packages module
So now you have two ZIP files one called INSTALL and one called SOURCE. What do you do with these? Well the install package is just that, a ZIP file that you can use to install your DotNetNuke module onto a DNN web site, it can be any other DNN website, or the website you are currently doing your development on. The source package can also be used to install the module, the difference between the two is that one will install the source code for the module, the other will not.
A few important things to remember about these packages you’ve now created. Because of the way the project is setup, it compiles against whatever version of DNN you have in your development environment, you will not be able to install the module on an older version of DNN without first recompiling the module, though you will be able to install it on a newer version of DotNetNuke. Another thing to remember, the project template that I released last week is for a basic module but that module doesn’t have any functionality built into it. There are three ASCX files, some language resource files, CSS, and a few other random bits included, but none of those bits actually do anything until you add some functionality.
That’s where standard ASP.NET development comes into play. You can add labels, buttons, and various other controls to the ASCX files to start making them actually perform a function. In future blog posts I will demonstrate some simple modules that have been developed using this template to get you a better understanding of more aspects of DotNetNuke Module Development.
DotNetNuke Training from DotNetNuke Corporation
For now, if you are interested in learning more check out the DotNetNuke Module Development webinar that I am teaching next week as part of our DotNetNuke Training. The webinar is 4 hours a day (8am PST – 12pm PST), Tuesday through Friday (June 15-18, 2010). If you can’t get signed up for next week the course will be offered again in August!