Introduction to DNN F# Framework
This is the first article is a series of articles on how to
use the F# automation Framework to write UI tests and WEB API tests. This first
blog will introduce the framework and how to run it to test your Platform site.
Background
Refer to this other blog
if you like to understand the history of this project.
In the previous years DNN has developed a testing framework
for automating DNN Platform application testing. The framework uses F# language
(which is one of the .NET languages) and utilizes a few other open source
libraries for this; of these: Canopy (http://lefthandedgoat.github.io/canopy/)
and Selenium (http://www.seleniumhq.org/).
The framework is called ATFS which stands for Automation
Testing F#. To use the ATFS framework you need to know how to write F# code and
get accustomed with the Canopy library syntax. It is advised that you visit http://lefthandedgoat.github.io/canopy/
website for this purpose. Also, it will be helpful if you have some knowledge
about Selenium, but not mandatory.
Prerequisites
To get your system ready for ATFS you need to have the
following software installed:
- .NET Framework 4.6.1 or higher
- Visual Studio 2015 (any edition; Community, Pro, etc.) or higher
- Visual F# 4.0 extension for Visual Studio
- Visual F# Power Tools (optional but helpful for maintaining coding standards)
Getting Stared
To start using ATFS you must:

-
Open “Config.yaml”
file and change the line
“DevTestsOnly:
False”
to
“DevTestsOnly:
True”
-
Run the solution by pressing F5 and you will see a command window opens with few lines of code and another Chrome browser window opens. The browser window will be maximized. The screen will look something like this.

If you have reached this point and seen the above screens,
then this validates that you have got your ATFS up and running correctly. At
this point we didn’t run any tests in the framework. In the next sections I
will tell you how to run pre-existing test in the framework.
Running ATFS for your site
WARNING: DO NOT run
this against your production site because it will create users and pages, install
modules, and many other actions that you don't want to appear in a production site; run
against test sites only.
To point ATFS to target your site, you need to edit the
“Config.yaml” file as follows:
- Change the “SiteAlias” to point to your test site
- Setup the “HostUserName”, “DefaultPassword”, and “HostDisplayName” to those of a super user account in your site
- Make sure the “DoInstallation” is set to “False”
- Set the “DevQualifier” to the same value set in the “web.config” of your test site (e.g., the <add name="SqlDataProvider" … objectQualifier="dnn_" … /> element)
- Change the “Browser” to target the browser of your choce from the supported ones. We recommend either “chrome” of “ff” for best results.
- Change or make sure the following lines are set exactly as shown:
DevTestsOnly: False
CoverageTests: False
BvtTests: True
P1ALL: False
- If you need a more complete set of tests, then change the last entry above to “P1ALL: True”
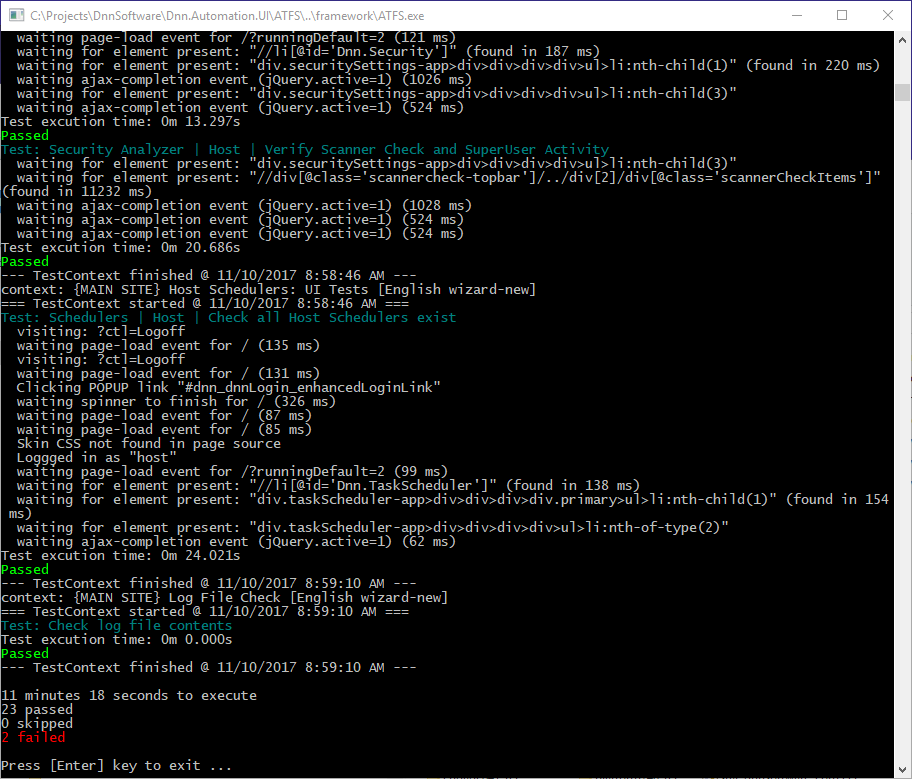
Now compile and run. If your changes were made properly, the application will start, load a browser, and start running the tests. The tests will run for a long time depending on the choices you made above and the speed of your test machine and the site you are testing. In the end, after about 10 to 20 minutes depending on the speed of your machine, you will see the results which are similar to this:

Summary
In this blog, I explained in brief how ATFS works and how to
target your site for UI testing. In the next blog, I will explain the various
configuration elements of the “Config.yaml” file and how they affect running
the tests. In another blog will show you how to write your own UI tests.
References:
Below are a few references for F# and the various libraries
used for creating the ATFS framework plus other F# sites that might be helpful: