Previously, took a look at some of the common components in the Persona Bar. In this blog post, we’re going to take a look at how to take advantage at some of these common components outside of the Persona Bar.
Useful Blogs
Before we proceed, you may want to reference these blogs:
1. DNN 9: Persona Bar Architecture
2. DNN 9: Extending the Persona Bar
3. DNN9: Adding a ReactJS App to Persona Bar
4. DNN9: Diving in a ReactJS Persona Bar Extension
5. DNN9: Calling an existing Web API from the Persona Bar
6. DNN9:
Working with Common Components in the Persona Bar
In this post, we’ll take our Persona Bar Add User application and strip any unnecessary components away. Since we’ll be outside of the Persona Bar, we won’t have the luxury of accessing certain utilities provided such as hooks to get Localized Records.
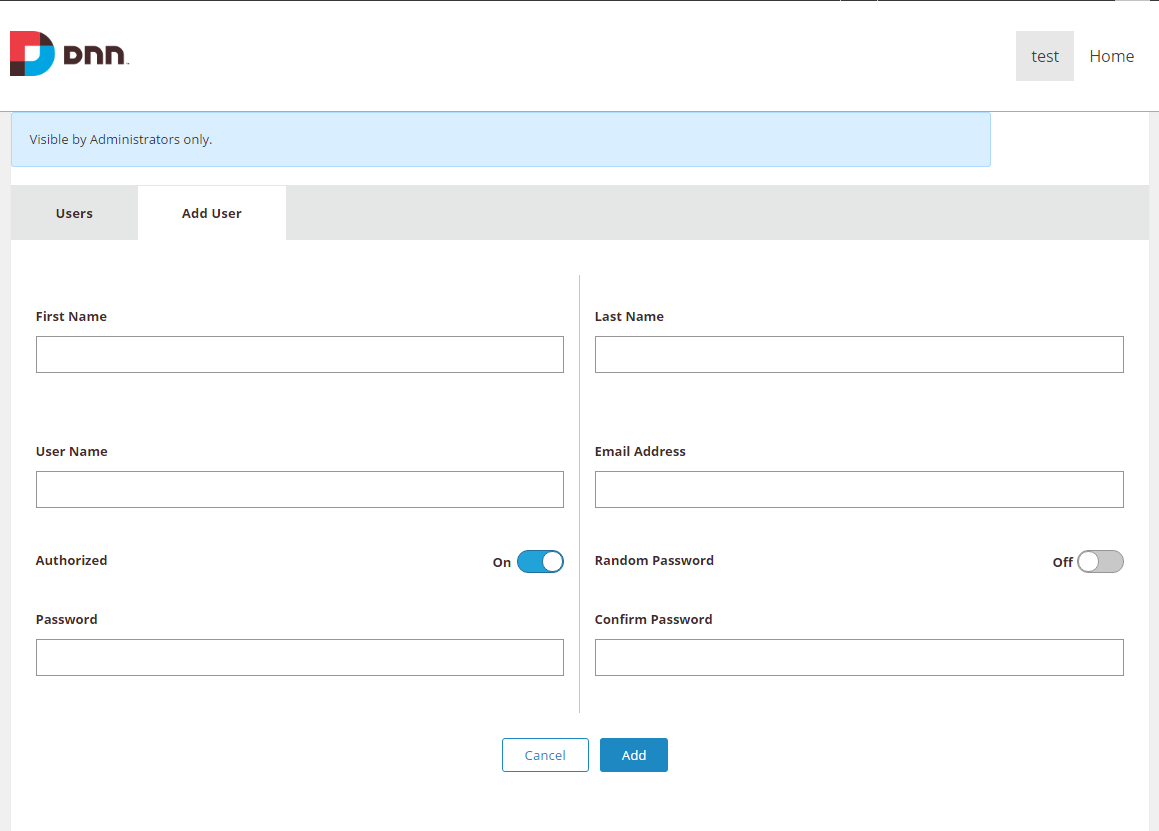
Below is the UI that was in the previous blog post, but stripped down to the core without Persona Bar Specific components such as Persona Bar Page Header.
Let’s start walking through this.
1.) Create Module – in this post I used Ash’s module development template in order to get a base module built and installed.
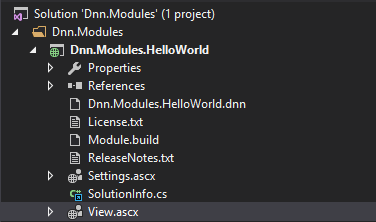
2.) Porting over HelloWorld.Web – we take the same ReactJS module from the previous blog post, and port it into the source folder of our module. We also create a scripts folder, which is where our bundle will live after the ReactJS module is built.

3.) Building the HelloWorld.Web module – here’s the tricky part. Strap in, it's a long one! Let’s break this down into several parts.
a. Our application is currently using common components available in the github repo. These common components were optimized to be used in the Persona Bar, using webpack externals.
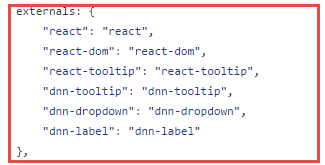
b. Since we are using webpack externals, our common components don’t have their own copy of React, and any other libraries that are already available in the Persona Bar. It assumes that the parent application that is running this component will have its own copy of the missing modules, to save itself from including react within its bundle. This small move can save up to 200 kb per component, since the React Library alone is over 100 kb.
c. To fix this issue, we must install the missing packages in our HelloWorld.web application. We can do this using npm install <package name> --save or –save-dev. If packages are missing, you will get an error message in the build script telling you which ones are missing.

d. Once all packages are installed we can now successfully run the build. The other item we need to address is the use of Persona Bar specific components that are in our application. We need to remove Persona Bar Page, Persona Bar Page Header and Persona Bar Page Body from our previous app, as these are styled for the Persona Bar.

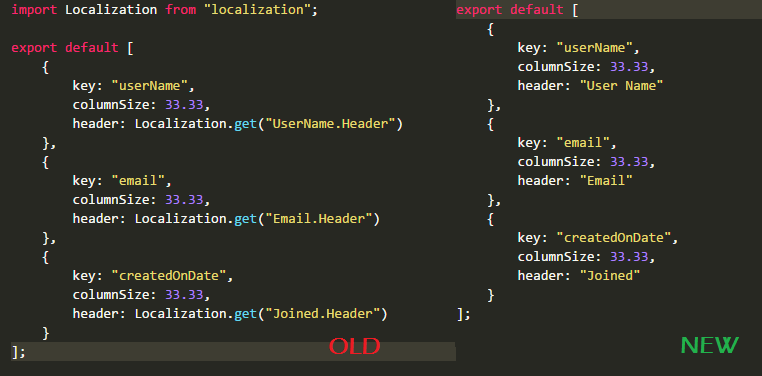
e. Another thing to note is that we are losing the built in resx capability from the Persona Bar, and we are also losing methods that provide service framework functions. In this blog post, we are simply getting rid of the localization in the module, we will handle that in a later post. For the service framework methods in the PB such as sf.get and .post, we will re-create these SF functionality in our module’s View.ascx file.
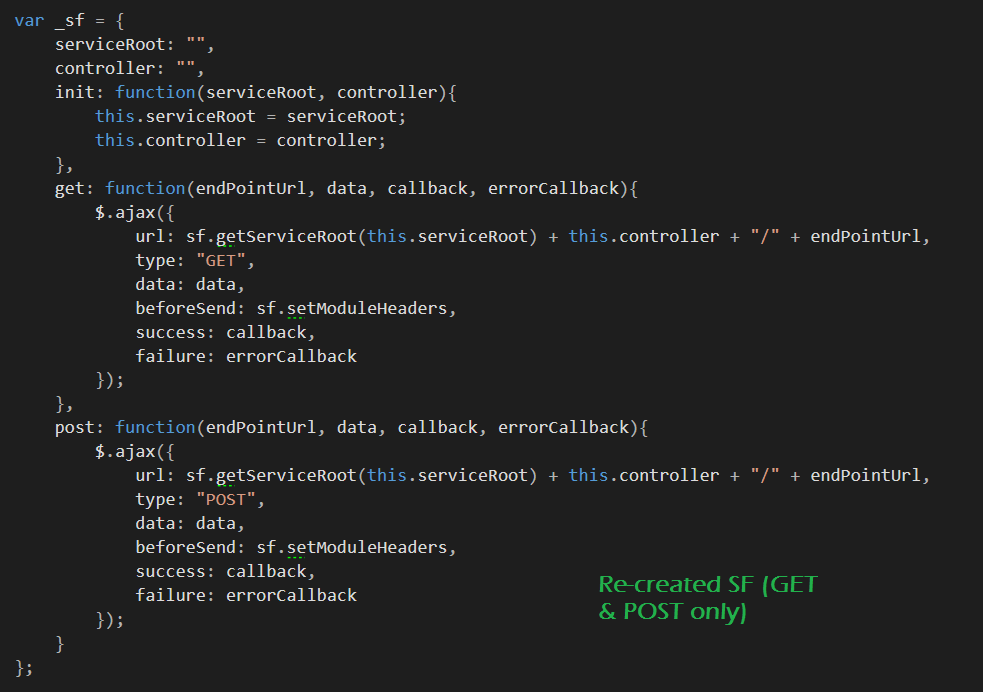
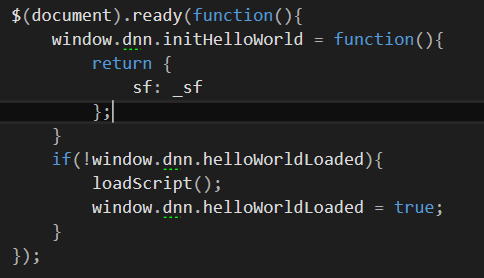
f. Now that we have the service framework re-created on the module side, we need to pass it in to our module somehow. We do this via an init method, placed under window.dnn. In this init method we return the SF we just defined and pass it into our HelloWorld.Web application.
i. In this image, we are first adding the initHelloWorld method which returns the SF we just defined to the window. This will allow are application to get these functions to call the appropriate APIs. We call this window function in our application, then assign the SF to one accessible across our application.
ii. We are also adding a check to see if the bundle has already been loaded, to prevent it from being loaded twice.
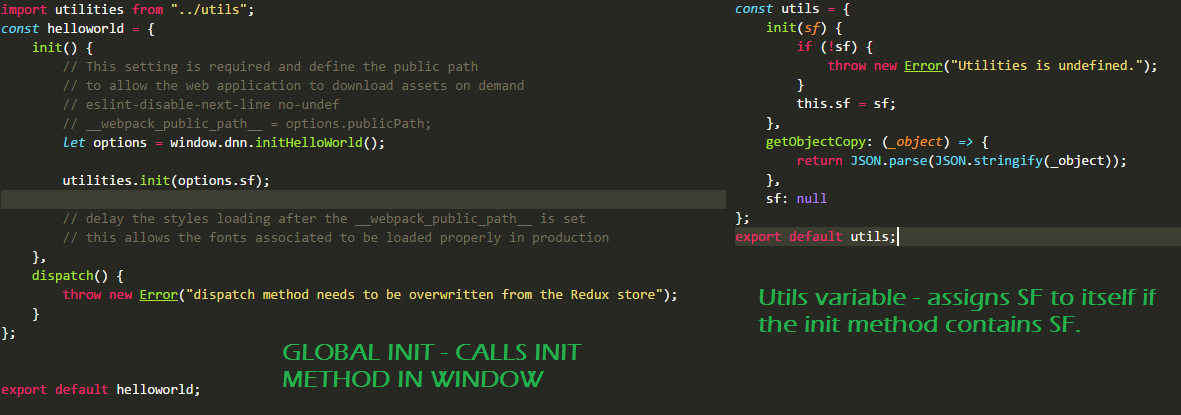
g. Now you might be asking, how does our module handle multiple modules being on the same page?
i. As mentioned above, we only load one bundle, even if there are two on the page.
ii. We changed the way our application renders, instead of rendering into a container with a single id, we loop through all containers with ids starting as “helloworld-container”. This allows one script to render in multiple containers on the same page.
iii. Note: if the store is configured outside of the foreach, modules on the page will use the same redux state. If you want to have modules that have individual states, keep this line where it is.
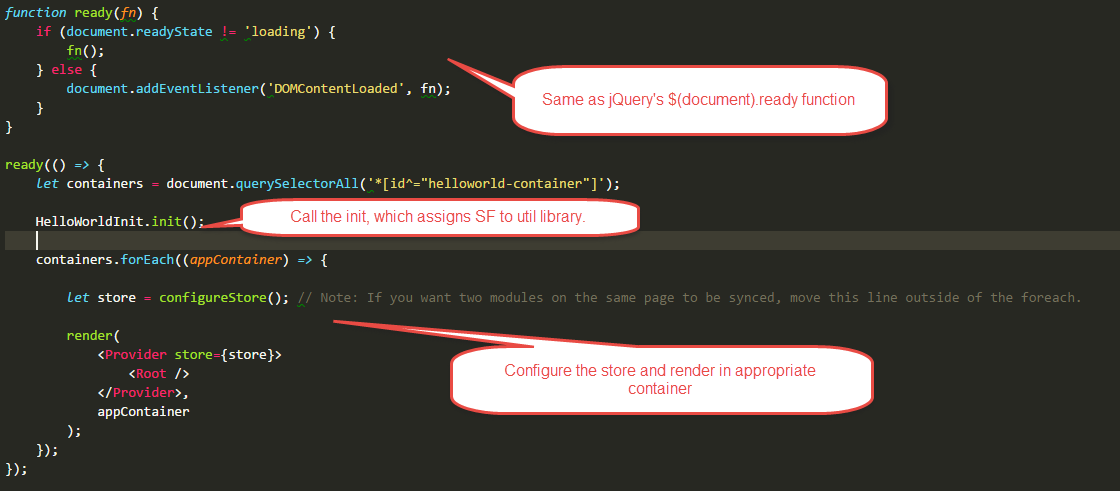

4.) Final Build - after all of this setup, we can run npm run build, which will build the final bundle, and the view will load the bundle once, rendering the HelloWorld.Web app into all helloworld-containers.
Your final UI output should look something like this!
 Source code: You can find all source code for this module here.