Before we get started into trying to develop a module we need to first understand what a module is, how we can use it, how to configure module settings, and where we go inside of DNN to learn more about a module. If you already know this information feel free to skip ahead (once subsequent entries are posted that is), but if you’re totally new to DNN then this information will most likely be helpful.
What is a Module
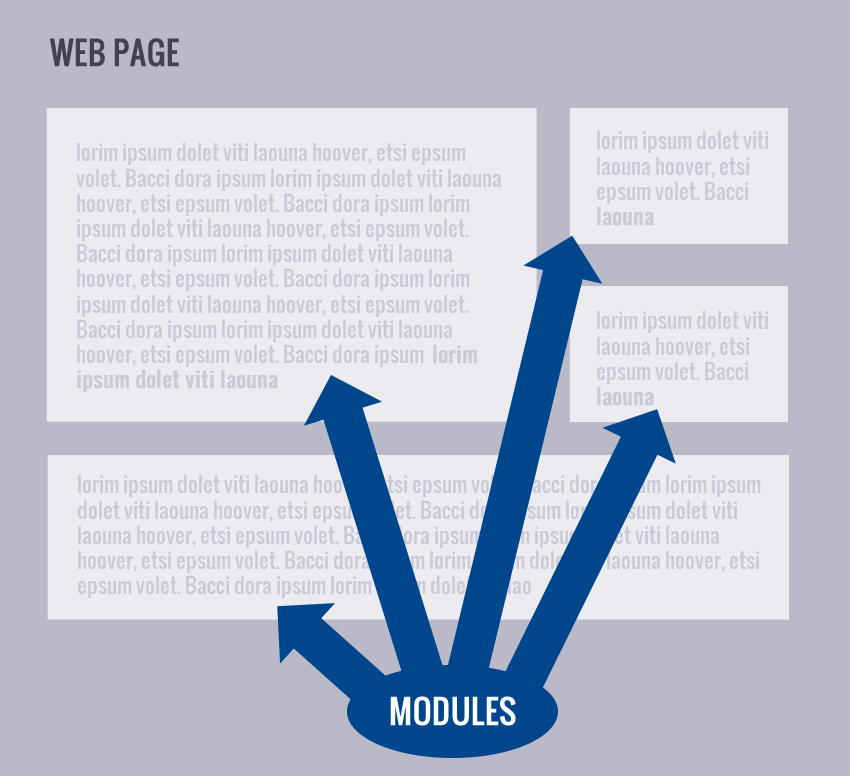
I often draw the parallel of a module being to DNN what an app is to an iPhone. Modules extend the functionality of the DNN framework. As DNN is architected in a modular fashion the term “modules” makes sense as a module represents a set of re-usable code that can be installed into any DNN site.

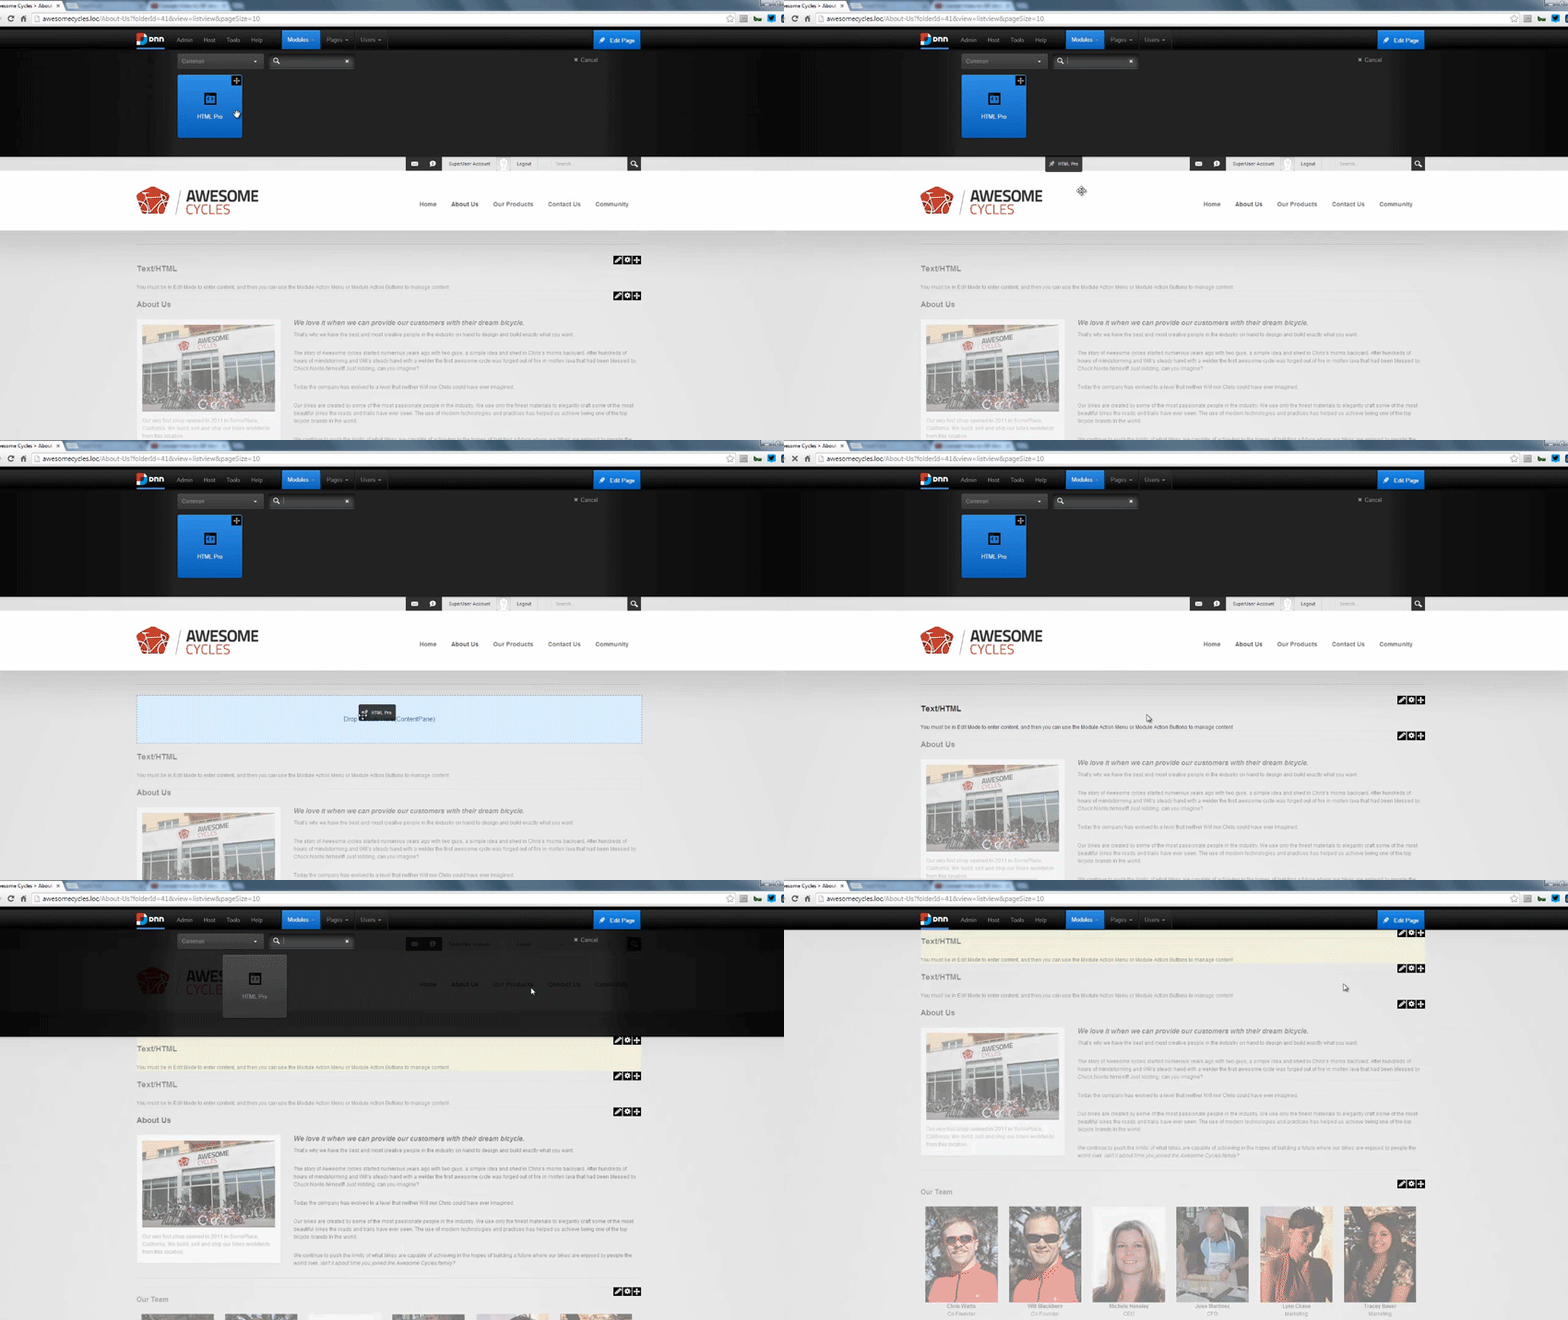
Once installed into DNN modules can easily be dragged and dropped to a page. You can also have multiple instances of the same module on one page. Modules can be shared across pages and, in the paid versions of DNN, even shared across multiple sites (via the Site Groups feature).

Imagine having a DNN site, but then having a need that is custom or specific to you or needing functionality that does not come with DNN out of the box. Let’s say for example you want to have a photo gallery on your site. A photo gallery module does not ship with DNN out of the box. These scenarios where you have a need for functionality that does not ship with DNN are prime scenarios for a custom module or 3rd party module.
Where to Get Modules
The term “3rd Party Module” may make you wonder “What is a 3rd party module?” and that is a good question. The DNN ecosystem has different locations where you can find modules. The DNN Store (http://store.dnnsoftware.com) is one location where you can get modules. The modules on the store are for sale by module vendors (developers who earn money by coding and selling modules). You can easily purchase, install, and be up and running with additional functionality within minutes. There are a ton of modules available on the store and some of the vendors even sell versions that include their source code.
The DNN ecosystem is also full of developers who contribute their code as “open source” or in other words… for free. You can download these free modules from the DNN Forge (https://www.dnnsoftware.com/Forge), Codeplex (http://DotNetNuke.CodePlex.com), and also find some on GitHub (https://github.com/dnnsoftware). As we are ultimately on a quest to develop a module in this blog series these open source modules are useful to us because they provide us with a great opportunity… the opportunity to download someone else’s code and review it, analyze it, and study it.
Module Settings & Permissions
While there are usually several modules on a single page every module in DNN has its own specific settings and permissions. In the video below we will visually review the settings and permissions of modules. For thoroughness I am also going to give an overview of permissions and mention a few key settings here.
Permissions
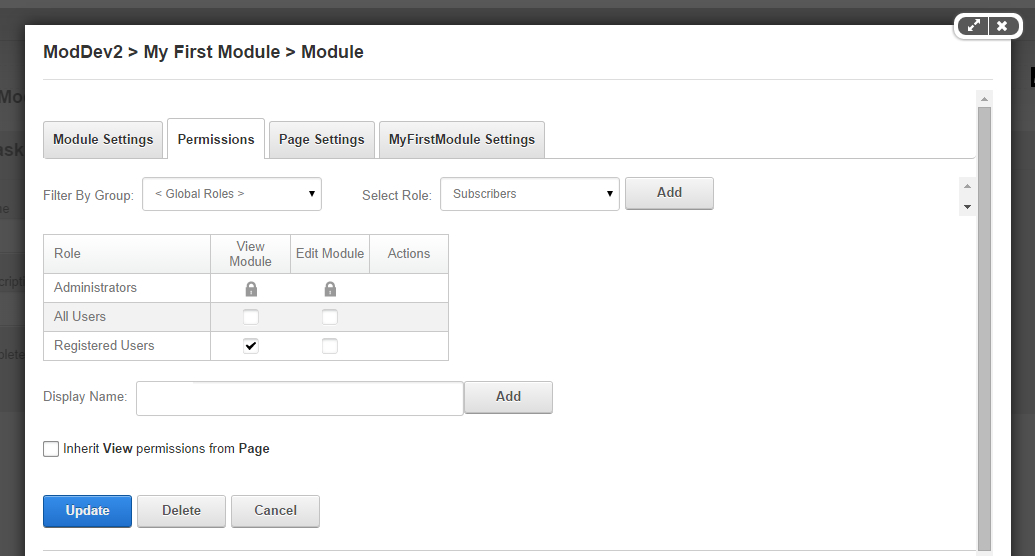
When you hear the term “permissions” in DNN it’s referring to the security model. Permissions give site Admins an easy way to control user access within a site. DNN has very granular permissions capabilities. Permissions exist in DNN at the page, module, and folder level. This means that site admins can easily allow their users to see/not-see or edit/not-edit an entire page or even down to the modules on the page. To update a module’s permissions we go to a module’s settings and access the 2nd tab, the Permissions tab. The permissions grid is on this tab and it shows us a grid of access levels and security rolls. Checking and unchecking these boxes allows us to control which users can see and/or edit the modules. By default modules inherit the “view” permissions from the page’s permissions.

Settings
A module’s settings also allows the site admins to easily control things like the module title, the start and end date and time (in case the site admin wants to schedule and expire content), the module’s container, and whether or not the module is indexed by search engines.
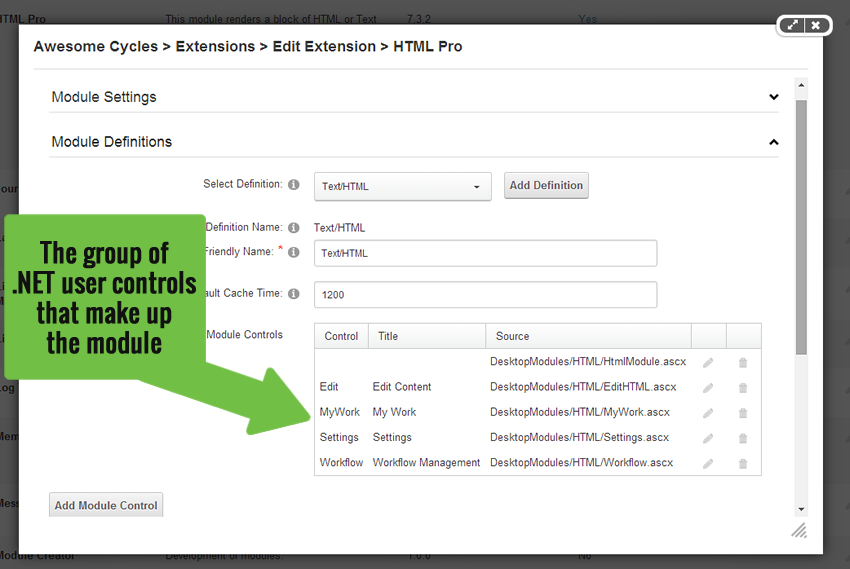
By default DNN provides 3 tabs in a module’s settings. Though, there can be more than 3 tabs. Most modules have settings related to their specific functionality. Module developers can include (and generally do include) a settings control in their module (and by “Control” I’m referring to a .NET user control which we will discuss more later). When a settings control is included with a module a 4th tab will appear in the list of tabs. This 4th tab will be named after the module’s name and is the area where the settings for your custom module will reside. Later in this series we will create custom settings for our module.

Why Permissions & Settings Matter to Developers
So why did I just spend a lot of time describing module settings & permissions? As a module developer it’s important to understand that these settings & permissions exist. The best part about all this is that when we develop a module we don’t have to create custom code to make these settings and permissions exist or appear. We get all of this functionality simply by inheriting from the base classes that the DNN API (Application Programming Interface) provides us. Don’t worry if you don’t understand all that just yet, but from a non-developer perspective you can look at it like this… by simply including a few lines of code into our module’s code base we get a lot of functionality for free. This is just one way that DNN helps organizations and developers be more efficient & effective… by speeding up the process of developing custom functionality. A developer no longer needs to worry about creating code to handle authentication, permissions, scheduling, indexing, etc… DNN gives us all that by default!
The Extensions Page
If you are curious about which modules are installed in your site you can easily find this out by going to the HOST > EXTENSIONS page. This page is the same page where we will install our module as well. This is also a good time to mention that modules are one of many extension points in DNN. Modules are probably the most popular extension point, but they are not the only extension point in DNN. DNN can be extended in several ways and this extensibility is one reason why developers love DNN.
Once you arrive to the HOST > EXTENSIONS page you should land on the “Installed Extensions” tab. From this tab you should be able to see the list of modules that exist in your site. If you don’t initially see them just expand the “Modules” panel by clicking on it. The list of modules gives information about the module including the module version number as well as indicating if the module is being used on the site.
In the last column there is an edit and delete icon. As imagined the delete icon allows you to delete or uninstall the module. The edit icon gives you access to see more details of the module such as the module’s definition, the controls that make up the module, the license, and release notes. We will investigate the module definitions more in depth in a few blogs from now, but I just wanted to make you aware of this area as we may reference it again in future blogs before we dive into it.

This video will provide a visual walk through of the items I've just described
Hopefully you now have a high level understanding of what a module is, how modules can be added to pages, a module’s settings, and where to find all the modules in your site. Now that we’ve gotten some initial information about a DNN module we’re ready to move forward another step toward developing our first module.