About Login Filters
How to configure the Settings for Login Filters. Login filters can be used to control which IP Addresses are allowed to login to the website. Single IP addresses or a range of addresses can also be permitted or denied. The Enable IP address checking check box must be selected to add new filters, See "Membership Management".
Adding a Login Filter
- Navigate to >
 Settings.
- Select the Advanced Settings tab and expand the Login IP Filters section.
- Click the Add New button.

- At Rule Specificity, select from these options:
- Single IP, this is the default option.
- In the First IP text box, enter the single IP to filter.
- IP Range
- In the First IP text box, enter the first IP to be used with the subnet mask to calculate a range of IP addresses.
- In the Mask text box, enter the subnet mask that will be combined with the first to calculate a range of IP addresses for filtering.
- At Rule Type, choose whether to Allow users within that IP range to login or Deny login. Using Deny is a good way to restrict access to hackers.
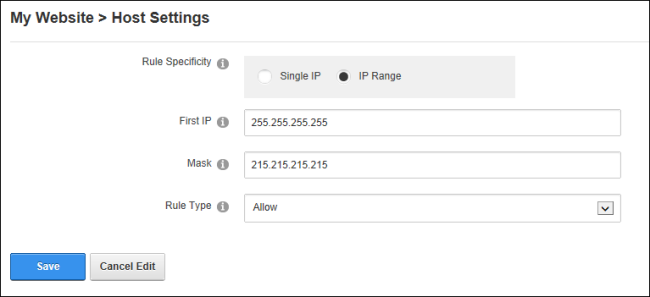
- Click the Save button.
Editing or Deleting a Login Filter
How to edit or delete an existing login filter. Note: A rule that bans the current IP cannot be deleted.
- Navigate to > Settings.
- Select the Advanced Settings tab.
- Expand the Login IP Filters section.
- Click the Edit
 or the Delete
  button beside the login filter to be edited or deleted.
Open topic with navigation