Creating an Image Map
How to create an image map using the .
- Insert an image.
- Select the image and click the Insert Media
 button and select Image Map from the drop down list - OR - Right click on the image and select Image Map from the actions toolbar. This will open the Image Map .
- To create an area:
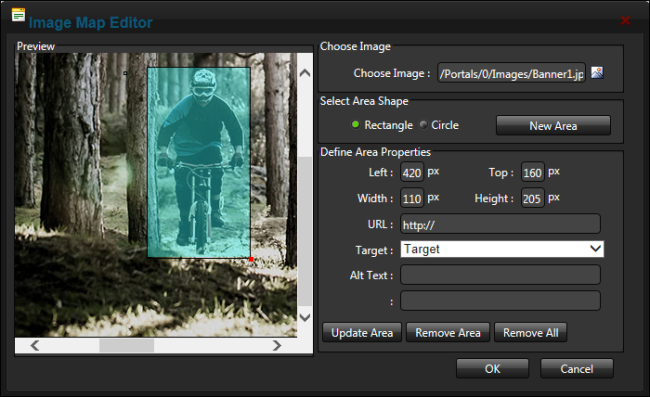
- At Select Area Shape, select Rectangle or Circle.
- Click the New Area button. This displays a gray box defining the area.
- Move and resize the area as required. This updates the Define Area Properties fields for Left, Width, Top and Height.
- Optional. In the URL text box, enter the URL to open when a user clicks on this Area.
- At Target, select the target for the URL from these options:
- Target: No target is set and the link will open in the same window.
- New Window: Will open a new window.
- Parent Window: If web page consists of frames, the link will open in the parent frame.
- Same Window: The link will open in the same window.
- Browser Window: The link will open in the same window.
- Search Pane: The link will open in the pane called Search.
- Media Pane: The link will open in the pane called Media.
- In the Alt Text text box, enter the text to be displayed for this area.
- Click the Update Area button.
- Repeat Step 3 to add additional areas.
- These additional editing options are available:
- To edit an existing area, click on it in the preview window, edit the properties as required and then click the Update Area button.
- To remove an area, click the Remove Area button.
- To remove all areas, click the Remove All button.
-
Click the OK button.
Creating an Image Map
Open topic with navigation